Mazda 3 Service Manual: Trunk Side Trim Removal/Installation
4SD
Left-side
1. Remove the following parts:
a. Rear scuff plate.
b. Tire house trim.
c. Trunk mat.
d. Trunk board.
e. Trunk end trim.
f. Service hole cover
2. Remove the fasteners.
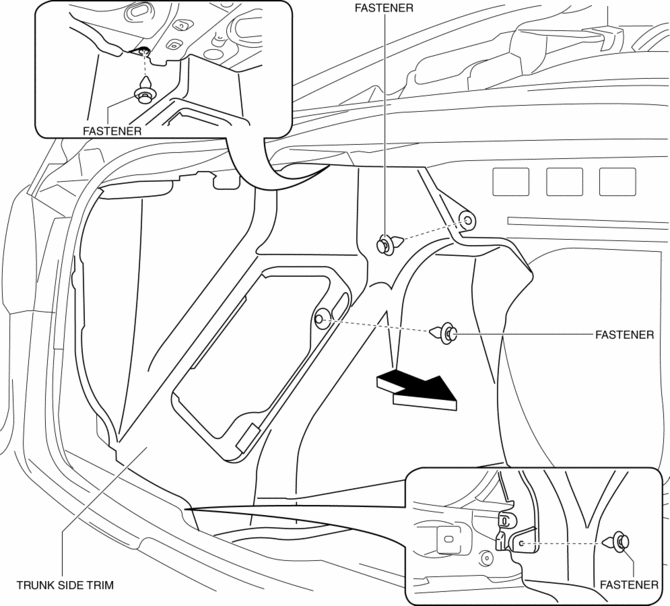
3. Install in the reverse order of removal.
Right-side
1. Remove the following parts:
a. Rear scuff plate.
b. Tire house trim.
c. Trunk mat.
d. Trunk board.
e. Trunk end trim.
2. Remove the fasteners and tab.
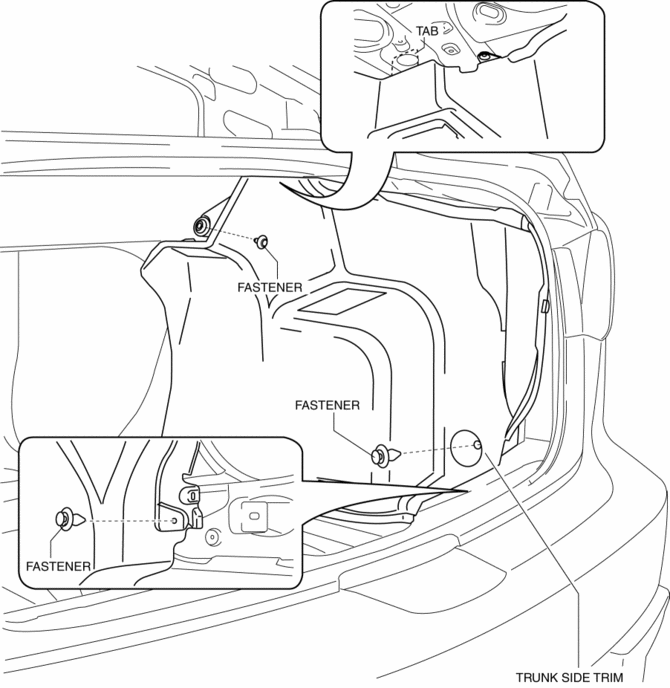
3. Install in the reverse order of removal.
5HB
1. Disconnect the negative battery cable..
2. Remove the following parts:
a. Rear seat.
b. Rear scuff plate.
c. Tire house trim.
d. Trunk end trim.
e. Trunk side upper trim.
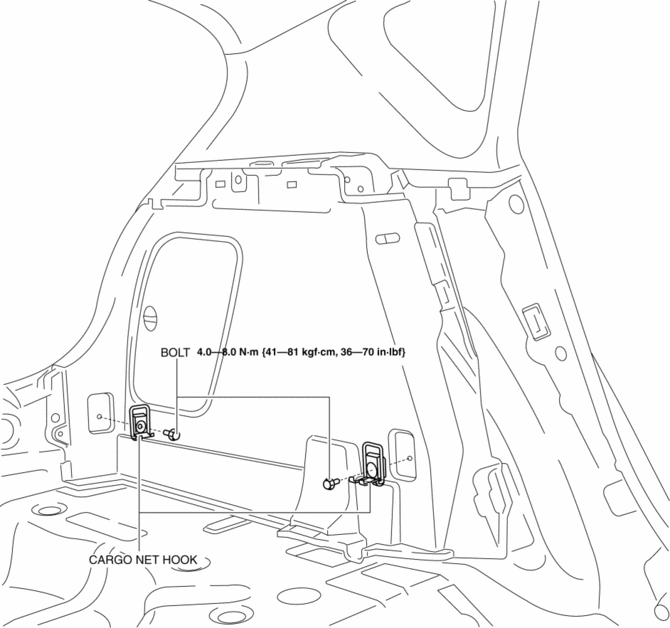
3. Remove the bolts, then remove the cargo net hooks.
4. Remove the fasteners.
5. Pull the trunk side trim in the direction of arrow, while remove the clip.
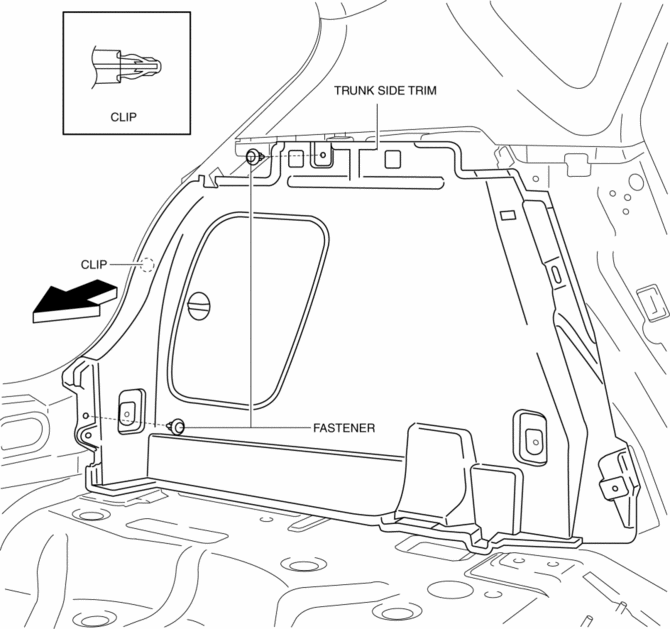
6. Remove the trunk side trim.
7. Disconnect the cargo compartment light connector. (Right-side only)
8. Install in the reverse order of removal.
 Trunk Lid Stay Damper Disposal
NOTE:
The gas in the trunk lid stay damper is colorless, odorless, and non-toxic.
1. Wear protective eye wear.
2. Lay the trunk lid stay damper flat.
3. Hacksaw 2—3 mm {0.08— ...
 Trunk Side Upper Trim Removal/Installation
1. Remove the rear seat cushion..
2. Remove the rear scuff plate..
3. Remove the tire house trim..
4. Open the cap.
5. Remove the screw.
6. Remove the fasteners.
7. Pull the trunk side upp ...
Other materials:
Supplier Identification Procedure [Audio]
Identification Using the Label or Inscribed Lettering
1. Disconnect the negative battery cable..
2. Remove the center panel..
3. Remove the audio unit..
4. Verify the supplier by referring to the label attached to each unit.
Verify Using the Diagnostic Assist Function
Without display
...
Shift Panel Removal/Installation
ATX
1. Remove the upper panel..
2. Remove the selector lever knob..
3. Pull the shift panel in the direction of the arrow shown in the figure and
remove it while detaching the clips A, hook B and guides C.
4. Pull the shift panel in the direction of the arrow (1), (2), (3) while remove ...
Driver Side Air Bag Module Removal/Installation [Two Step Deployment Control
System]
WARNING:
Handling the air bag module improperly can accidentally deploy the air bag
module, which may seriously injure you. Read the air bag system service warnings
and cautions before handling the air bag module..
Due to the adoption of 2-step deployment control in the driver- ...
