Mazda 3 Service Manual: Charcoal Canister Inspection [Mzr 2.0, Mzr 2.5]
Leakage Inspection
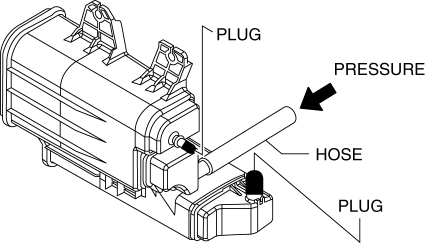
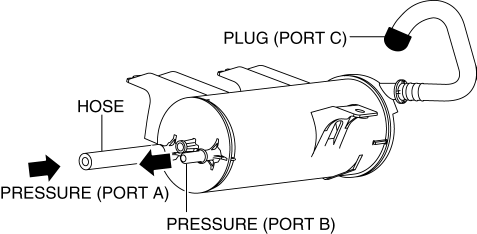
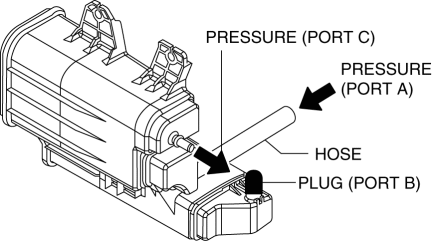
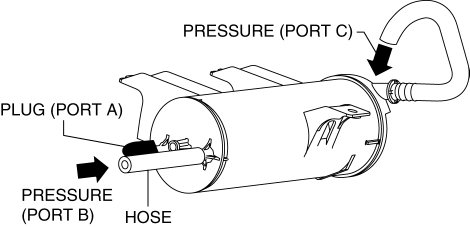
1. Perform the following procedures:
-
Assemble the hose used for inspection to port A.
-
Cover ports B and C with the caps.
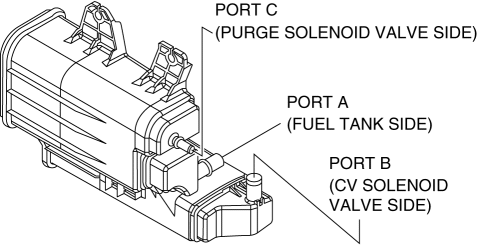
Except for Mexico
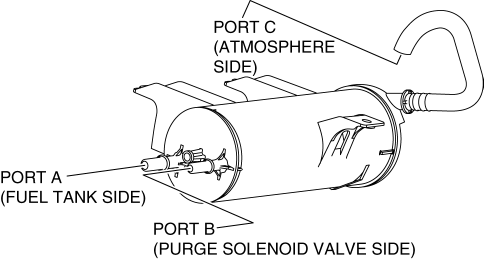
Mexico
CAUTION:
-
Do not apply a pressure 20 kPa {150 mmHg, 5.91 inHg} or more to the charcoal canister for 1 min. or more. Doing so will damage the charcoal canister.
2. Apply pressure (19.6 kPa {147 mmHg, 5.79 inHg}
) through the hose, and verify that air does not leak from the charcoal canister.
Except for Mexico
Mexico

-
If there is airflow, replace the charcoal canister..
-
If there is no airflow, perform the following “Airflow Inspection”.
Airflow Inspection
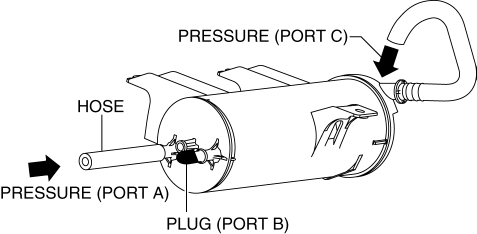
1. Perform the following procedure to verify the charcoal canister airflow.
-
Between port A and port B
-
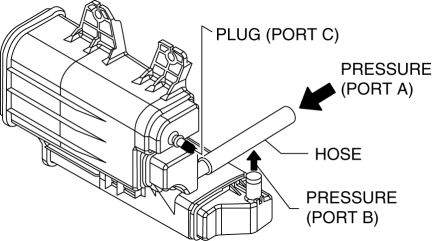
Plug the port C.
Except for Mexico
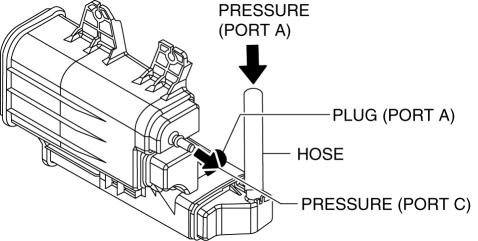
Mexico
-
Apply a pressure of 19.6 kPa {147 mmHg, 5.79 inHg}
to port A.
-
Verify that there is airflow from port B.
-
If there is no airflow, replace the charcoal canister..
-
Between port A and port C
-
Plug the port B.
Except for Mexico
Mexico
-
Apply a pressure of 19.6 kPa {147 mmHg, 5.79 inHg}
to port A.
-
Verify that there is airflow from port C.
-
If there is no airflow, replace the charcoal canister..
-
Between port B and port C
-
Plug the port A.
Except for Mexico
Mexico
-
Apply a pressure of 19.6 kPa {147 mmHg, 5.79 inHg}
to port B.
-
Verify that there is airflow from port C.
-
If there is no airflow, replace the charcoal canister..
 Catch Tank Inspection [Skyactiv G 2.0]
1. Remove the catch tank..
2. Plug the catch tank of the purge solenoid valve side.
3. Inspect for air leakage when blowing air pressure from charcoal canister side.
If there is air l ...
 Charcoal Canister Removal/Installation [Mzr 2.0, Mzr 2.5]
Except for Mexico
1. Remove in the order indicated in the table.
1
Evaporative hose
2
Quick release connector
(See QUICK RELEASE CONNECTOR ...
Other materials:
Seat Weight Sensor Control Module Removal/Installation [Two Step Deployment
Control System]
CAUTION:
When the seat weight sensor control module is replaced with a new one, perform
the seat weight sensor calibration using the M–MDS..
1. Switch the ignition to off.
2. Disconnect the negative battery cable and wait for 1 min or more..
3. Disconnect the connectors.
...
Trunk Lid Key Cylinder Removal/Installation
1. Disconnect the negative battery cable..
2. Remove the trunk lid trim..
3. Lift the clip in the direction of the arrow (1), and pull out the key rod
in the direction of the arrow (2).
4. Remove the nuts.
5. Remove the trunk lid key cylinder.
6. Install in the reverse order of r ...
Fuel Pump Control Module Inspection [Skyactiv G 2.0]
1. Perform the KOEO self-test..
2. Verify that a fuel pump control module related DTC is detected..
If DTCs are detected, repair the malfunctioning part according to the applicable
DTC troubleshooting..
If a DTC is not detected, go to the next step.
3. Inspect the followin ...
