Mazda 3 Service Manual: Climate Control Unit Removal/Installation [Manual Air Conditioner]
1. Disconnect the negative battery cable..
2. Remove the following parts:
a. Upper panel.
b. Shift lever knob (MTX).
c. Selector lever knob (ATX).
d. Shift panel.
e. Side wall.
f. Console.
g. Front scuff plate.
h. Front side trim.
i. Dashboard under cover.
j. Glove compartment.
k. Hood release lever.
l. Lower panel.
m. Center panel.
n. Audio unit.
o. Shower duct (driver-side).
3. Remove in the order indicated in the table.
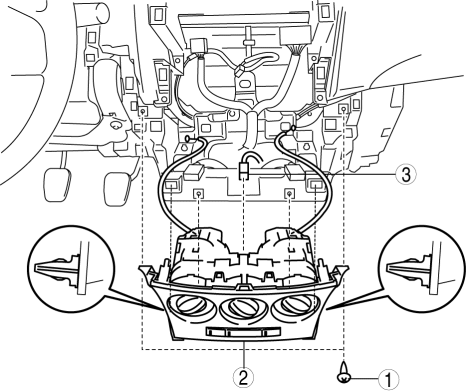
|
1 |
Screw |
|
2 |
Climate control unit (See Climate Control Unit Removal Note.) (See Climate Control Unit Installation Note.) |
|
3 |
Connector |
4. Install in the reverse order of removal.
Climate Control Unit Removal Note
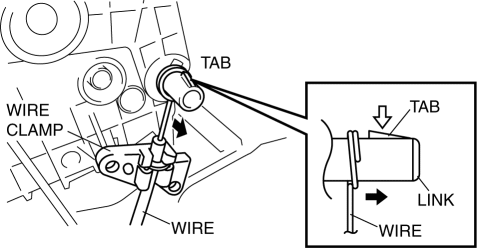
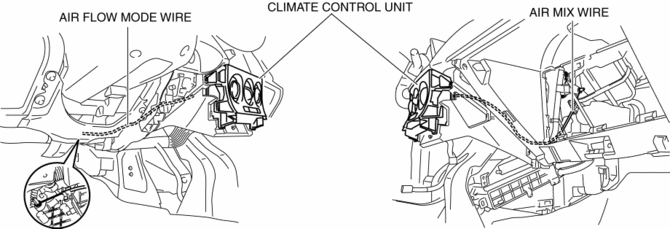
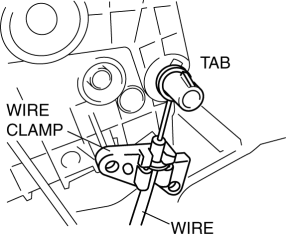
1. Disconnect each wire to links and remove it to the wire clamps.
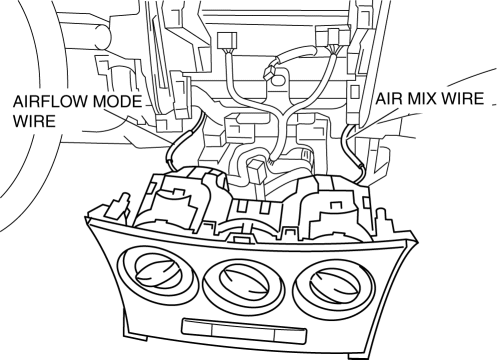
2. Pull out the air mix wire and airflow mode wire from the dashboard.
Climate Control Unit Installation Note
1. Pass each wire through the hole on the dashboard as shown in the figure.
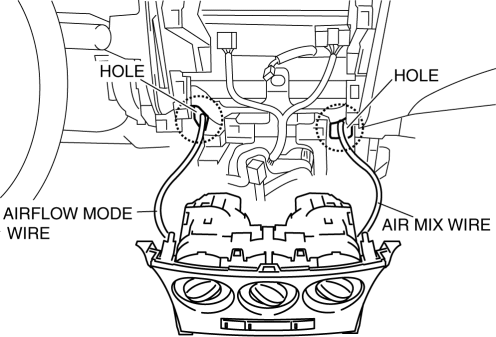
2. Route each wire as shown in the figure.
3. Connect the climate control unit connector.
4. Connect each wire to links and install it to the wire clamps.
5. Verify that the dial is turned fully from one end to the other.
 Climate Control Unit Removal/Installation [Full Auto Air Conditioner]
1. Disconnect the negative battery cable..
2. Remove the following parts:
a. Upper panel.
b. Shift lever knob (MTX).
c. Selector lever knob (ATX).
d. Shift panel.
e. Side wall.
f. Consol ...
 Condenser Inspection
1. Inspect the condenser for cracks, damage, and oil leakage.
If there is any malfunction, replace the condenser.
2. Visually inspect the fins for clogging of foreign material.
I ...
Other materials:
Lighting Control
Headlights
Turn the headlight switch to turn the headlights, other exterior lights and
dashboard
illumination on or off.
When the lights are turned on, the lights-on indicator light in the instrument
cluster turns on.
NOTE
If the light switch is left on, the lights will automatical ...
Making a Call
Phonebook Usage
Telephone calls can be made by saying
the name of a person (voice tag) whose
phone number has been registered in
Bluetooth ® Hands-Free in advance. Refer
to Phonebook registration.
Press the pick-up button or talk button
with a short press.
Say: [Beep] “Call”
Prompt: “ ...
Climate Control Unit Disassembly/Assembly [Manual Air Conditioner]
1. Disassemble in the order indicated in the figure.
1
Dial
2
Airflow mode wire
(See Wire Removal Note.)
(See Wire Installation Note.)
3
Air mix wire
(See Wire Removal Note.)
(See Wire Installation Note ...
