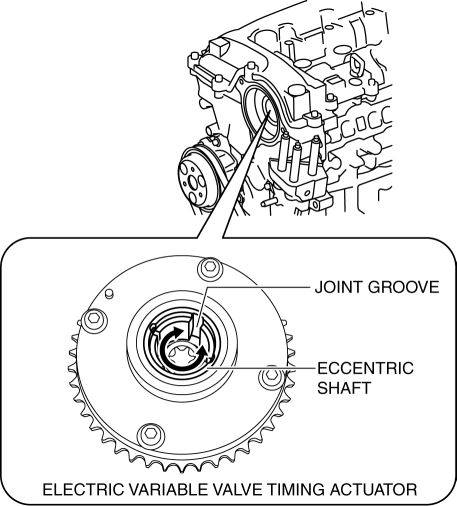
Mazda 3 Service Manual: Electric Variable Valve Timing Actuator Inspection [Skyactiv G 2.0]
WARNING:
-
A hot engine can cause severe burns. Turn off the engine and wait until it is cool before servicing.
CAUTION:
-
Do not disassemble the electric variable valve timing actuator because it is a precision unit.
1. Remove the battery cover..
2. Disconnect the negative battery cable..
3. Remove the plug hole plate..
4. Remove the coolant reserve tank with the hose still connected and set it out of the way..
5. Remove the electric variable valve timing motor/driver..
6. Rotate the eccentric shaft of the electric variable valve timing actuator by hand and verify that it rotates smoothly.

-
If it does not rotate smoothly, replace the electric variable valve timing actuator..
NOTE:
-
Hook a finger onto the joint groove of the eccentric shaft to rotate the shaft easily.
-
The eccentric shaft stops rotating at the maximum retard position when it is rotated counterclockwise as viewed from the front, and at the maximum advance position when rotated clockwise.
-
The eccentric shaft rotates 15.8 turns from the maximum retard position to the maximum advance position.
7. Install in the reverse order of removal.
 Compression Inspection [Skyactiv G 2.0]
WARNING:
Hot engines and oil can cause severe burns. Be careful not to burn yourself
during removal/installation of each component.
Fuel vapor is hazardous. It can very easily ignit ...
 Electric Variable Valve Timing Actuator, Hydraulic Variable Valve Timing Actuator
Removal/Installation [Skyactiv G 2.0]
WARNING:
A hot engine can cause severe burns. Turn off the engine and wait until it
is cool before servicing.
CAUTION:
Do not disassemble the electric variable valve timing ac ...
Other materials:
Passenger Compartment Temperature Sensor Inspection [Full Auto Air Conditioner]
1. Measure the temperature around the passenger compartment temperature sensor
and measure the resistance between passenger compartment temperature sensor terminals
B and D.
If the characteristics of the passenger compartment temperature sensor are
not as shown in the graph, repla ...
Crankshaft Position (CKP) Sensor Inspection [Mzr 2.0, Mzr 2.5]
Visual Inspection
CAUTION:
When foreign material such as an iron chip is on the CKP sensor, it can cause
abnormal output from the sensor because of flux turbulence and adversely affect
the engine control. Be sure there is no foreign material on the CKP sensor when
replacing.
...
Back Up Light Switch Inspection
1. Disconnect the negative battery cable..
2. Remove the battery component. (ex: battery, battery tray and PCM component)
(G35-MR,G66M-R).
3. Remove the aerodynamic under cover No.2. (G35-MR,G66M-R,C66M-R).
4. Disconnect the back-up light switch connector..
5. Verify that the continuity be ...
