Mazda 3 Service Manual: Liftgate Side Trim Removal/Installation
1. Remove the liftgate upper trim..
2. Pull the point A of the strap hanger as shown in the figure.
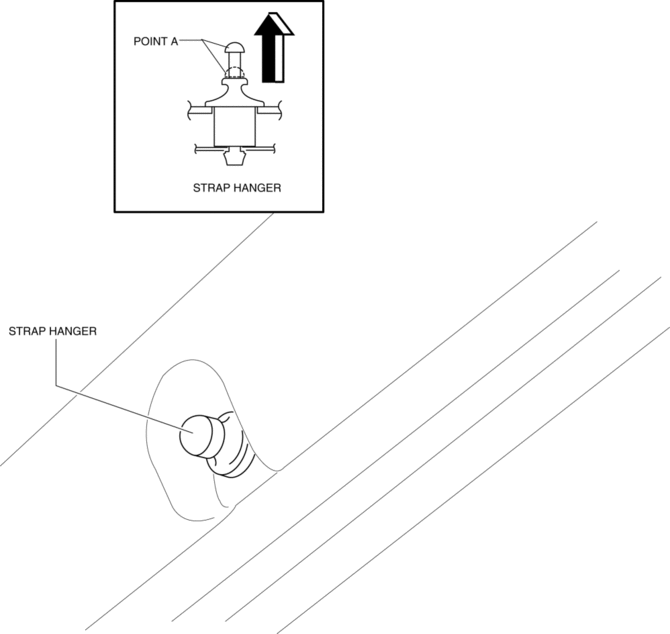
3. Remove the strap hanger.
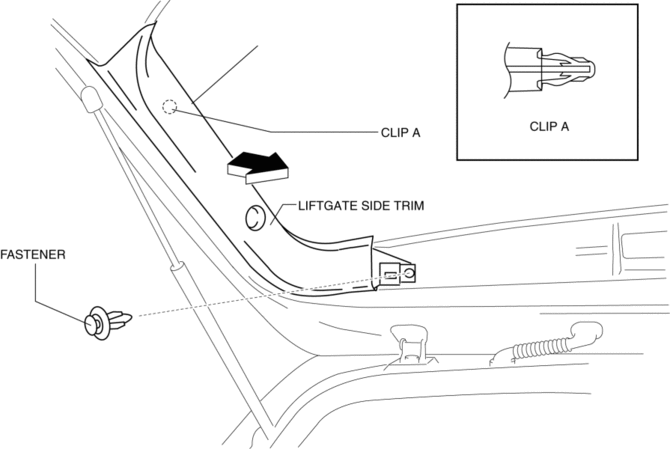
4. Remove the fastener.
5. Pull the liftgate side trim in the direction of arrow then remove clip A.
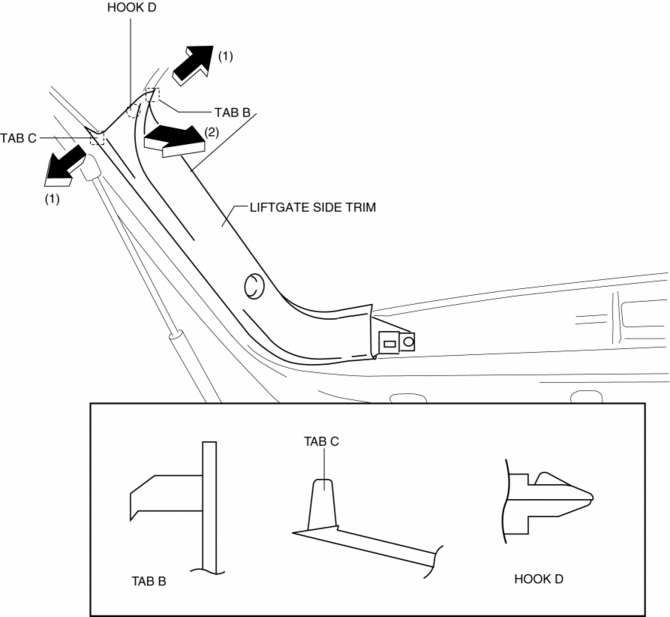
6. Detach tab B and C while pulling the liftgate side trim in the direction of the arrow (1) shown in the figure, then detach hook D while pulling in the direction of the arrow (2).
7. Install in the reverse order of removal.
 Liftgate Removal/Installation
WARNING:
When removing the stay damper, serious injury may occur if the stay damper
is removed without supporting the liftgate. Always perform the procedure with
at least another person. ...
 Liftgate Upper Trim Removal/Installation
1. Detach tab while pulling the liftgate upper trim in the direction of the arrow
(1) shown in the figure, then detach clips and pin while pulling in the direction
of the arrow (2).
2. Detac ...
Other materials:
Fastening the Seat Belt
Pull the seat belt tongue to the desired
length.
Insert it into the seat belt buckle until
you hear a click sound.
Adjust the belt length.
To lengthen the belt, hold the seat belt
tongue at a right angle to the webbing
and pull. To shorten, pull the loose end
of the webbin ...
Heating
Set the mode selector dial to the
position.
Set the air intake selector to the outside
air position.
Set the temperature control dial to the
hot position.
Set the fan control dial to the desired
speed.
If dehumidified heating is desired, turn
on the air conditioner.
NOTE
...
Driver monitor
Basic functions
In the Subaru Solterra, the driver monitoring system continuously observes the
driver during operation using an advanced in-cabin camera. It analyzes the driver’s
head position, gaze direction, and whether the eyes are open or closed.
Based on this data, the Subaru Solterra e ...
