Mazda 3 Service Manual: Rear Window Glass Removal
4SD
1. Disconnect the negative battery cable.
2. Remove the following parts:
a. Rear seat cushion.
b. Rear scuff plate.
c. Rear side seat back.
d. C–pillar trims.
e. Rear package trim.
f. Tire house trims.
3. Remove the fasteners.
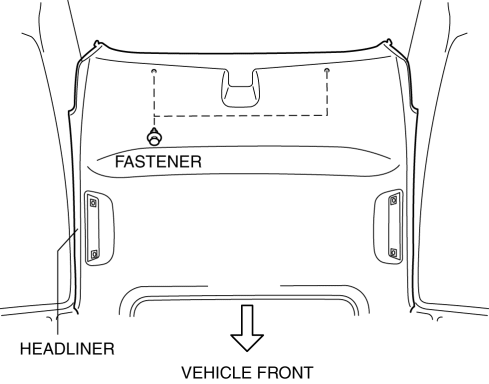
4. Set the headliner out of the way.
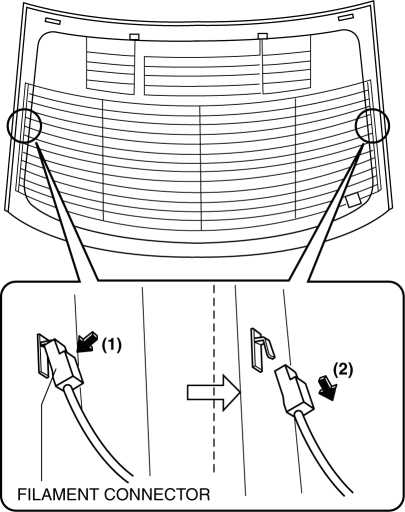
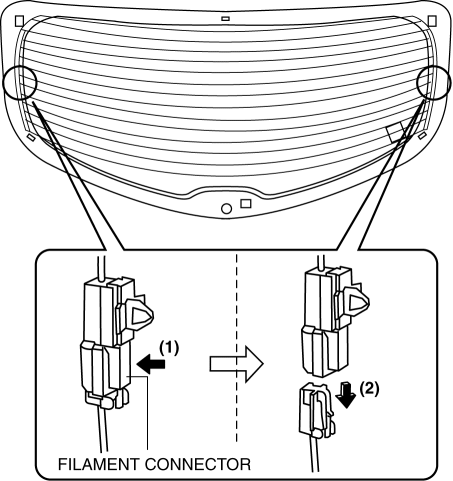
5. Disconnect the filament connector.
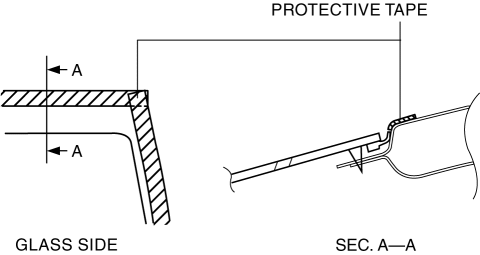
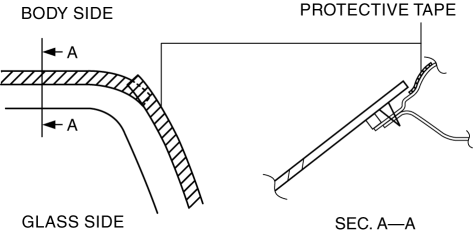
6. Apply protective tape along the edge of the body.
NOTE:
-
Overlap and adhere the protective tape to the corners to prevent damage.
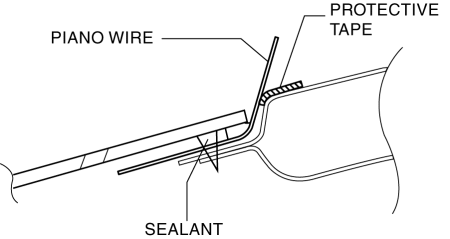
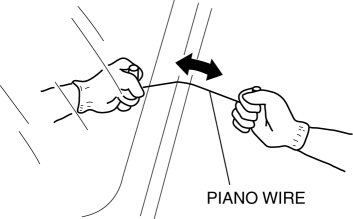
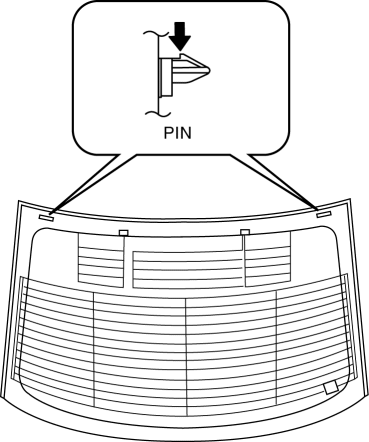
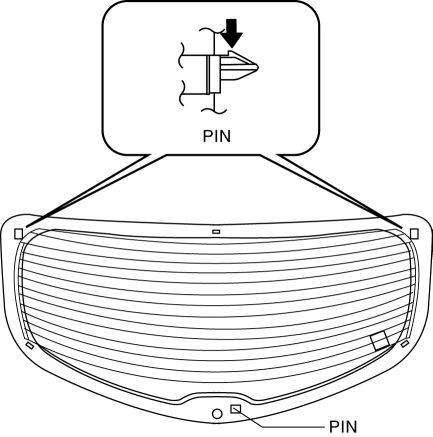
7. Avoiding the pin on the inside of the vehicle, insert piano wire which has been cut to sufficient length.
WARNING:
-
Using piano wire with bare hands can cause injury. Always wear gloves when using piano wire.
NOTE:
-
Before removing the rear window glass from the body, mark the position of the glass by affixing tape to the glass and body panel.
8. Wind each end of piano wire around a bar.
NOTE:
-
Use a long sawing action to spread the work over the whole length of piano wire to prevent it from breaking due to localized heating.
9. Secure one end of piano wire, and while pulling the other end, cut the sealant around the rear window glass.
10. Pinch the pin from the inside of the vehicle and detach it.
11. Remove the rear window glass.
5HB
1. Disconnect the negative battery cable.
2. Remove the following parts:
a. Liftgate upper trim.
b. High-mount brake light.
c. Liftgate side trim.
d. Liftgate lower trim.
e. Rear spoiler.
f. Rear wiper arm and blade.
3. Disconnect the filament connector.
4. Apply protective tape along the edge of the body.
NOTE:
-
Overlap and adhere the protective tape to the corners to prevent damage.
5. Avoiding the pin on the inside of the vehicle, insert piano wire which has been cut to sufficient length.
WARNING:
-
Using piano wire with bare hands can cause injury. Always wear gloves when using piano wire.
NOTE:
-
Before removing the rear window glass from the body, mark the position of the glass by affixing tape to the glass and body panel.
6. Wind each end of piano wire around a bar.
NOTE:
-
Use a long sawing action to spread the work over the whole length of piano wire to prevent it from breaking due to localized heating.
7. Secure one end of piano wire, and while pulling the other end, cut the sealant around the rear window glass.
8. Pinch the pin from the inside of the vehicle and detach it.
9. Remove the rear window glass.
 Rear Window Glass Installation
WARNING:
Using a utility knife with bare hands can cause injury. Always wear gloves
when using a utility knife.
CAUTION:
Proper installation of the glass may be difficult if s ...
 Windshield Installation
WARNING:
Using a utility knife with bare hands can cause injury. Always wear gloves
when using a utility knife.
CAUTION:
If a door is opened or closed when all the window glas ...
Other materials:
Rear Door Latch And Lock Actuator Inspection
1. The following actuator and switch are integrated with the rear door latch
and lock actuator. Inspect the rear door latch and lock actuator according to each
inspection procedure for the following items.
Rear door lock actuator.
Rear door latch switch.
Rear door lock-li ...
Starter Interlock Switch Inspection [Mzr 2.0, Mzr 2.5]
CAUTION:
Do not reuse the starter interlock switch if it is removed from the vehicle
even once. Replace with a new starter interlock switch when installing.
1. Remove the battery cover..
2. Disconnect the negative battery cable..
3. Disconnect the starter interlock switch connec ...
If your vehicle has to be stopped in an emergency
In rare emergency situations where normal stopping is not possible,
follow this procedure to safely bring your Subaru Solterra to a halt.
Stopping the vehicle
1. Firmly press the brake pedal using both feet and maintain steady pressure.
Avoid repeatedly pumping the brake pedal, as this may redu ...
