Mazda 3 Service Manual: Air Fuel Ratio (A/F) Sensor Inspection [Mzr 2.0, Mzr 2.5]
A/F Sensor Inspection
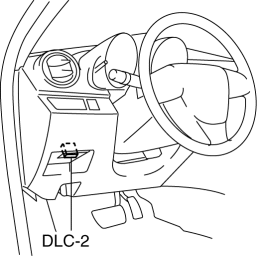
1. Connect the M-MDS to the DLC-2.
2. Switch the ignition to ON.
3. Warm up the engine to normal operating temperature.
4. Access the following PIDs using the M-MDS..
-
VSS (Vehicle speed)
-
RPM (Engine speed)
-
O2S11 (A/F sensor output current)
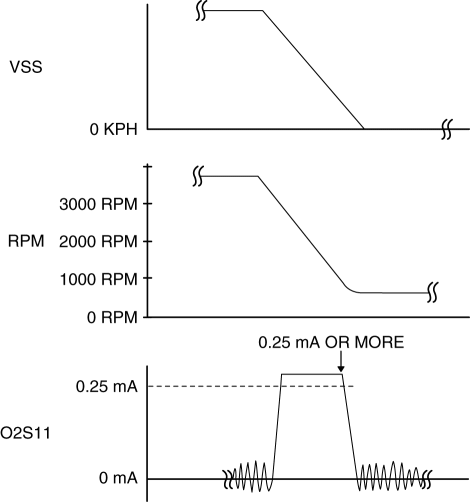
5. Drive the vehicle and decelerate the engine speed by releasing the accelerator pedal fully when the engine speed is 3,000 rpm or more
.
6. Verify that the A/F sensor output current (PID: O2S11) is 0.25 mA or more
while decelerating as shown in the figure.
-
If not as specified, replace the A/F sensor..
A/F Sensor Heater Inspection
WARNING:
-
A hot engine and exhaust system can cause severe burns. Turn off the engine and wait until they are cool before removing the exhaust system.
1. Remove the battery cover..
2. Disconnect the negative battery cable..
3. Remove the plug hole plate..
4. Remove the air cleaner assembly. (MZR 2.5).
5. Disconnect the A/F sensor connector.
6. Measure the resistance between A/F sensor terminals A and E.
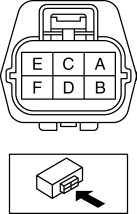
-
If not as specified, replace the A/F sensor..
-
A/F sensor heater resistance
-
1—10 ohms [normal temperature]
 Accelerator Pedal Position (App) Sensor Inspection [Mzr 2.0, Mzr 2.5]
Voltage Inspection
NOTE:
Because the APP sensor is integrated in the accelerator pedal, replacing
the APP sensor includes replacement of the accelerator pedal.
1. Connect the M-MDS t ...
 Air Fuel Ratio (A/F) Sensor Removal/Installation [Mzr 2.0, Mzr 2.5]
WARNING:
A hot engine and exhaust system can cause severe burns. Turn off the engine
and wait until they are cool before removing the exhaust system.
1. Remove the battery cover..
2 ...
Other materials:
Trunk Lid Key Cylinder Removal/Installation
1. Disconnect the negative battery cable..
2. Remove the trunk lid trim..
3. Lift the clip in the direction of the arrow (1), and pull out the key rod
in the direction of the arrow (2).
4. Remove the nuts.
5. Remove the trunk lid key cylinder.
6. Install in the reverse order of r ...
Rear View Monitor Operation
The operation of the rear view monitor when reversing the vehicle varies
depending on
the traffic, road, and vehicle conditions. The amount of steering and the
timing also varies
depending on conditions, so confirm the surrounding conditions directly with
your eyes and
steer the vehicle in ...
PID/Data Monitor Inspection [Standard Deployment Control System]
1. Connect the M-MDS (IDS) to the DLC-2.
2. After the vehicle is identified, select the following items from the initialization
screen of the IDS.
a. Select “DataLogger”.
b. Select “Modules”.
c. Select “RCM”.
3. Select the applicable PID from the PID table.
4. Verify the PID data a ...
