Mazda 3 Service Manual: Antenna Feeder No.7 Inspection
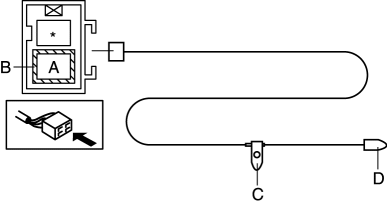
1. Disconnect the negative battery cable..
2. Remove the liftgate upper trim..
3. Disconnect the connector A and B..
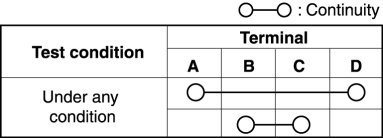
4. Verify that the continuity between antenna feeder No.7 terminals is as indicated in the table.
-
If not as indicated in the table, replace antenna feeder No.7.
 Antenna Feeder No.6 Removal/Installation
NOTE:
Antenna feeder No.6 is integrated with the vehicle wiring harness.
1. Refer to CAR-NAVIGATION UNIT REMOVAL/INSTALLATION. ...
 Antenna Feeder No.7 Removal/Installation
1. Disconnect the negative battery cable..
2. Remove the liftgate upper trim..
3. Disconnect the connector A.
4. Disconnect the connector B..
5. Remove the bolt.
6. Remove the antenna fe ...
Other materials:
Power Metal Oxide Semiconductor Field Effect Transistor (Power Mos Fet) Inspection
[Full Auto Air Conditioner]
1. Verify that the continuity between the power MOS FET terminals is as indicated
in the table.
If there is any malfunction, replace the power MOS FET.
If the blower motor operation is not normal even though no malfunction can
be verified, inspect the climate control unit..
...
Information on Passenger Vehicle Tires
Please refer to the sample below.
TIN: U.S. DOT tire identification number
Passenger car tire
Nominal width of tire in millimeters
Ratio of height to width (aspect ratio)
Radial
Run-flat tire
Rim diameter code
Load index & speed symbol
Severe snow conditions
Tire ply co ...
Emergency flashers
The emergency flashers in the Subaru Solterra are designed to alert
surrounding drivers when the vehicle must be stopped unexpectedly due to a breakdown,
hazard, or other urgent situation.
Operating instructions
Press the emergency flasher switch located in the Subaru Solterra cabin.
All turn ...
