Mazda 3 Service Manual: Front Bumper Reinforcement Removal/Installation
1. Disconnect the negative battery cable..
2. Remove the following parts:
a. Front bumper.
b. Seal plate.
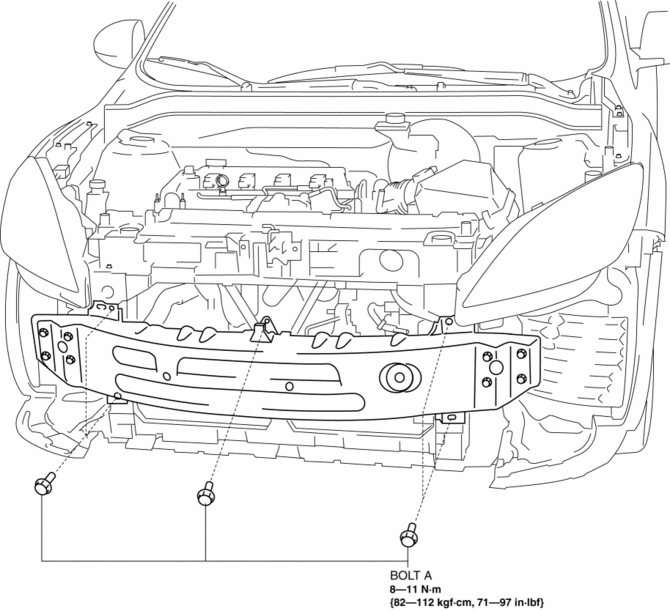
3. Remove the bolts A.
4. Remove the bolts B.
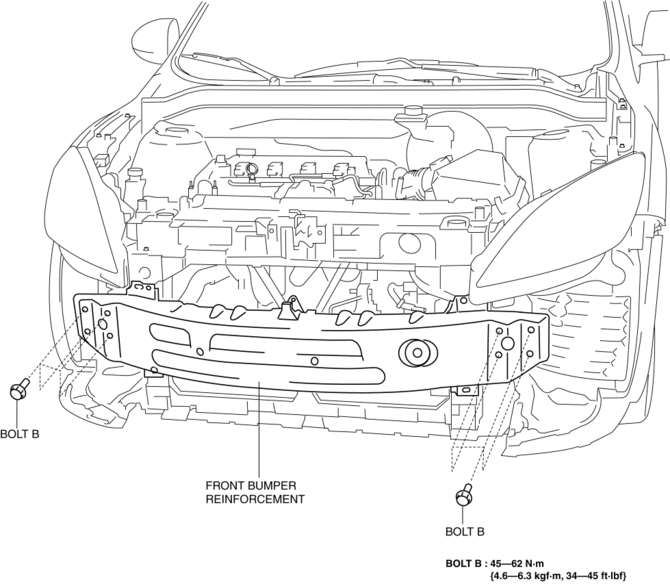
5. Remove the front bumper reinforcement.
6. Install in the reverse order of removal.
 Front Bumper Disassembly/Assembly
Standard Type
Except SKYACTIV-G 2.0
1. Disassemble in the order indicated in the table.
1
Screw A
2
Guard cover
3
...
 Front Bumper Removal/Installation
1. Disconnect the negative battery cable..
2. Remove the screw A and fasteners B.
3. Remove the screws C.
4. Remove the bolts D.
5. Remove the fasteners E, screw F and fastener G. ...
Other materials:
Direct Mode
Direct mode can be used for temporarily
switching gears by operating the steering
shift switch while the vehicle is being
driven with the selector lever in the D
range.
While in direct mode, the D and M
indication illuminate and the gear position
in use is illuminated.
Direct mode is can ...
No.2 Car Navigation System Does Not Operation [Car Navigation System]
2
Even if the map screen is touched, the car-navigation system cannot be
operated
Possible DTC
—
POSSIBLE CAUSE
Audio unit malfunction (bad LCD panel)
Car-navigation unit malfunct ...
Compression Inspection [Mzr 2.0, Mzr 2.5]
WARNING:
Hot engines and oil can cause severe burns. Be careful not to burn yourself
during removal/installation of each component.
Fuel vapor is hazardous. It can very easily ignite, causing serious injury
and damage. Always keep sparks and flames away from fuel.
Fuel ...
