Mazda 3 Service Manual: High Mount Brake Light Removal/Installation
4SD
1. Disconnect the negative battery cable..
2. Remove the trunk lid trim..
3. Disconnect the connector.
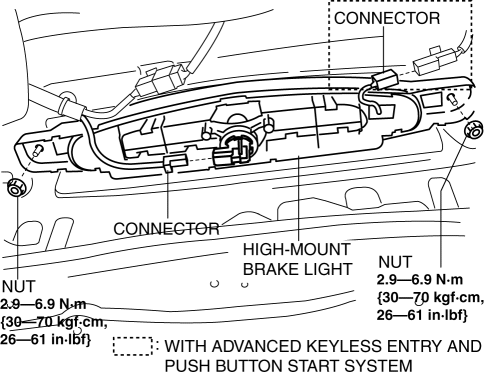
4. Remove the nuts.
5. While pressing the tabs shown in the figure, pull the high-mount brake light outward and remove it.
6. Remove the high-mount brake light.
7. Install in the reverse order of removal.
5HB
Except Mazdaspeed3
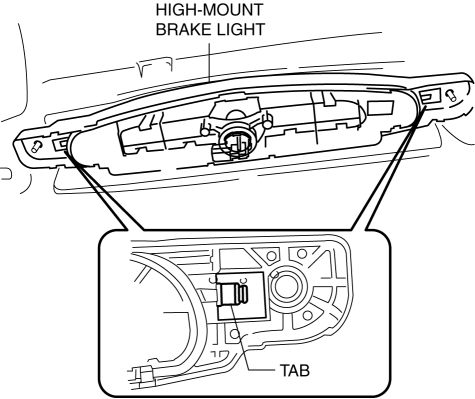
1. Disconnect the negative battery cable..
2. Remove the liftgate upper trim..
3. While pressing the tabs shown in the figure, pull the high-mount brake light outward and remove it.
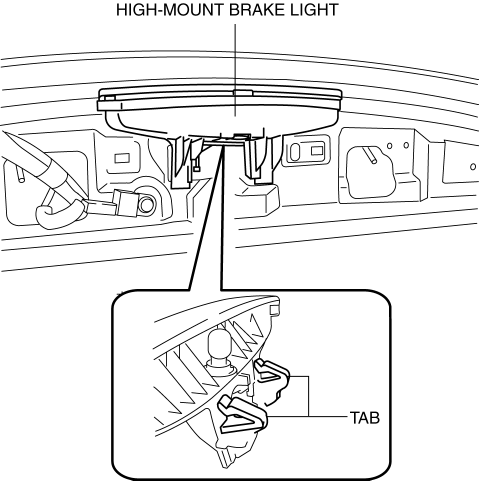
4. Remove the high-mount brake light socket.
5. Remove the high-mount brake light.
6. Install in the reverse order of removal.
Mazdaspeed3
1. Disconnect the negative battery cable..
2. Remove the liftgate upper trim..
3. Remove the rear spoiler..
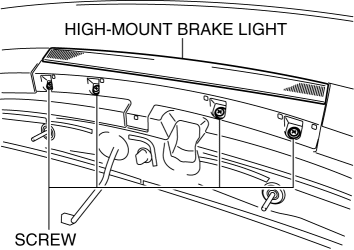
4. Remove the screws shown in the figure.
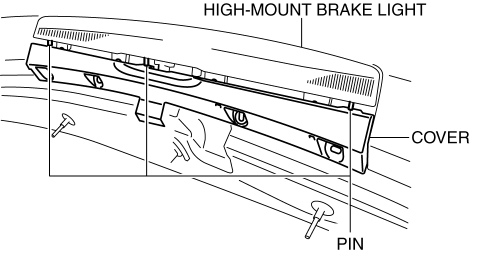
5. Set the pin aside and remove the cover.
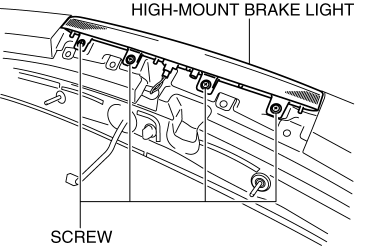
6. Remove the screws shown in the figure.
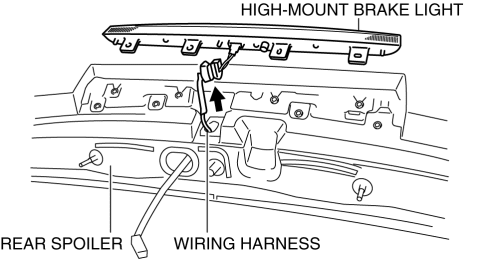
7. Pull out the wiring harness from the rear spoiler.
8. Remove the high-mount brake light.
9. Install in the reverse order of removal.
 High Mount Brake Light Disassembly/Assembly
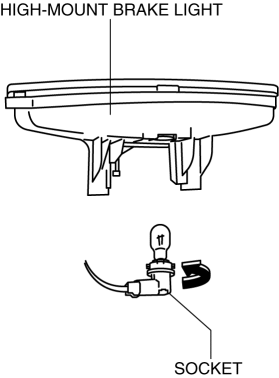
4SD
1. Disconnect the negative battery cable..
2. Remove the trunk lid trim..
3. Remove the high-mount brake light..
4. Remove the high-mount brake light outer lens.
5. Remove the high-mo ...
 License Plate Light Bulb Removal/Installation
1. Disconnect the negative battery cable..
2. Insert a tape-wrapped fastener remover to the position shown in the figure,
release the tabs, and remove the lens.
3. Remove the license plate l ...
Other materials:
Outer Mirror Glass Removal
1. Disconnect the negative battery cable.
2. Press area B of the mirror glass so that area A moves outward.
3. Detach pin B while lifting up the inside of the mirror glass holder.
4. Pull the mirror glass holder and remove pins A and C.
5. Disconnect the mirror heater connectors. (Ve ...
Replacing a Tire
WARNING
Always use tires that are in good condition:
Driving with worn tires is dangerous. Reduced braking, steering, and
traction could result
in an accident.
If a tire wears evenly, a wear indicator will appear as a solid band across
the tread.
Replace the tire when ...
Front Door Speaker Inspection
1. Disconnect the negative battery cable..
2. Remove the inner garnish..
3. Remove the front door trim..
4. Remove the front door speaker..
5. Verify the resistance between the front door speaker terminals.
If not within the specification, replace the front door speaker.
...
