Mazda 3 Service Manual: Joint Shaft Assembly [Mzr 2.0, Mzr 2.5 (MTX)]
1. Assemble in the order indicated in the table.
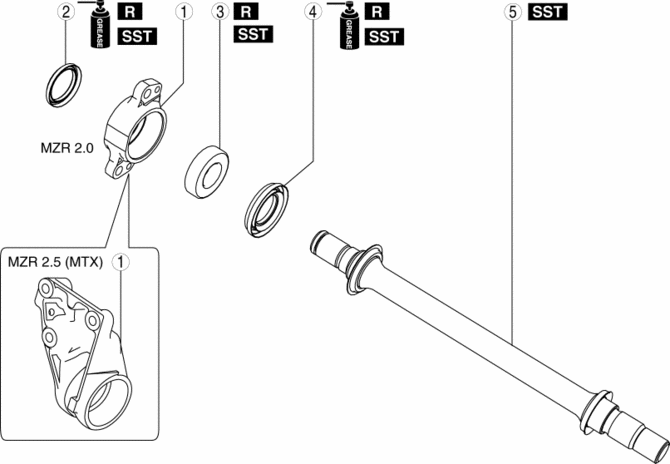
|
1 |
Bracket |
|
2 |
Dust seal (RH) . |
|
3 |
Bearing . |
|
4 |
Dust seal (LH) . |
|
5 |
Joint shaft . |
Dust Seal (RH) Assembly Note
1. Apply grease to a new dust seal lip.
2. Install the dust seal (RH) using the SSTs
.

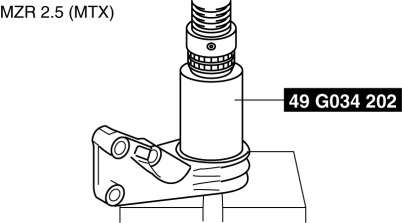
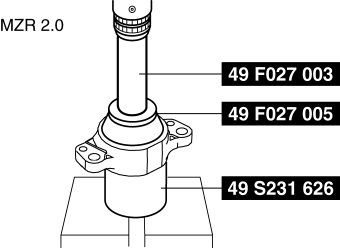
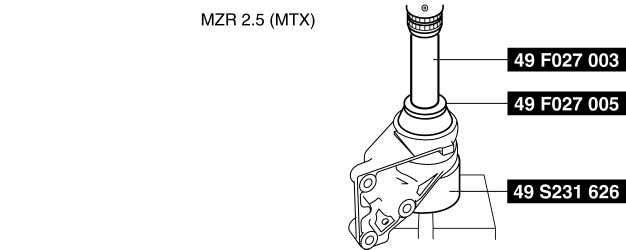
Bearing Assembly Note
1. Install a new bearing using the SSTs
.
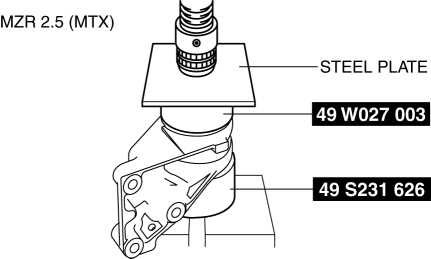
Dust Seal (LH) Assembly Note
1. Apply grease to a new dust seal lip.
2. Install a new dust seal (LH) using the steel plate and the SSTs
.

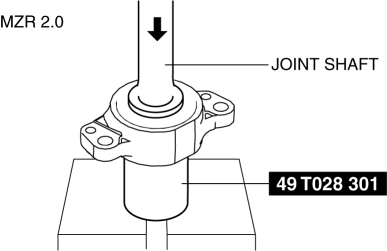
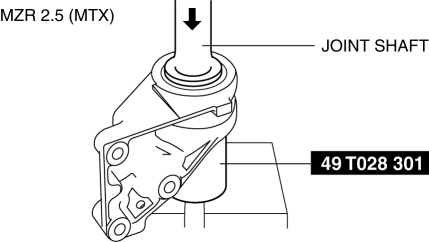
Joint Shaft Assembly Note
1. Press fit the joint shaft using the SST
and a press.
 Drive Shaft Removal/Installation
CAUTION:
Performing the following procedures without first removing the ABS wheel-speed
sensor may possibly cause an open circuit in the wiring harness if it is pulled
by mistake. Before ...
 Joint Shaft Assembly [Mzr 2.3 Disi Turbo]
1. Assemble in the order indicated in the table.
1
Bracket
2
Dust seal (RH)
.
3
Bearing
.
4 ...
Other materials:
Cowl Panel Removal/Installation
1. Disconnect th negative battery cable..
2. Remove the windshield wiper arm and blade..
3. Remove the front fender molding..
4. Remove the cowl grille..
5. Remove the washer hose grommet from the cowl panel and disconnect the front
washer hose.
6. Remove the windshield wiper motor..
7 ...
Input/Turbine Speed Sensor Removal/Installation [FS5 A EL]
CAUTION:
Always use a new bolt. If the removed input/turbine speed sensor installation
bolt is reused, it may cause oil leakage.
A sealant coating is applied to the input/turbine speed sensor installation
bolt to prevent oil leakage from the installation bolt hole which passes ...
Manual Transaxle Shift Mechanism Removal/Installation [C66 M R]
1. Remove the battery cover..
2. Disconnect the negative battery cable..
3. Remove the shift lever.
a. Remove the upper panel..
b. Remove the shift lever knob.
c. Remove the shift panel..
d. Remove the side wall..
e. Remove the console..
f. Detach the clip as shown in the figure. ...
