Mazda 3 Service Manual: Keyless Control Module Removal/Installation
1. If the keyless control module is replaced, always perform the following procedure.
-
Vehicles with immobilizer system
-
Keyless Control Module Configuration.
-
Immobilizer System-related Parts Programming [No.4 Programming Procedure Due to Keyless Control Module Replacement].
-
Vehicles without immobilizer system
-
Keyless Control Module Configuration.
-
Advanced Key Id Code Registration.
-
Steering Lock Unit Id Code Registration.
2. Disconnect the negative battery cable..
3. Remove the following parts:
a. Passenger-side front scuff plate.
b. Passenger-side front side trim.
c. Grove compartment.
d. Passenger-side lower panel.
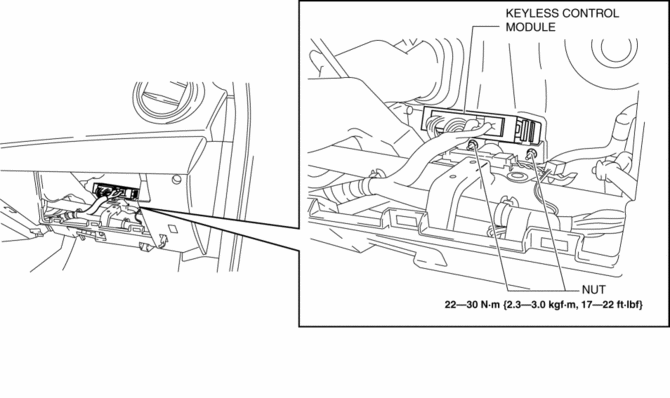
4. Remove in the nuts.
5. Disconnect the connector.
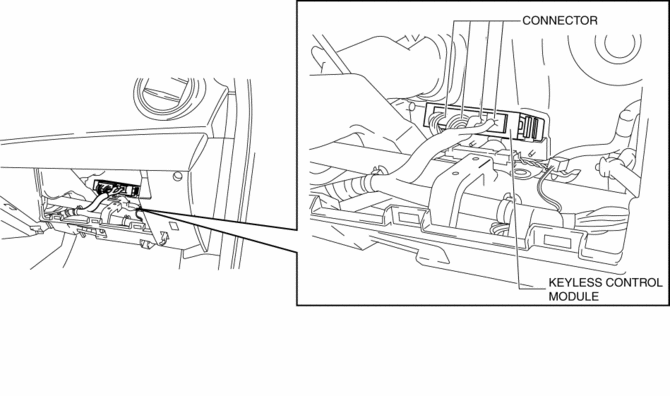
6. Remove the keyless control module.
7. Install in the reverse order of removal.
 Keyless Control Module Inspection
1. Remove the following parts:
a. Passenger-side front scuff plate.
b. Passenger-side front side trim.
c. Grove compartment.
d. Passenger-side lower panel.
2. Measure the voltage according t ...
 Front Door Key Cylinder Removal/Installation
1. To access the glass installation bolt, position the front door glass so that
the distance from the top of the front door glass to the upper part of the front
beltline molding is approx. 80 mm { ...
Other materials:
Selecting the Airflow Mode
Dashboard Vents
Defroster and Floor Vents
Dashboard and Floor Vents
Defroster Vents
Floor Vents
...
Front Seat Belt Removal/Installation [Two Step Deployment Control System]
WARNING:
Handling the front seat belt (pre-tensioner seat belt) improperly can accidentally
deploy the pre-tensioner seat belt, which may seriously injure you. Read the
air bag system service warnings and cautions before handling the front seat
belt..
WARNING:
Th ...
Washer Motor Removal/Installation
4SD
1. Disconnect the negative battery cable..
2. Remove the front mudguard (RH)..
3. Remove in the order indicated in the table.
1
Windshield washer hose
2
Washer motor connector
3
Washer motor
...
