Mazda 3 Service Manual: Liftgate Latch And Lock Actuator Removal/Installation
1. Disconnect the negative battery cable..
2. Remove the following parts:
a. Liftgate upper trim.
b. Liftgate side trim.
c. Liftgate lower trim.
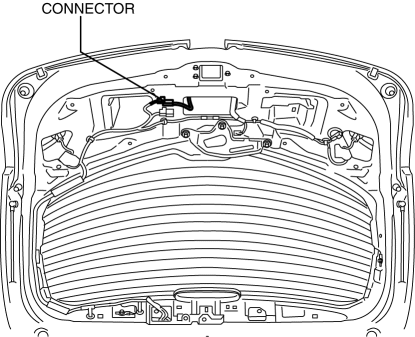
3. Disconnect the connector.
4. Remove the bolts.
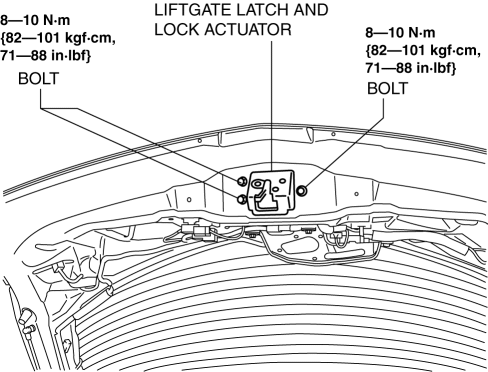
5. Remove the liftgate latch and lock actuator.
6. Install in the reverse order of removal.
 Liftgate Latch And Lock Actuator Inspection
1. The following actuator and switch are integrated with the liftgate latch and
lock actuator. Inspect the liftgate latch and lock actuator according to each inspection
procedure for the following ...
 Liftgate Latch Switch Inspection
1. Disconnect the negative battery cable..
2. Remove the following parts:
a. Liftgate upper trim.
b. Liftgate side trim.
c. Liftgate lower trim.
d. Liftgate latch and lock actuator.
3. Pre ...
Other materials:
Generator Disassembly/Assembly [Mzr 2.0, Mzr 2.5]
CAUTION:
Melt the solder quickly, otherwise the diodes (rectifier) and regulator will
be damaged by excessive heat.
1. Disassemble in the order indicated in the table.
2. Assemble in the reverse order of disassembly.
MZR 2.0
1
Rotor component
...
Auto Dimming Mirror Removal
1. Disconnect the negative battery cable.
2. Remove the screw.
3. Disconnect the auto-dimming mirror connector.
4. Pull out the rearview mirror toward the vehicle rear.
CAUTION:
When removing the rearview mirror, it may hit the headliner and cause damage.
Hold the ...
Radiator Removal/Installation [Mzr 2.0, Mzr 2.5]
WARNING:
Never remove the cooling system cap or loosen the radiator drain plug while
the engine is running, or when the engine and radiator are hot. Scalding engine
coolant and steam may shoot out and cause serious injury. It may also damage
the engine and cooling system.
Tu ...
