Mazda 3 Service Manual: Liftgate Lock Striker Removal/Installation
1. Remove the trunk end trim..
2. Remove the bolts, then remove the liftgate lock striker.
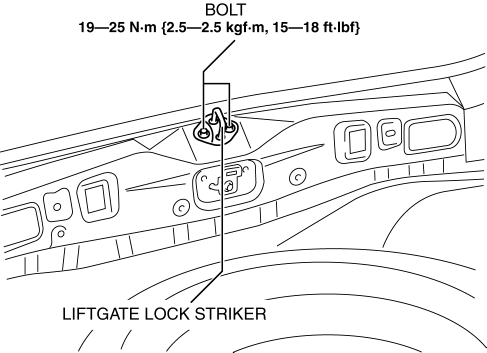
3. Install in the reverse order of removal.
4. Adjust the liftgate lock striker..
 Liftgate Latch Switch Inspection
1. Disconnect the negative battery cable..
2. Remove the following parts:
a. Liftgate upper trim.
b. Liftgate side trim.
c. Liftgate lower trim.
d. Liftgate latch and lock actuator.
3. Pre ...
 Liftgate Lower Trim Removal/Installation
1. Remove the liftgate upper trim..
2. Remove the liftgate side trim..
3. Remove the screw and fasteners.
4. Pull the liftgate lower trim in the direction of arrow (1), (2), (3), then
deta ...
Other materials:
Bass Box Inspection
1. Disconnect the negative battery cable..
2. Disconnect the connector..
3. Verify the resistance between bass-box terminals.
If not within the specification, replace the bass-box.
Resistance
0.9—1.1 ohms
...
Non Return Valve Inspection [Mzr 2.0, Mzr 2.5]
WARNING:
Fuel is very flammable liquid. If fuel spills or leaks from the pressurized
fuel system, it will cause serious injury or death and facility breakage. Fuel
can also irritate skin and eyes. To prevent this, always complete the “Fuel
Line Safety Procedure”, while referring ...
Outer Mirror Glass Inspection
Vehicles With Heated Outer Mirror
1. Disconnect the negative battery cable..
2. Remove the outer mirror glass..
3. Verify that the resistance is as indicated in the table.
If not as indicated in the table, or if the resistance is not within the
specification, replace the outer mi ...
