Mazda 3 Service Manual: Liftgate Opener Switch Removal/Installation
1. Disconnect the negative battery cable..
2. Remove the following parts:
a. Liftgate upper trim.
b. Liftgate side trim.
c. Liftgate lower trim.
d. Liftgate latch and lock actuator.
3. Disconnect the connector.
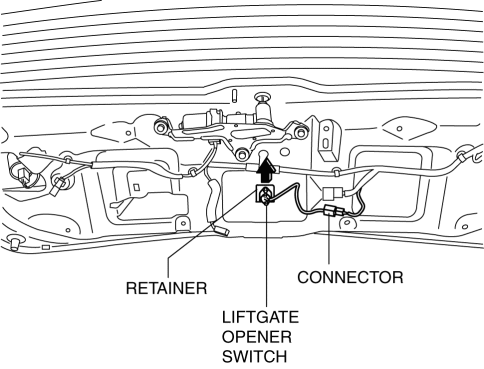
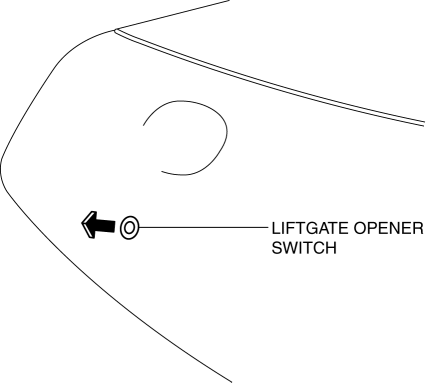
4. Pull out the retainer in the direction of the arrow.
5. Remove the liftgate opener switch.
6. Install in the reverse order of removal.
 Liftgate Opener Switch Inspection
1. Disconnect the negative battery cable..
2. Remove the following parts:
a. Liftgate upper trim.
b. Liftgate side trim.
c. Liftgate lower trim.
d. Liftgate latch and lock actuator.
e. Lif ...
 Liftgate Removal/Installation
WARNING:
When removing the stay damper, serious injury may occur if the stay damper
is removed without supporting the liftgate. Always perform the procedure with
at least another person. ...
Other materials:
Fuel Pump Unit Removal/Installation [Mzr 2.0, Mzr 2.5]
WARNING:
Fuel is very flammable liquid. If fuel spills or leaks from the pressurized
fuel system, it will cause serious injury or death and facility breakage. Fuel
can also irritate skin and eyes. To prevent this, always complete the “Fuel
Line Safety Procedure”, while referring ...
Parking Support Brake function (pedestrians rear of the vehicle)
The Subaru Solterra is equipped with a rear camera-based detection
system capable of identifying pedestrians behind the vehicle while reversing. When
a pedestrian is detected and the system determines that collision risk is elevated,
an audible warning is issued. If the danger becomes critical ...
Mute
The microphone can be muted during a
call.
Press the talk button with a short press.
Say: [Beep] “Mute”
Prompt: “Microphone muted”
Canceling mute
Press the talk button with a short press.
Say: [Beep] “Mute off”
Prompt: “Microphone unmuted”
Transferring a Call f ...
