Mazda 3 Service Manual: Rain Sensor Removal/Installation
1. Disconnect the negative battery cable..
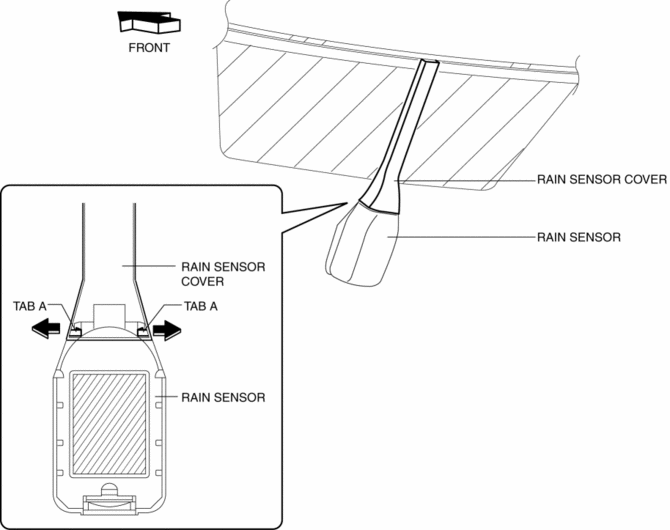
2. Spread open the rain sensor cover in the direction of the arrows and disengage tabs A to remove it.
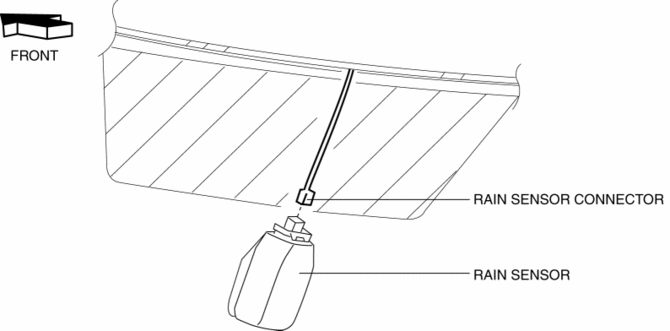
3. Disconnect the rain sensor connector.
4. Slide rain sensor tab B in the direction of the arrow shown in the figure and detach tab B.
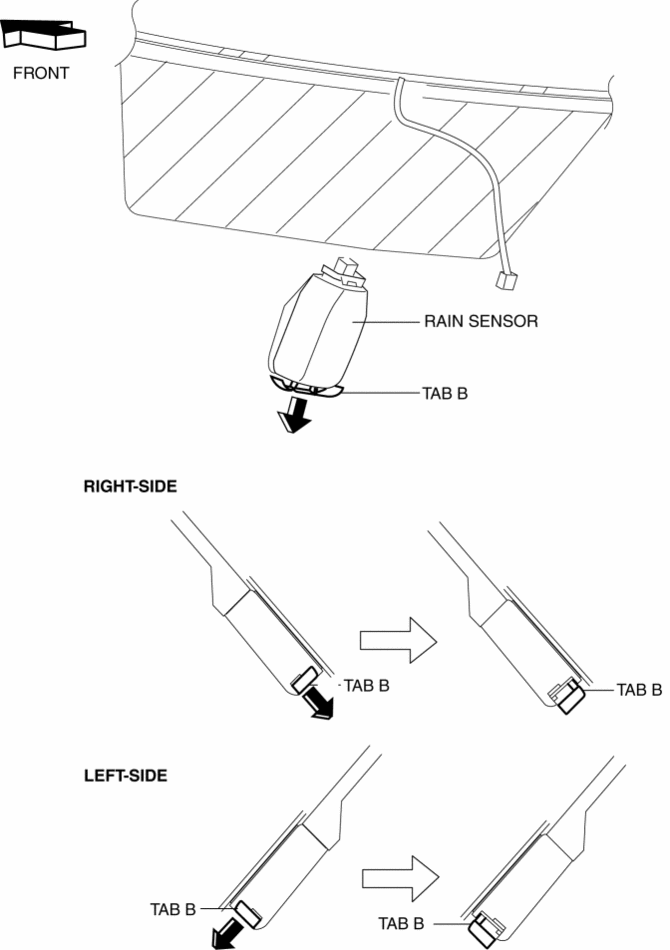
5. Remove the rain sensor in the direction of the arrow shown in the figure.
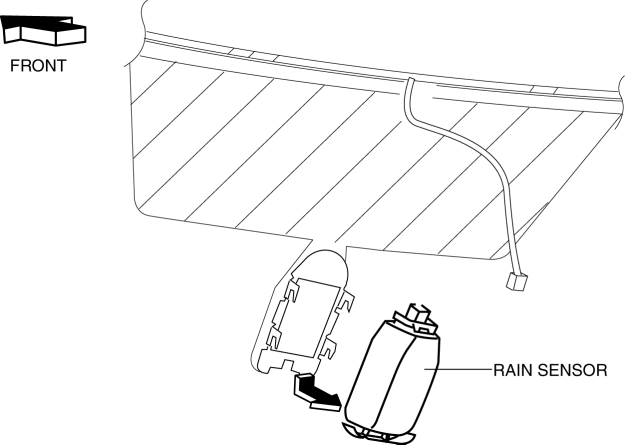
6. Peel off the rain sensor protective sheet from the rain sensor.
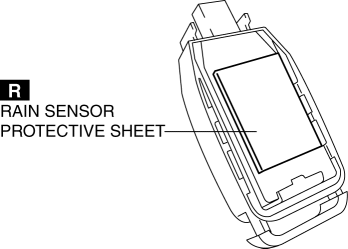
7. Install in the reverse order of removal..
Rain Sensor Installation Note
CAUTION:
-
If the rate at which the rain sensor reflects or transmits infrared light between the rain sensor and the windshield, or through the protective sheet is changed, the rain sensor will determine that there is a malfunction in the rain detection function and stop auto wiper system control. Be careful of the following when installing the rain sensor:
-
Do not reuse rain sensor protective sheet
-
Do not touch rain sensor lens, rain sensor protective sheet, and sensor installation area on windshield with your finger
-
Verify that there is no air bubble after installing rain sensor
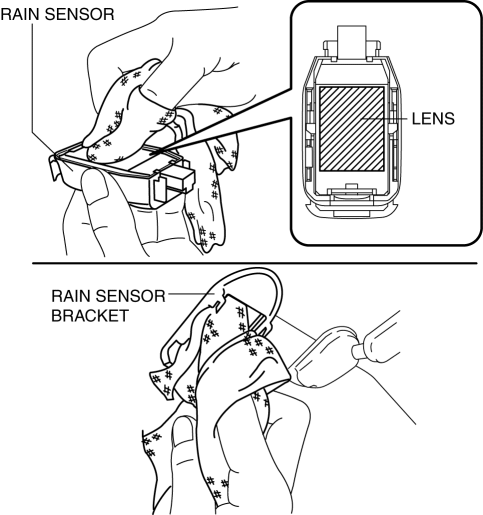
1. Wipe off any oil or dirt from the rain sensor lens and the windshield using a clean rag.
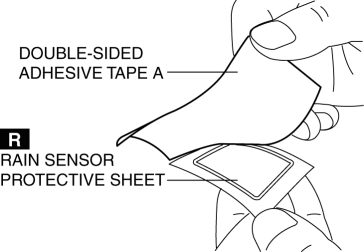
2. Peel off double-sided adhesive tape A from the rain sensor protective sheet.
3. Adhere the rain sensor protective sheet to the rain sensor lens.
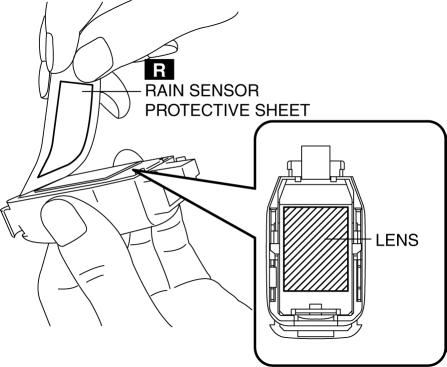
4. Peel off double-sided adhesive tape B from the rain sensor protective sheet.
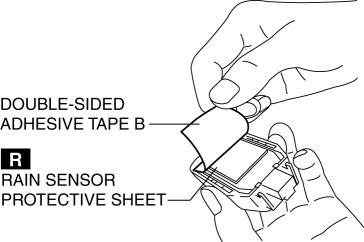
5. Install the rain sensor.
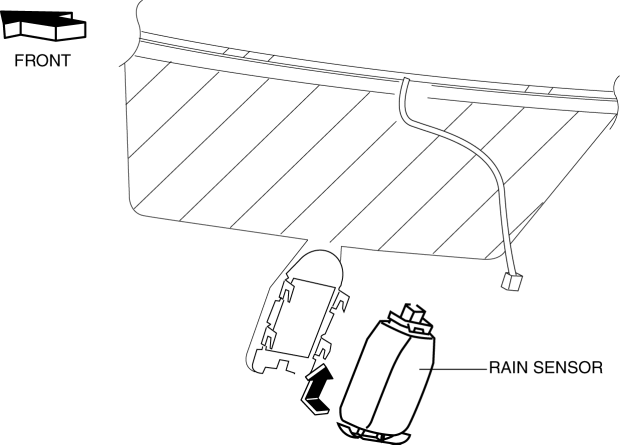
6. Press the rain sensor in the direction of the windshield and press out any air bubbles.
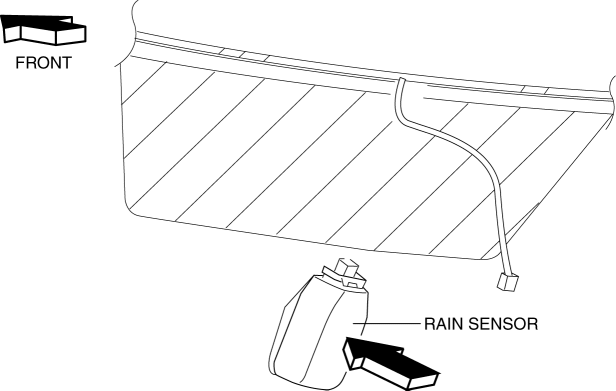
7. Verify that there is no air bubble between the windshield and the rain sensor.
 Wiper And Washer Switch Removal/Installation
1. Disconnect the negative battery cable..
2. Remove the column cover.
3. Disconnect the wiper and washer switch connector.
4. Remove the screws.
5. Remove the wiper and washer switch.
6 ...
Other materials:
If You Must Use the Front Seat for
Children
If you cannot put all children in the rear
seat, at least put the smallest children
in the rear and be sure the largest child
up front uses the shoulder belt over the
shoulder.
NEVER put a rear-facing child-restraint
system on the front passenger seat whether
your vehicle is equipped with a ...
Seat Weight Sensor Control Module Removal/Installation [Two Step Deployment
Control System]
CAUTION:
When the seat weight sensor control module is replaced with a new one, perform
the seat weight sensor calibration using the M–MDS..
1. Switch the ignition to off.
2. Disconnect the negative battery cable and wait for 1 min or more..
3. Disconnect the connectors.
...
Foot Brake
This vehicle has power-assisted brakes
that adjust automatically through normal
use.
Should power-assist fail, you can stop by
applying greater force than normal to the
brake pedal. But the distance required to
stop will be greater than usual.
WARNING
Do not coast with the engine ...

