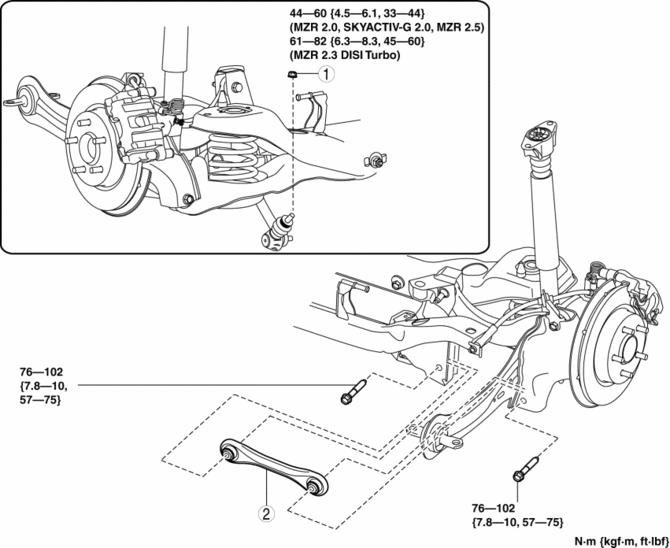
Mazda 3 Service Manual: Rear Lateral Link Removal/Installation
1. Remove in the order indicated in the table.
2. Install in the reverse order of removal.
3. Inspect the wheel alignment and adjust it if necessary..
|
1 |
Rear stabilizer control link upper nut |
|
2 |
Rear lateral link (See Rear Lateral Link Removal Note.) (See Rear Lateral Link Installation Note.) |
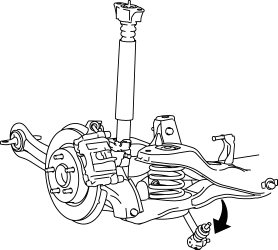
Rear Lateral Link Removal Note
1. Rotate the rear stabilizer component downwards as shown in the figure.
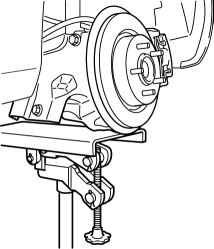
2. Jack up the vehicle to the unloaded condition, and support the trailing link using a jack.
3. Remove the rear lateral link.
Rear Lateral Link Installation Note
1. Jack up the vehicle to the unloaded condition, and support the trailing link using a jack.
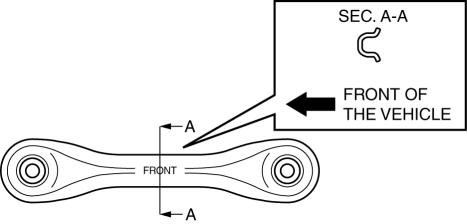
2. Install the rear lateral link so that the rib is facing toward the front of the vehicle.
 Rear Coil Spring Removal/Installation
1. Disconnect the auto leveling sensor lower side. (Vehicles with AFS).
2. Remove in the order indicated in the table.
3. Install in the reverse order of removal.
4. Inspect the wheel alignment ...
 Rear Lower Arm Removal/Installation
1. Disconnect the auto leveling sensor link lower side. (Vehicles with AFS).
2. Remove in the order indicated in the table.
3. Install in the reverse order of removal.
4. Inspect the wheel alig ...
Other materials:
Operation
System triggering conditions
The horn sounds intermittently and the
hazard warning lights flash for about 30
seconds when the system is triggered by
any one of the following:
Unlocking a door with the key, door
lock switch, or an inside door-lock knob.
Forcing open a door, the hood or th ...
Brakes SST
49 D043 0A0
Adapter set
49 U043 0A0A
Oil pressure gauge set
49 0221 600C
Disc brake expand tool
49 B033 001
Installer
49 G033 102
Handle
...
Wheel Balance Adjustment
CAUTION:
Adjust the outer wheel balance first, then the inner wheel balance.
Be careful not to scratch the wheels.
Adhesive-type Balance Weight (Outer)
1. Remove the old balance weight from the wheel.
2. Remove the double-sided adhesive tape remaining on the wheel, then clea ...
