Mazda 3 Owners Manual: Rearview Mirror
| WARNING Do not stack cargo or objects higher than the seatbacks: Cargo stacked higher than the seatbacks is dangerous. It can block your view in the rearview mirror, which might cause you to hit another car when changing lanes. |
Rearview mirror adjustment
Before driving, adjust the rearview mirror to center on the scene through the rear window.
NOTE For the manual day/night mirror, perform the adjustment with the day/night lever in the day position.
Reducing glare from headlights
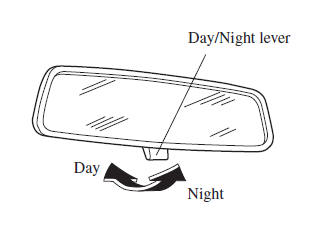
Manual day/night mirror
Push the day/night lever forward for day driving. Pull it back to reduce glare of headlights from vehicles at the rear.
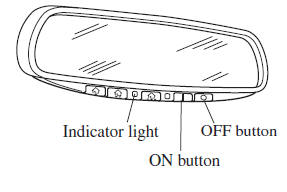
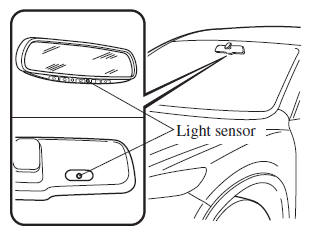
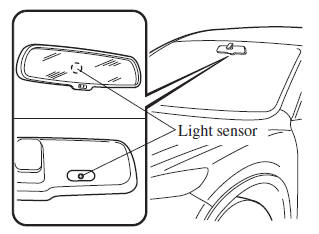
Auto-dimming mirror
The auto-dimming mirror automatically reduces glare of headlights from vehicles at the rear when the ignition is switched ON.
(With Homelink wireless control system)
Press the OFF button to cancel the automatic dimming function. The indicator light will turn off.
To reactivate the automatic dimming function, press the ON button . The indicator light will illuminate.
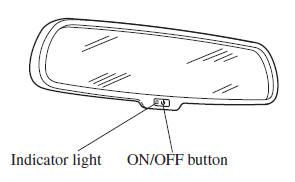
(Without Homelink wireless control system)
Press the ON/OFF button to cancel the automatic dimming function. The indicator light will turn off.
To reactivate the automatic dimming function, press the ON/OFF button . The indicator light will illuminate.
NOTE
- Do not use glass cleaner or suspend
objects on or around the light sensor.
Otherwise, light sensor sensitivity will be affected and may not operate normally.
(With Homelink wireless control system)
(Without Homelink wireless control system)
- (With Homelink wireless control
system)
For information regarding the 3 buttons
(
 ,
,
 ,
,
 ) on the auto-dimming
mirror.Refer to HomeLink Wireless Control System on .
- The auto-dimmer function is canceled when the ignition is switched ON and the shift lever is in reverse (R).
 Outside Mirrors
WARNING
Be sure to look over your shoulder
before changing lanes:
Changing lanes without taking
into account the actual distance of
the vehicle in the convex mirror is
dangero ...
 Windows
...
Other materials:
Engine Coolant Level Inspection [Mzr 2.0, Mzr 2.5]
WARNING:
Never remove the cooling system cap or loosen the radiator drain plug while
the engine is running, or when the engine and radiator are hot. Scalding engine
coolant and steam may shoot out and cause serious injury. It may also damage
the engine and cooling system.
Tu ...
Immobilizer System
The immobilizer system allows the
engine to start only with a key the system
recognizes.
If someone attempts to start the engine
with an unrecognized key, the engine
will not start, thereby helping to prevent
vehicle theft.
If you have a problem with the
immobilizer system or the key, co ...
Cylinder Head Gasket Replacement [Mzr 2.0, Mzr 2.5]
WARNING:
Fuel vapor is hazardous. It can very easily ignite, causing serious injury
and damage. Always keep sparks and flames away from fuel.
Fuel line spills and leakage are dangerous. Fuel can ignite and cause serious
injuries or death and damage. Fuel can also irritate skin ...
