
Mazda 3 Service Manual: Seal Plate Removal/Installation
1. Disconnect the negative battery cable..
2. Remove the front bumper..
3. Remove the bolt.
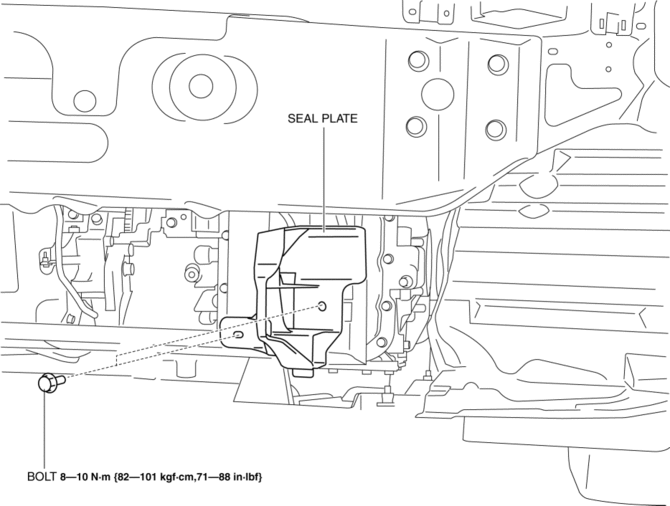
4. Pull the seal plate in the direction of arrow shown in the figure, then remove the hook.
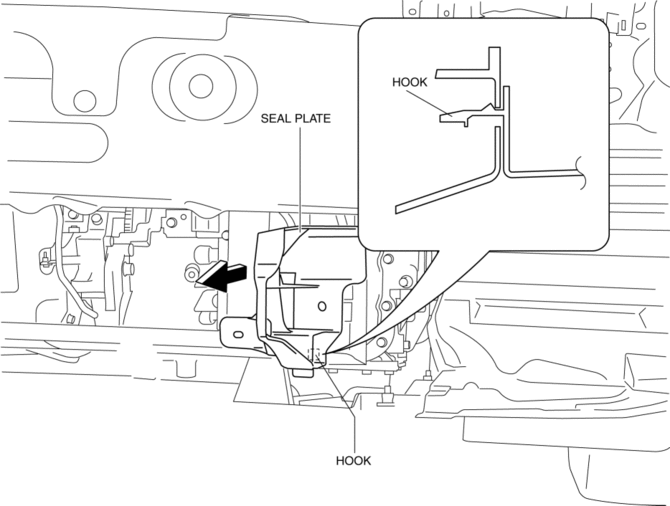
5. Install in the reverse order of remove.
 Rear Spoiler Removal/Installation
4SD
1. Remove the trunk lid trim..
2. Remove the nuts.
3. While cutting the double-sided adhesive tape using a flathead screwdriver
or a razor, separate the rear spoiler from the trunk lid. ...
 Side Panel Removal/Installation
1. Insert a tape-wrapped fastener remover into the position indicated by the
arrow in the figure.
2. Pull the side panel in the direction of the arrow shown in the figure, then
remove the clips ...
Other materials:
Power Steering Fluid Inspection
Fluid Level Inspection
1. Verify that the fluid level is between MAX and MIN of the sub tank when the
engine is cold.
If the fluid is not at the specified level, adjust the fluid level (MIN-MAX
on sub tank) by adding/draining the fluid.
Power steering fluid type
Mazda Gen ...
Transaxle Oil Inspection [G66 M R]
1. Park the vehicle on level ground.
2. Remove the aerodynamic under cover No.2..
3. Remove the oil level plug and washer.
4. Verify that the oil is near the brim of the plug port.
If the oil level is lower than the low level, add the specified amount and
type of oil through the ...
Instrument Cluster Configuration
1. Connect the M-MDS (IDS) to the DLC-2.
2. After the vehicle is identified, select the following items from the initialization
screen of the IDS.
Select the “Module Programming”.
3. Then, select items from the screen menu in the following order.
Select “Programma ...
