Mazda 3 Owners Manual: Tiedown Hooks
| CAUTION
Do not use the front and rear tiedown
eyelets for towing the vehicle. They have been designed only for securing the vehicle to a transport vessel during shipping. Using the eyelets for any other purpose could result in the vehicle being damaged. |
Tiedown Hooks
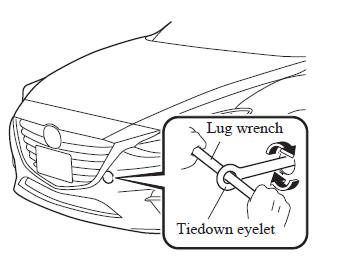
- Remove the tiedown eyelet and the lug wrench from the luggage compartment .
- Wrap a flathead screwdriver or similar tool with a soft cloth to prevent damage to a painted bumper, and open the cap located on the front or rear bumper.
Front
Rear
| CAUTION Do not use excessive force as it may damage the cap or scratch the painted bumper surface |
NOTE Remove the cap completely and store it so as not to lose it.
- Securely install the tiedown eyelet using the lug wrench.
Front
Rear
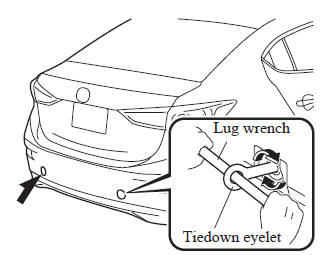
- Hook the tying rope to the tiedown eyelet.
| CAUTION If the tiedown eyelet is not securely tightened, it may loosen or disengage from the bumper when tying the vehicle. Make sure that the tiedown eyelet is securely tightened to the bumper. |
 Towing Description
We recommend that towing be done only
by an Authorized Mazda Dealer or a
commercial tow-truck service.
Proper lifting and towing are necessary
to prevent damage to the vehicle.
Government and ...

Other materials:
Vehicle Speed Sensor (VSS) Inspection [FS5 A EL]
On-Vehicle Inspection
1. Inspect the power supply circuit for the VSS.
a. Remove the insulator from the transaxle.
b. Disconnect the VSS connector.
c. Switch the ignition to ON (engine off).
d. Measure the voltage at VSS connector terminal A (harness-side).
If there is a ...
No.7 Bsm Indicator Light Does Not Flash While Under Bsm Indicator Light Flashing
Conditions (With Combination Switch Operation (Turn Signal Switch)) [Blind Spot
Monitoring (Bsm)]
7
BSM indicator light does not flash while under BSM indicator light-flashing
conditions (with combination switch operation (turn signal switch))
Description
The BSM indicator light does not flash or illuminate continuously,
...
Do-it-yourself service precautions
When performing maintenance on the Subaru Solterra самостоятельно,
важливо суворо дотримуватись правильних процедур,
описаних у відповідних розділах, щоб забезпечити
безпеку та уник ...
