Mazda 3 Service Manual: Trunk Lid Latch And Release Actuator Removal/Installation
1. Disconnect the negative battery cable..
2. Remove the trunk lid trim..
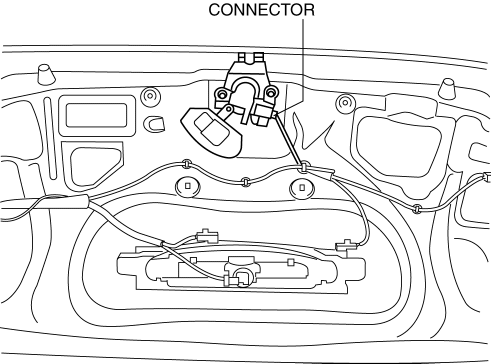
3. Disconnect the connector.
4. Remove the bolts.
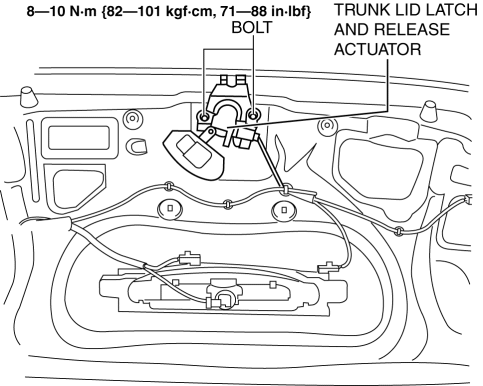
5. Remove the trunk lid latch and release actuator.
6. Install in the reverse order of removal.
 Trunk Lid Latch And Release Actuator Inspection
1. The following actuator and switch are integrated with the release actuator.
Inspect the trunk lid latch and release actuator according to each inspection procedure
for the following items.
...
 Trunk Lid Latch Switch Inspection
1. Disconnect the negative battery cable..
2. Remove the trunk lid trim..
3. Remove the trunk lid latch and lock actuator..
4. Press the latch in using a flathead screwdriver to inspect the latc ...
Other materials:
Immobilizer system
The Subaru Solterra is equipped with advanced key technology featuring
integrated transponder chips that communicate with the vehicle’s onboard system,
ensuring that the EV system can only be started with a properly registered key.
This significantly enhances protection against unauthorized ...
Driving assist systems
In the Subaru Solterra, a range of advanced driving assist systems
work seamlessly in the background to enhance safety, stability, and overall driving
performance. These systems automatically respond to changing road and driving conditions;
however, they are designed to support the driver and ...
Drive Shaft (Tripod Joint) Disassembly/Assembly
1. Disassemble in the order indicated in the table.
2. Assemble in the reverse order of disassembly.
1
Boot band (transaxle side)
(See Boot Band (Transaxle Side) Disassembly Note.)
(See Boot Band (Transaxle Side) Assembly Note.)
2
Cli ...
