Mazda 3 Service Manual: Trunk Lid Removal/Installation
WARNING:
-
Removing the trunk lid stay damper without supporting the trunk lid can be dangerous. The trunk lid may fall and injure you. Be sure to open the trunk lid completely and support it securely before removing the trunk lid stay damper.
1. Disconnect the negative battery cable..
2. Remove the following parts:
a. Rear scuff plate.
b. Tire house trim.
c. Trunk mat.
d. Trunk board.
e. Trunk end trim.
f. Trunk side trim (LH).
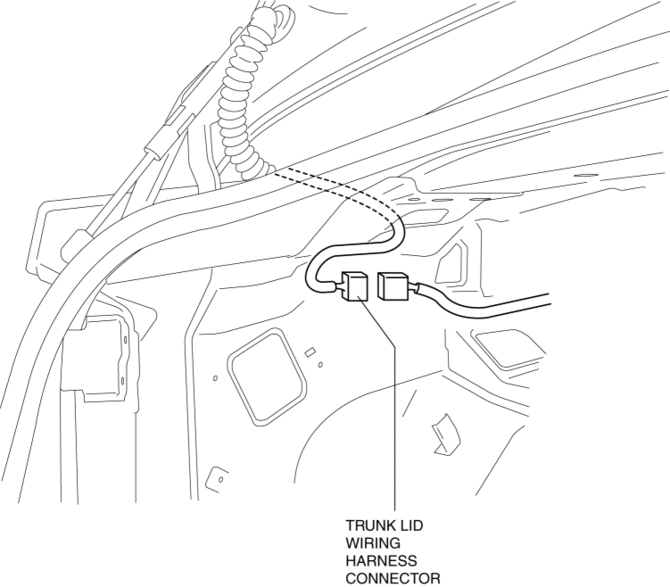
3. Disconnect the trunk lid wiring harness connector, then take the trunk lid wiring harness out from the vehicle.

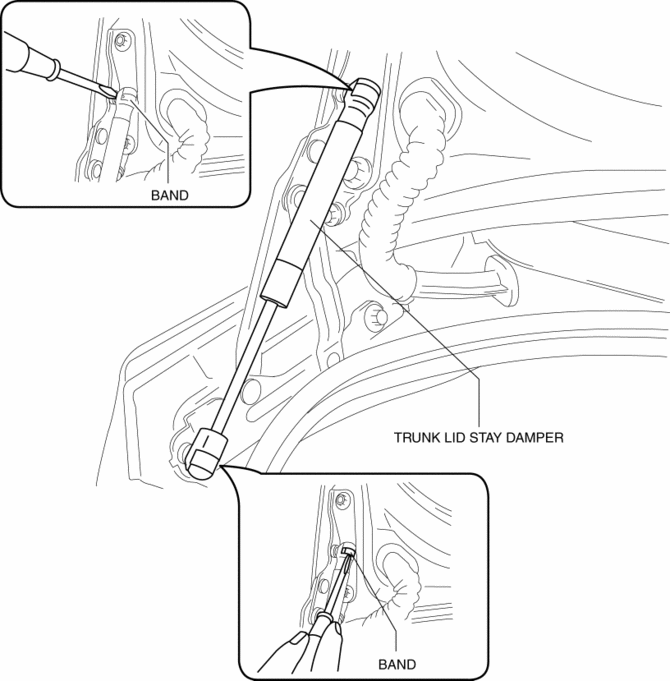
4. Pry off the trunk lid stay damper band using a flathead screwdriver.

5. Pry out the connecting parts of the trunk lid stay damper out of the hinge with a flathead screwdriver, then remove the trunk lid stay damper.
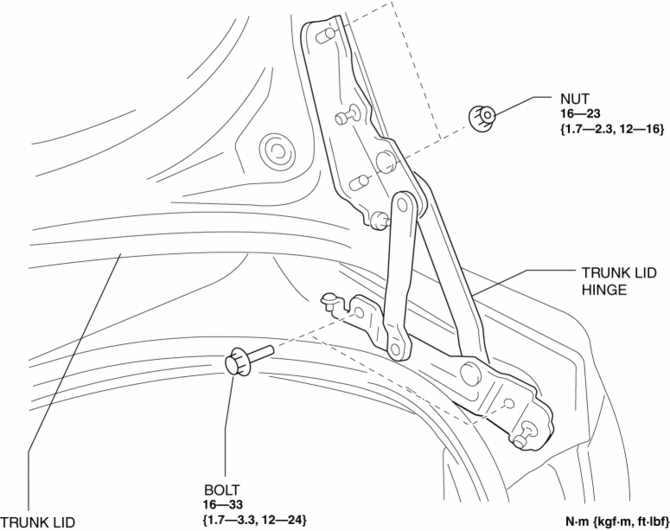
6. Remove the nuts, then remove the trunk lid.

7. Remove the bolts, then remove the trunk lid hinge.
8. Install in the reverse order of removal.
9. Adjust the trunk lid..
 Trunk Lid Release Actuator Inspection
1. Disconnect the negative battery cable..
2. Remove the trunk lid trim..
3. Remove the trunk lid latch and release actuator..
4. Press the latch in using a flathead screwdriver to inspect the l ...
 Trunk Lid Stay Damper Disposal
NOTE:
The gas in the trunk lid stay damper is colorless, odorless, and non-toxic.
1. Wear protective eye wear.
2. Lay the trunk lid stay damper flat.
3. Hacksaw 2—3 mm {0.08—0.11 ...
Other materials:
Theft Deterrent System Reading Freeze Frame Data
1. Connect the M-MDS (IDS) to the DLC–2.
2. After the vehicle is identified, select the following items from the initialization
screen of the IDS.
Select “Body”.
Select "Burglar Service Functions".
3. Then, select the following item from the screen menu.
...
Electric Power Steering Oil Pump Component Removal/Installation
CAUTION:
Be careful not to drop the electric power steering oil pump component as
the internal parts of the EHPAS CM could be damaged. Replace the electric power
steering oil pump component if it is subjected to an impact.
1. Remove the front mudguard (RH)..
2. Remove the aerod ...
No.1 Car Navigation System Does Not Start Operation [Car Navigation System]
1
Even if the NAVI mode is selected, the car-navigation system screen does
not display.
Possible DTC
—
POSSIBLE CAUSE
NAVI button malfunction
Power supply fuse (+B, ACC) burnt out
...
