Mazda 3 Service Manual: Vacuum Hose Removal/Installation [Skyactiv G 2.0]
1. Remove the plug hole plate..
2. Remove the battery and battery tray..
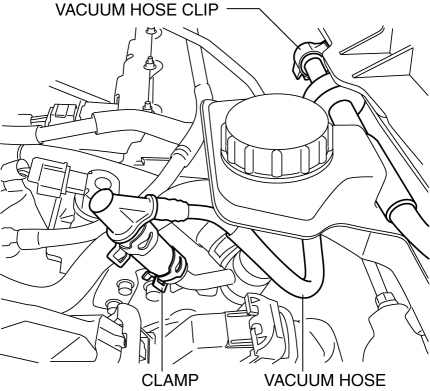
3. Remove the vacuum hose from the vacuum hose clip.

4. Pinch open the clamp using pliers and disconnect the vacuum hose from the vacuum pump.
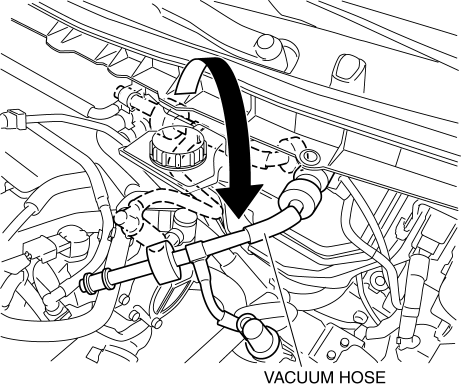
5. Move the vacuum hose as shown in the figure.

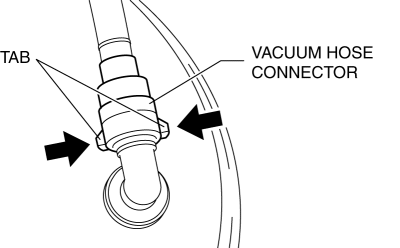
6. Disconnect the vacuum hose connector from the power brake unit while pressing the tabs of the vacuum hose connector.

7. Remove the vacuum hose.
8. Install in the reverse order of removal.
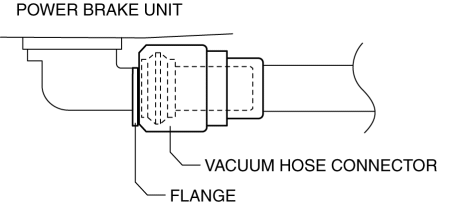
9. Insert the vacuum hose connector to the power brake unit.
10. Verify that the vacuum hose is inserted so that the connector contacts the power brake unit flange.

 Vacuum Hose Removal/Installation [Mzr 2.3 Disi Turbo]
1. Remove the charge air cooler cover..
2. Remove the charge air cooler..
3. Insert a thin flathead screwdriver at the point indicated by the arrow in
the figure, push the ring down and disconne ...
 Vacuum Line Inspection
MZR 2.0, MZR 2.5, MZR 2.3 DISI Turbo
1. Remove the vacuum hose..
2. Verify that air can be blown from the power brake unit side of the vacuum
hose towards the intake manifold side, and that air c ...
Other materials:
Rear View Monitor Operation
The operation of the rear view monitor when reversing the vehicle varies
depending on
the traffic, road, and vehicle conditions. The amount of steering and the
timing also varies
depending on conditions, so confirm the surrounding conditions directly with
your eyes and
steer the vehicle in ...
Starter Disassembly/Assembly [Mzr 2.0, Mzr 2.5]
1. Disassemble in the order indicated in the table.
2. Assemble in the reverse order of disassembly.
1
Magnetic switch
2
Adjustment washer
3
Rear housing
4
Brush and brush holder
...
Key Reminder Switch Removal/Installation
1. Disconnect the negative battery cable. (See BATTERY REMOVAL/INSTALLATION [MZR
2.0, MZR 2.5].)(See BATTERY REMOVAL/INSTALLATION [MZR 2.3 DISI Turbo].)(See BATTERY
REMOVAL/INSTALLATION [SKYACTIV-G 2.0].)
2. Remove the column cover. (See COLUMN COVER REMOVAL/INSTALLATION.)
3. Disconnect the ...
