Mazda 3 Owners Manual: Antenna (5-Door)
AM/FM Radio Antenna *
The AM/FM radio antenna receives both AM and FM signals.
(Type A)
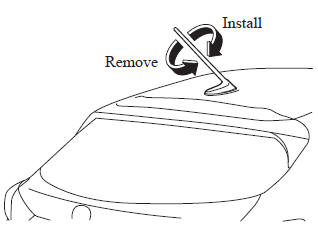
To remove the antenna, turn it counterclockwise.
To install the antenna, turn it clockwise.
Make sure the antenna is securely installed.
CAUTION
|
NOTE When leaving your vehicle unattended, we recommend that you remove the antenna and store it inside the vehicle.
(Type B)
Antenna for AM/FM and Satellite RadioAntenna *
The antenna for AM/FM and satellite radio antenna receives both AM and FM signals and SiriusXM signals.
 Antenna (4-Door)
AM/FM Radio Antenna
The AM/FM radio antenna receives both
AM and FM signals.
The antenna is embedded into the window
glass.
CAUTION
When washing the inside of the
window which has ...
 Operating Tips for Audio System
WARNING
Always adjust the audio while the
vehicle is stopped:
Do not adjust the audio control
switches while driving the vehicle.
Adjusting the audio while driving
the vehicle ...
Other materials:
Accelerator Pedal Position (App) Sensor Inspection [Mzr 2.0, Mzr 2.5]
Voltage Inspection
NOTE:
Because the APP sensor is integrated in the accelerator pedal, replacing
the APP sensor includes replacement of the accelerator pedal.
1. Connect the M-MDS to the DLC–2.
2. Switch the ignition to ON.
3. Verify that the APP sensor output voltage (PID ...
High Mount Brake Light Disassembly/Assembly
4SD
1. Disconnect the negative battery cable..
2. Remove the trunk lid trim..
3. Remove the high-mount brake light..
4. Remove the high-mount brake light outer lens.
5. Remove the high-mount brake light inner lens.
6. Remove the screws (with advanced keyless entry and push button ...
Driving on Uneven Road
Your vehicle's suspension and underbody can be damaged if driven on
rough/uneven roads
or over speed bumps at excessive speeds. Use care and reduce speed when
traveling on
rough/uneven roads or over speed bumps.
Use care not to damage the vehicle's underbody, bumpers or muffler(s) when
dr ...
