
Mazda 3 Service Manual: Automatic Transaxle Fluid (ATF) Inspection [Fw6 A EL]
CAUTION:
-
If the ATF level is not within the specification or ATF is not adhering to the dipstick after warming up the engine, do not drive the vehicle. Otherwise, the transaxle could be damaged.
ATF Level Inspection
1. Remove aerodynamic undercover No.2..
2. Remove the dipstick securing bolt.
3. Connect the M-MDS to the DLC-2 and display the PID TFT.
4. Warm up the engine until the ATF temperature is 50 °C {122 °F}
.
5. Remove the dipstick and wipe ATF off using a nylon cloth while leaving the engine idling.
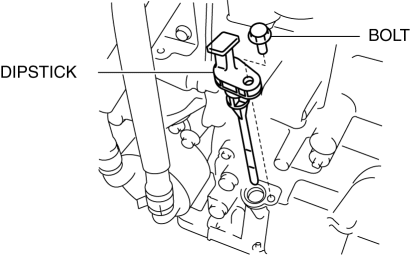
6. Insert the dipstick and pull it out again.
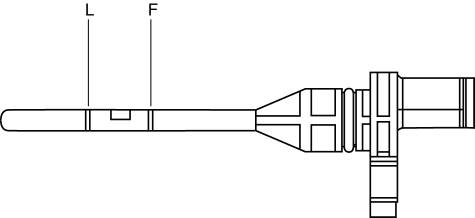
7. Verify that the ATF is adhering between L and F on the dipstick.
-
If ATF is not adhering between L and F on the dipstick, adjust the ATF level..
-
ATF type
-
Genuine ATF FZ
8. Insert the dipstick and install the securing bolt.
-
Tightening torque
-
8—11 N·m {82—112 kgf·cm, 71—97 in·lbf}
9. Install aerodynamic undercover No.2..
 Automatic Transaxle Fluid (ATF) Inspection [FS5 A EL]
Automatic Transaxle Fluid (ATF) Condition Inspection
1. One way of determining whether the transaxle should be disassembled is by
noting:
If the ATF is muddy or varnished.
If the AT ...
 Automatic Transaxle Fluid (ATF) Replacement [FS5 A EL]
WARNING:
A hot transaxle and ATF can cause severe burns. Turn off the engine and wait
until they are cool before changing the ATF.
1. Drain the ATF.
a. Remove the oil dipstick.
b. ...
Other materials:
Rear Upper Arm Removal/Installation
1. When working on the right side of the vehicle, disconnect the canister vent
(CV) solenoid valve from the rear crossmember. (MZR 2.0 (Except Mexico), SKYACTIV-G
2.0, MZR 2.3 DISI Turbo, MZR 2.5 (Except Mexico))
2. Remove in the order indicated in the table.
3. Install in the reverse or ...
High Mount Brake Light Bulb Removal/Installation
4SD
1. Disconnect the negative battery cable..
2. Remove the trunk lid trim..
3. Remove in the order indicated in the table.
1
Connector
2
Socket
3
High-mount brake light bulb
4. Install in the rev ...
Passenger Compartment Temperature Sensor Inspection [Full Auto Air Conditioner]
1. Measure the temperature around the passenger compartment temperature sensor
and measure the resistance between passenger compartment temperature sensor terminals
B and D.
If the characteristics of the passenger compartment temperature sensor are
not as shown in the graph, repla ...
