Mazda 3 Service Manual: Blower Motor Installation [Full Auto Air Conditioner]
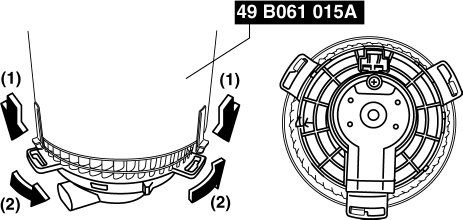
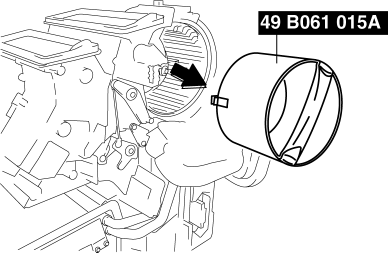
1. Install the SST (49 B061 015A)
to the blower motor.
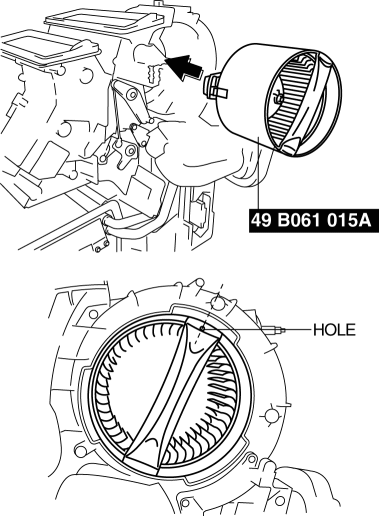
2. Install the blower motor with the SST (49 B061 015A)
installed, to the A/C unit.
CAUTION:
-
To prevent damage to the sirocco fan, install the blower motor being careful that the blower motor does not interfere with the A/C unit. Also, another person must hold the blower motor at the installation position.
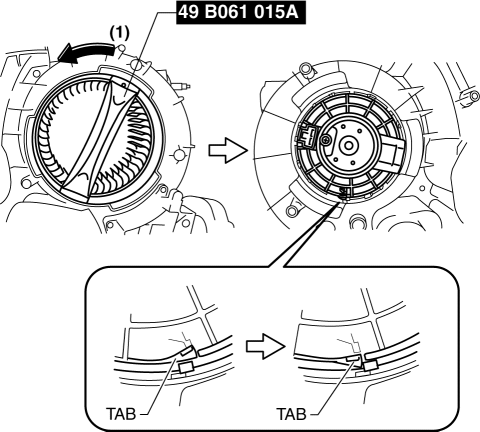
3. Rotate the SST (49 B061 015A)
until to the blower motor tab locked.
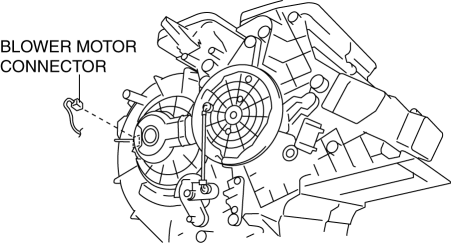
4. Connect the blower motor connector as shown in the figure.
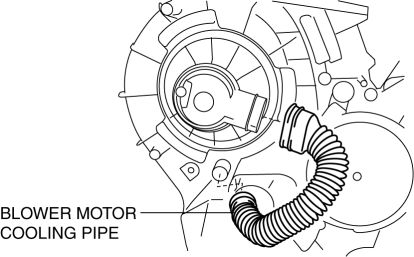
5. Connect the blower motor cooling pipe.
6. Rotate the SST (49 B061 015A)
in the direction shown by the arrow.
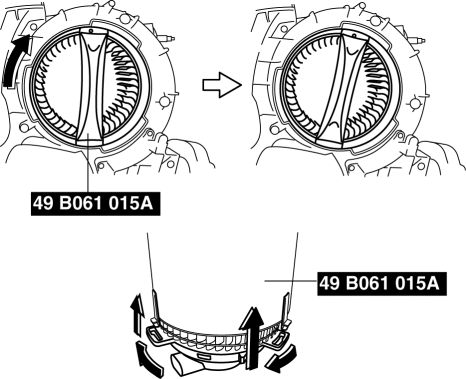
7. Remove the SST (49 B061 015A)
from the blower motor.
8. Install the blower case.
CAUTION:
-
Install the blower case while pressing the dashboard insulator, otherwise the blower case could be damaged.
9. Install the screws shown in the figure.
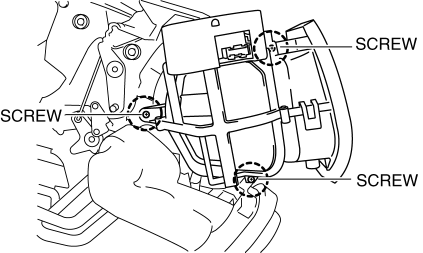
10. Install the harness clip to the blower case.
11. Connect the air intake actuator connector.
12. Install the following parts:
a. Accelerator pedal.
b. Shower duct (Passenger-side).
c. Lower panel.
d. Hood release lever.
e. Dashboard under cover.
f. Glove compartment.
g. Shift panel.
h. Selector lever knob (ATX).
i. Shift lever knob (MTX).
j. Upper panel.
k. Front side trim.
l. Front scuff plate.
13. Connect the negative battery cable..
Blower Case Installation Note
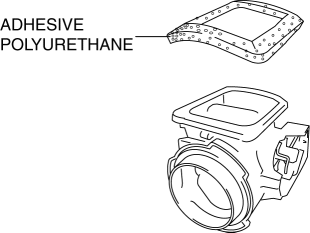
1. If not replacing the blower case, replace the adhesive polyurethane on the fresh-air inlet of the blower case.
CAUTION:
-
To adhere new polyurethane properly, be sure to remove the adhesive agent and adhesive polyurethane completely.
NOTE:
-
If the blower case is removed or installed, the adhesive polyurethane can be damaged. Damaged adhesive polyurethane could cause abnormal noise or other malfunctions, therefore replace it.
 Blower Motor Inspection [Manual Air Conditioner]
1. Connect battery positive voltage to blower motor terminal A, connect terminal
B to ground, and then verify its operation.
If there is any malfunction, replace the blower motor.
...
 Blower Motor Removal [Full Auto Air Conditioner]
NOTE:
The blower motor is located on the A/C unit as shown in the figure.
Perform the work from the front passenger side in the posture shown in the
figure.
1. Set ...
Other materials:
Front Seat Belt Pretensioner and Load Limiting Systems
For optimum protection, the driver and
front passenger seat belts are equipped
with pretensioner and load limiting
systems. For both these systems to work
properly you must wear the seat belt
properly.
Pretensioners:
When a collision is detected, the
pretensioners deploy simultaneously wit ...
Accessory Socket Inspection
Front
1. Disconnect the negative battery cable..
2. Remove the upper panel..
3. Remove the shift lever knob. (MTX).
4. Remove the selector lever knob. (ATX).
5. Remove the shift panel.
6. Remove the accessory socket (front).
7. Connect a tester as shown in the figure and verify that the ...
Warm Up Three Way Catalytic Converter (Wu Twc) Inspection [Mzr 2.0, Mzr 2.5]
CAUTION:
Perform the following procedures, DTC P0421:00 is indicated only.
1. Connect the M-MDS to the DLC-2.
2. Start the engine and warm it up to normal operating temperature.
3. Turn off the engine.
4. Verify that the engine compression is within the specification..
...
