Mazda 3 Service Manual: Center Cover Removal/Installation
1. Disconnect the negative battery cable..
2. Remove the center panel..
3. Remove the upper clumn cover..
4. Remove the instrument cluster..
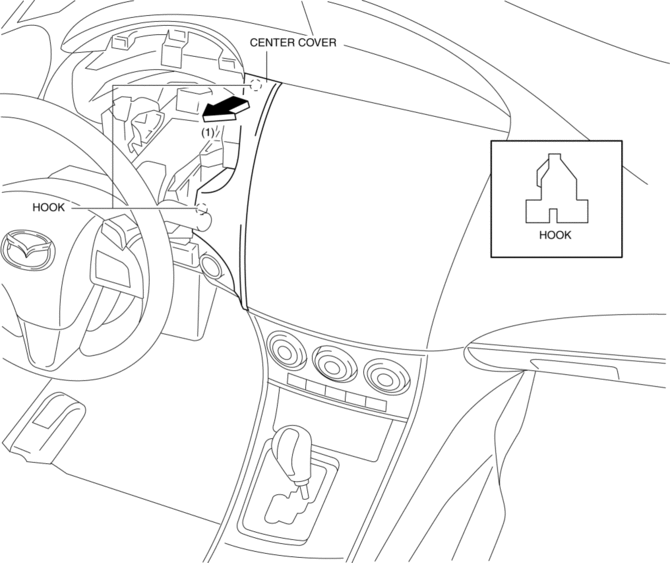
5. Pull the center cover in the direction of arrow (1) shown in the figure, then remove the hooks.
6. Pull the center cover in the direction of arrow (2) shown in the figure, then remove the hook.
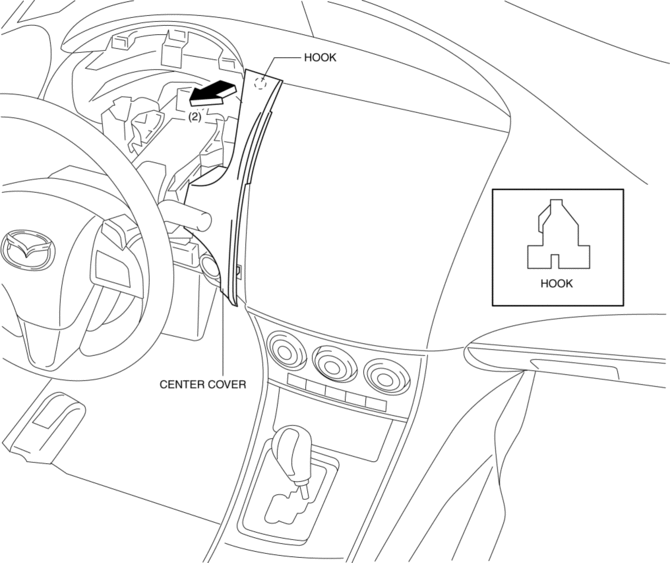
7. Remove the center cover.
8. Install in the reverse order of removal.
 C Pillar Trim Removal/Installation
4SD
1. Remove the following parts:
a. Rear seat cushion.
b. Rear scuff plate.
c. Tire house trim.
2. Partially peel back the seaming welt.
3. Pull the C-pillar trim in the direction of the ...
 Center Panel Removal/Installation
1. Disconnect the negative battery cable..
2. Affix protective tape to the position shown in the figure.
3. Hold parts (A) shown in the figure with your hands and pull the lower edge
of the ...
Other materials:
Ignition Coil Removal/Installation [Mzr 2.0, Mzr 2.5]
1. Remove the battery cover..
2. Disconnect the negative battery cable..
3. Remove the plug hole plate..
4. Remove in the order indicated in the table.
5. Install in the reverse order of removal.
1
Plug hole plate bracket
2
Connector
...
Front Door Speaker Removal/Installation
1. Disconnect the negative battery cable..
2. Remove the inner garnish..
3. Remove the front door trim..
4. Disconnect the connector.
Without Bose®
With Bose®
5. Remove the screw.
6. Remove the front door speaker in the direction of the arrow shown in the figure.
Without Bos ...
Front Scuff Plate Removal/Installation
1. Detach tab A while pulling the front scuff plate in the direction of the arrow
(1) shown in the figure, then detach hook B, clips C, and pins D while pulling in
the direction of the arrow (2).
2. Detach tab E while pulling the front scuff plate in the direction of the arrow
(3) shown in t ...
