Mazda 3 Service Manual: Engine Tune Up [Mzr 2.3 Disi Turbo]
NOTE:
-
If the accelerator pedal is depressed continuously for a specified time, the engine speed may decrease to the idle speed. This is due to the fuel cut control operation, which prevents overheating, and it does not indicate a malfunction.
Engine Tune-up Preparation
1. Verify that the shift lever is in neutral position.
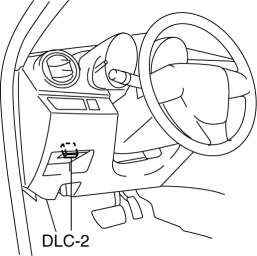
2. Connect the M-MDS to the DLC-2.
3. Verify that no DTCs are available.
4. Warm up the engine (ECT is approx. 80°C {176 °F} or more
).
5. Turn off all electrical loads.
6. Wait until the cooling fan stops.
Ignition Timing Inspection
NOTE:
-
The ignition timing cannot be adjusted.
-
The M-MDS is required to verify the ignition timing.
1. Complete the engine tune-up preparation..
2. Verify the ignition timing (M-MDS: SPARKADV) using the PID/data monitor function of the M-MDS..
-
Ignition timing
-
Approx. BTDC 10°
3. Verify that ignition timing advances when the engine speed increases gradually.
-
If there is malfunction, refer to “ENGINE SYMPTOM TROUBLESHOOTING”..
Idle Speed Inspection
NOTE:
-
The idle speed cannot be adjusted.
-
The M-MDS is required to verify the idle speed.
1. Complete the engine tune-up preparation..
2. Verify that the idle speed (M-MDS: RPM PID) is within the specification using the M-MDS..
-
If there is malfunction, refer to “ENGINE SYMPTOM TROUBLESHOOTING”..
-
Idle speed
-
No load: 650—750 rpm
-
Electrical load on*1: 650—750 rpm
-
A/C on: 700—800 rpm
Idle Mixture Inspection
1. Verify that the idle speed and ignition timing are within the specification..
2. Insert an exhaust gas analyzer to the tailpipe.
3. Verify that the CO and HC concentrations are within the regulation.
-
Idle mixture
-
HC concentration: Within the regulation
-
CO concentration: Within the regulation
 Engine Tune Up [Mzr 2.0, Mzr 2.5]
NOTE:
If the accelerator pedal is depressed continuously for a specified time,
the engine speed may decrease to the idle speed. This is due to the fuel cut
control operation, which preve ...
 Engine Tune Up [Skyactiv G 2.0]
Engine Tune-up Preparation
NOTE:
If the accelerator pedal is depressed continuously for a specified time,
the engine speed may decrease to the idle speed. This is due to the fuel cut
co ...
Other materials:
Seat Weight Sensor Inspection [Two Step Deployment Control System]
CAUTION:
If any of the following work is performed, perform the seat weight sensor
inspection using the M-MDS.
Removal of the passenger-side seat
Loosening and retightening of passenger’s seat fixing bolts
Or, the vehicle is involved in a collision
...
High Mount Brake Light Disassembly/Assembly
4SD
1. Disconnect the negative battery cable..
2. Remove the trunk lid trim..
3. Remove the high-mount brake light..
4. Remove the high-mount brake light outer lens.
5. Remove the high-mount brake light inner lens.
6. Remove the screws (with advanced keyless entry and push button ...
Cleaning the Upholstery and
Interior Trim
Vinyl
Remove dust and loose dirt from vinyl
with a whisk broom or vacuum cleaner.
Clean vinyl with a leather-and-vinyl
cleaner.
Leather *
Remove dust and sand first using a
vacuum cleaner or other means, then wipe
dirt off using a soft cloth with a leather
cleaner or a soft cloth soaked i ...
