Mazda 3 Service Manual: Front Door Key Cylinder Removal/Installation
1. To access the glass installation bolt, position the front door glass so that the distance from the top of the front door glass to the upper part of the front beltline molding is approx. 80 mm {3.1 in}
.

2. Disconnect the negative battery cable..
3. Remove the following parts:
a. Inner garnish.
b. Front door trim.
c. Front door speaker.
d. Front door glass.
e. Front door module panel.
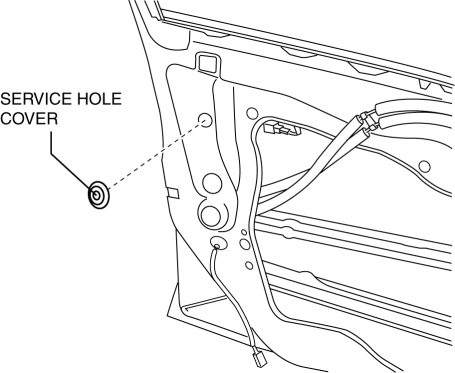
4. Remove the service hole cover.
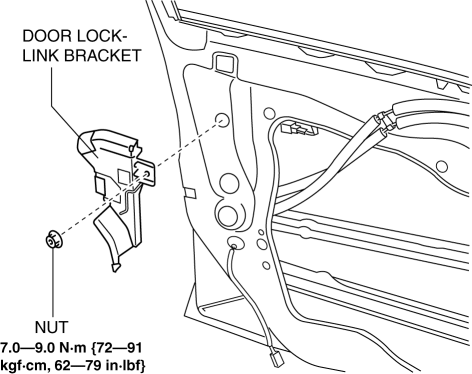
5. Remove the tab, then remove the door lock-link bracket.
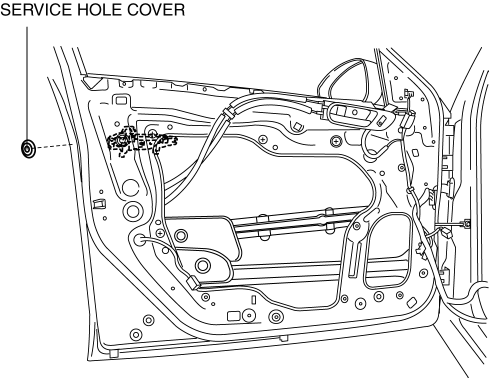
6. Remove the service hole cover.
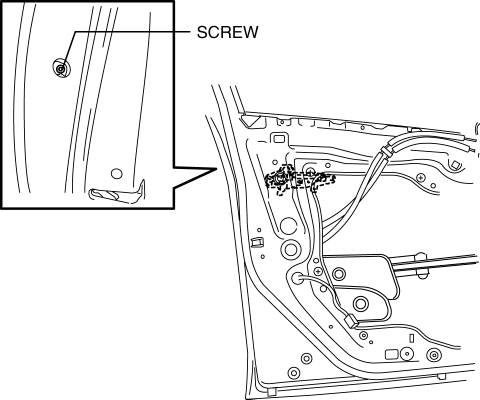
7. Remove the screw from the service hole.
NOTE:
-
The screw cannot be removed because of the stopper.
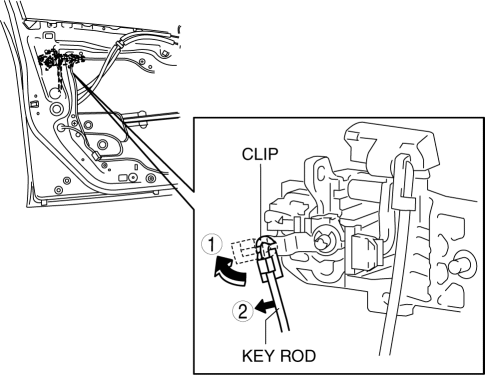
8. Lift the clip in the direction of the arrow (1), and pull out the key rod in the direction of the arrow (2).
9. Press the tab on the front outer handle bracket in the direction of the arrow.
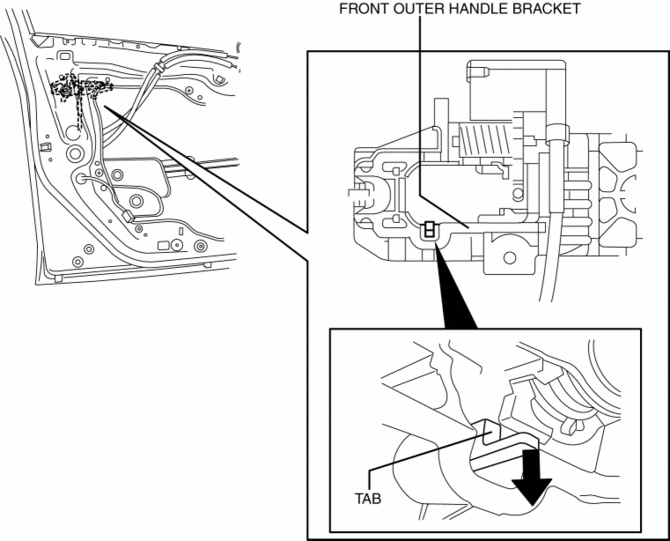
10. Maintaining the condition in Step 9, remove the front key cylinder.
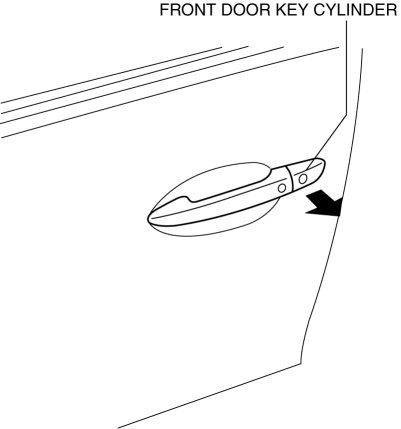
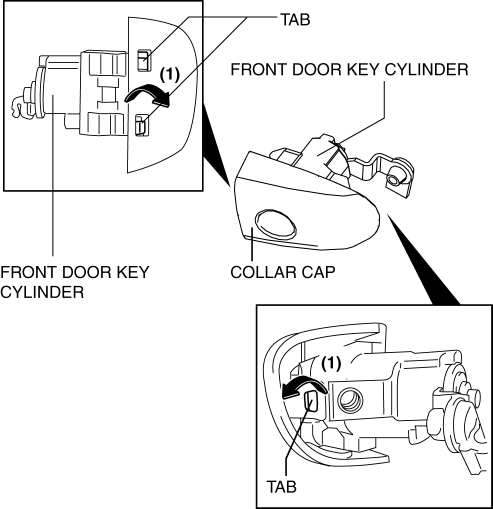
11. Using a tape-wrapped fastener remover, press up the collar cap in the direction of the arrow shown in the arrow, press aside the front door key cylinder tabs (1), and remove the collar cover from the front door key cylinder.
12. Install in the reverse order of removal.
 Front Door Hinge Removal/Installation
1. Disconnect the negative battery cable..
2. Remove the following parts:
a. Front bumper.
b. Front combination light.
c. Front fender molding.
d. Side step molding.
e. Front fender panel. ...
 Front Door Key Cylinder Switch Inspection
1. To access the glass installation bolt, position the front door glass so that
the distance from the top of the front door glass to the upper part of the front
beltline molding is approx. 80 mm { ...
Other materials:
Antenna Feeder No.7 Removal/Installation
1. Disconnect the negative battery cable..
2. Remove the liftgate upper trim..
3. Disconnect the connector A.
4. Disconnect the connector B..
5. Remove the bolt.
6. Remove the antenna feeder No.7.
7. Install in the reverse order of removal.
Connector B Removal Note
1. Remove the c ...
Emission Control System
This vehicle is equipped with an emission control system (the catalytic
converter is
part of this system) that enables the vehicle to comply with existing exhaust
emissions
requirements.
WARNING
Never park over or near anything fl ammable:
Parking over or near anything fl ammable ...
Purge Solenoid Valve Removal/Installation [Mzr 2.0, Mzr 2.5]
1. Remove the battery cover..
2. Disconnect the negative battery cable..
3. Remove in the order indicated in the table.
1
Purge solenoid valve connector
2
Evaporative hose
(See Evaporative Hose Installation Note.)
3
...
