
Mazda 3 Service Manual: Front Door Speaker Removal/Installation
1. Disconnect the negative battery cable..
2. Remove the inner garnish..
3. Remove the front door trim..
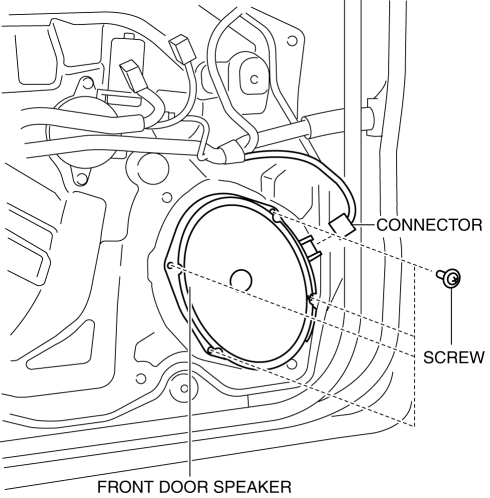
4. Disconnect the connector.
Without Bose®
With Bose®
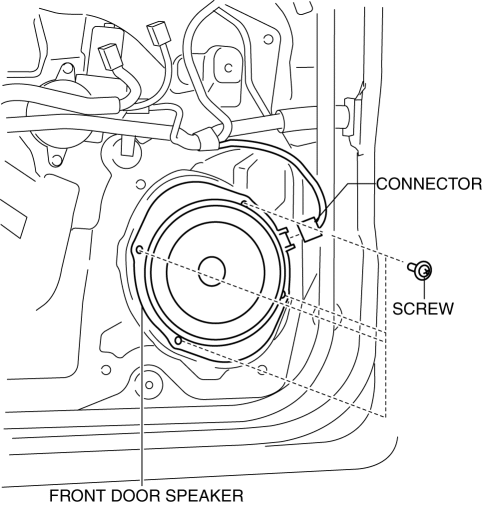
5. Remove the screw.
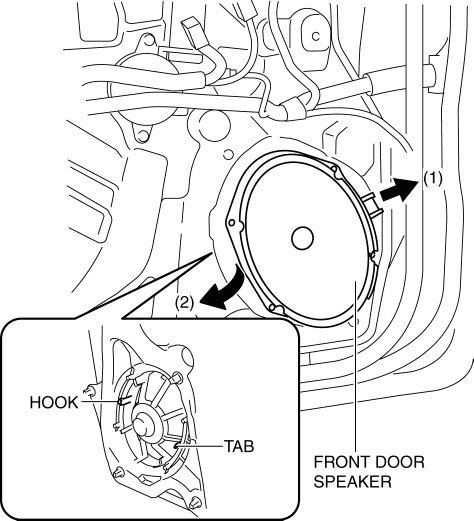
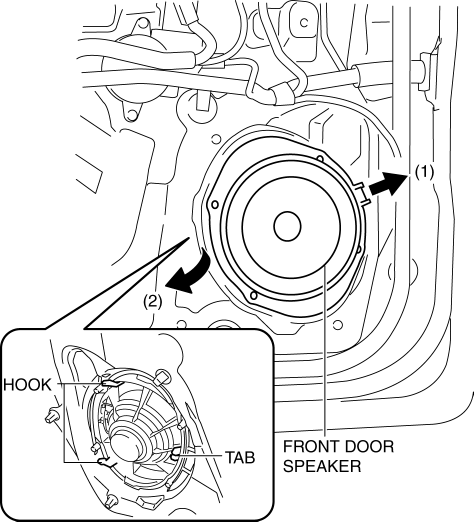
6. Remove the front door speaker in the direction of the arrow shown in the figure.
Without Bose®
With Bose®
7. Install in the reverse order of removal.
 Front Door Speaker Inspection
1. Disconnect the negative battery cable..
2. Remove the inner garnish..
3. Remove the front door trim..
4. Remove the front door speaker..
5. Verify the resistance between the front door spea ...
 Glass Antenna
Purpose, Function
4SD
The AM/FM radio waves and RDS-TMC (Radio Data System-Traffic Message Channel)
radio waves are converted to an electrical signal and the signal is sent to
the audio ...
Other materials:
Ignition Switch Inspection [Without Advanced Keyless Entry And Push Button Start
System]
1. Disconnect the negative battery cable..
2. Remove the column cover..
3. Remove the ignition switch..
4. Verify that the continuity between the ignition switch terminals is as indicated
in the table.
If not as indicated in the table, replace the ignition switch.
...
Seat Weight Sensor Calibration [Two Step Deployment Control System]
CAUTION:
If any of the following work is performed, perform the seat weight sensor
calibration using the M-MDS.
Replacement with a new seat weight sensor
Replacement with a new seat weight sensor control module
Replacement with new passenger-side seat pa ...
Clock Spring Adjustment
NOTE:
The adjustment procedure is also specified on the caution label of the clock
spring.
1. Set the front wheels straight ahead.
CAUTION:
The clock spring will break if over–wound. Do not forcibly turn the clock
spring.
2. Turn the clock spring clockwise until ...
