Mazda 3 Service Manual: PID/Data Monitor Inspection [Bcm]
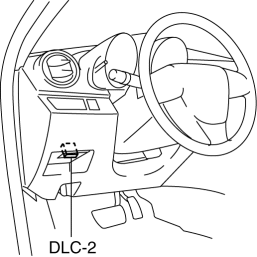
1. Connect the M-MDS (IDS) to the DLC-2.

2. After the vehicle is identified, select the following items from the initialization screen of the IDS.
a. Select “DataLogger”.
b. Select “Modules”.
c. Select “BCM/GEM”.
3. Select the applicable PID from the PID table.
4. Verify the PID data according to the directions on the screen.
NOTE:
-
The PID data screen function is used for monitoring the calculated value of input/output signals in the module. Therefore, if the monitored value of the output parts is not within the specification, it is necessary to inspect the monitored value of input parts corresponding to the applicable output part control. In addition, because the system does not display an output part malfunction as an abnormality in the monitored value, it is necessary to inspect the output parts individually.
-
When detecting DTCs, PIDs related to a malfunctioning system may not display even if the module is normal. Therefore, if a PID is not displayed, it is necessary to verify the DTC, perform malfunction diagnosis of the DTC that was detected, and do repairs.
 On Board Diagnostic System Simulation Inspection [Fw6 A EL]
1. Connect the M-MDS (IDS) to the DLC-2.
2. After the vehicle is identified, select the following items from the initialization
screen of the IDS.
a. Select “DataLogger”.
b. Select “Module ...
Other materials:
Audio Amplifier Removal/Installation
1. Slide the passenger seat rearward.
2. Remove the cover.
3. Remove the bolt.
4. Detach the clips and set the vehicle wiring harness aside.
5. Slide the passenger seat forward.
6. Disconnect the negative battery cable..
7. Remove the caps.
8. Remove the nuts.
9. Disconnect t ...
Operational Range
The system operates only when the driver
is in the vehicle or within operational
range while the key is being carried.
Starting the Engine
NOTE
Starting the engine may be possible
even if the key is outside of the vehicle
and extremely close to a door and
window, however, always start ...
Auto Leveling Sensor Removal/Installation
1. Disconnect the negative battery cable..
2. Lift up the vehicle.
3. Disconnect the quick release connector. (charcoal canister side).
4. Remove in the order indicated in the table.
1
Bolt
2
Connector
3
Auto ...

