Mazda 3 Service Manual: PID/Data Monitor Inspection [Instrument Cluster]
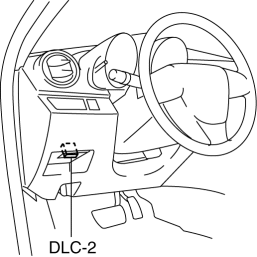
1. Connect the M-MDS (IDS) to the DLC-2.
2. After the vehicle is identified, select the following items from the initialization screen of the IDS.
a. Select “DataLogger”.
b. Select “Modules”.
c. Select “IC”.
3. Select the applicable PID from the PID table.
4. Verify the PID data according to the directions on the screen.
NOTE:
-
The PID data screen function is used for monitoring the calculated value of input/output signals in the module. Therefore, if the monitored value of the output parts is not within the specification, it is necessary to inspect the monitored value of input parts corresponding to the applicable output part control. In addition, because the system does not display an output part malfunction as an abnormality in the monitored value, it is necessary to inspect the output parts individually.
-
When detecting DTCs, PIDs related to a malfunctioning system may not display even if the module is normal. Therefore, if a PID is not displayed, it is necessary to verify the DTC, perform malfunction diagnosis of the DTC that was detected, and do repairs.
 Instrumentation/Driver Info. Personalization Features Setting Procedure
Instrument Cluster
1. Connect the M-MDS (IDS) to the DLC–2.
2. After the vehicle is identified, select the following items from the initial
screen of the M-MDS.
Select the “Module ...
 Air Bleeding
CAUTION:
If the strainer is removed, impurities may penetrate the power steering system
and damage it. To prevent this, always bleed air with the strainer installed.
Do not ma ...
Other materials:
My Settings
In the Subaru Solterra, the My Settings function enables personalized
driver recognition using various authentication devices, automatically restoring
individual driving preferences and vehicle configurations upon entry.
By linking a specific device—such as an electronic key—to a registered ...
Front Door Latch And Lock Actuator Inspection
1. The following actuators and switches are integrated with the front door latch
and lock actuator. Inspect the front door latch and lock actuator according to each
inspection procedure for the following items.
Front door lock actuator.
Door lock-link switch.
Door latch s ...
Control Valve Body Removal/Installation [FS5 A EL]
Primary Control Valve Body On-Vehicle Removal
WARNING:
A hot transaxle and ATF can cause severe burns. Turn off the engine and wait
until they are cool.
Using compressed air can cause dirt and other particles to fly out, causing
injury to the eyes. Wear protective eyeglasses w ...
