Mazda 3 Service Manual: Rear Door Trim Disassembly/Assembly
1. Disassemble in the order shown in the figure.
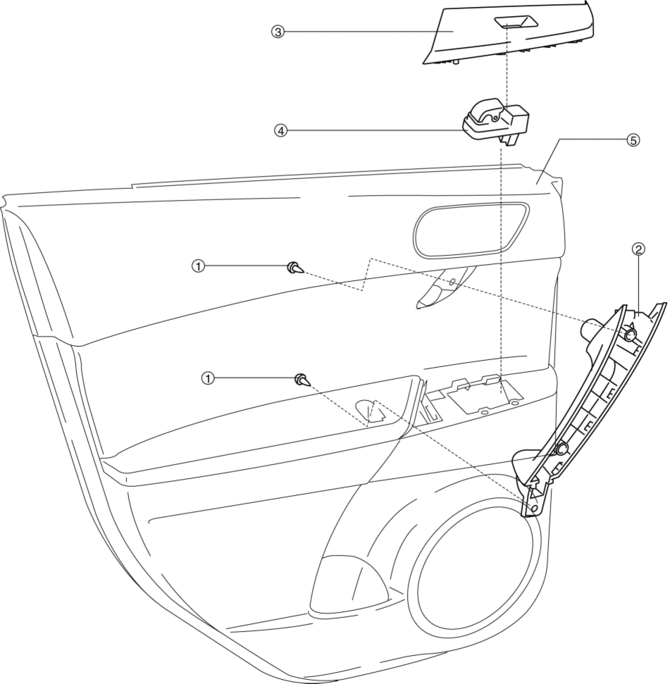
|
1 |
Screw |
|
2 |
Assist handle |
|
3 |
Switch panel cover |
|
4 |
Power window subswitch |
|
5 |
Rear door trim |
2. Assemble in the reverse order of disassembly.
 Front Door Trim Removal/Installation
1. Disconnect the negative battery cable..
2. Remove the inner garnish..
3. Move the hook in the direction of arrow shown in the figure using a tape-lapped
flathead screwdriver and detach it fro ...
 Rear Door Trim Removal/Installation
1. Disconnect the negative battery cable..
2. Move the hook in the direction of arrow shown in the figure using a tape-lapped
flathead screwdriver and detach it from the rear door trim.
CAUT ...
Other materials:
Shift-Lock Override
If the selector lever will not move from P
using the proper shift procedure, continue
to hold down the brake pedal.
Remove the shift-lock override cover
using a cloth-wrapped flat head
screwdriver.
Insert a screwdriver and push it down.
Press and hold the lock-release button.
...
Front Combination Light Removal/Installation
WARNING:
Incorrect servicing of the discharge headlights could result in electrical
shock. Before servicing the discharge headlights, always refer to the discharge
headlight service warnings..
1. Disconnect the negative battery cable..
2. Remove the front bumper..
3. Disconne ...
Camshaft Position (CMP) Sensor Inspection [Mzr 2.0, Mzr 2.5]
Visual Inspection
CAUTION:
When replacing the CMP sensor, make sure there is no foreign material on
it such as metal shavings. If it is installed with foreign material, the sensor
output signal will malfunction resulting from fluctuation in magnetic flux and
cause a deterioration i ...
