Mazda 3 Service Manual: Rear Power Window Regulator Removal/Installation
1. Fully lower the rear door glass.
2. Disconnect the negative battery cable..
3. Remove the rear door trim..
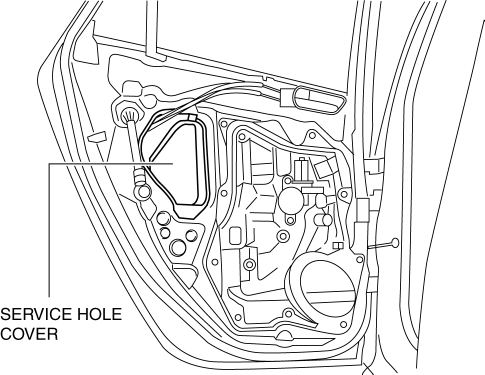
4. Remove the service hole cover.
5. Remove the rear door speaker..
6. Remove the glass guide..
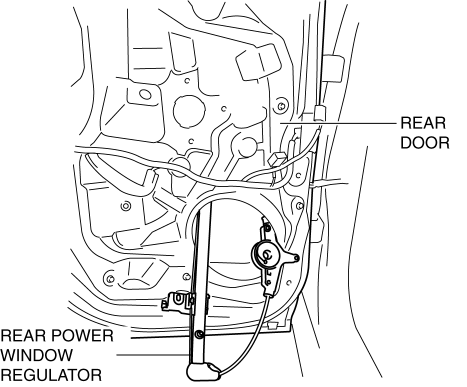
7. Remove the rear power window motor..
8. Remove the rear door glass..
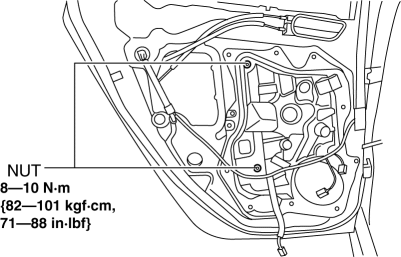
9. Remove the nuts.
10. Insert a hand through the speaker installation hole, rotate the drum housing in the direction shown in the figure to detach the tabs from the rear door module.
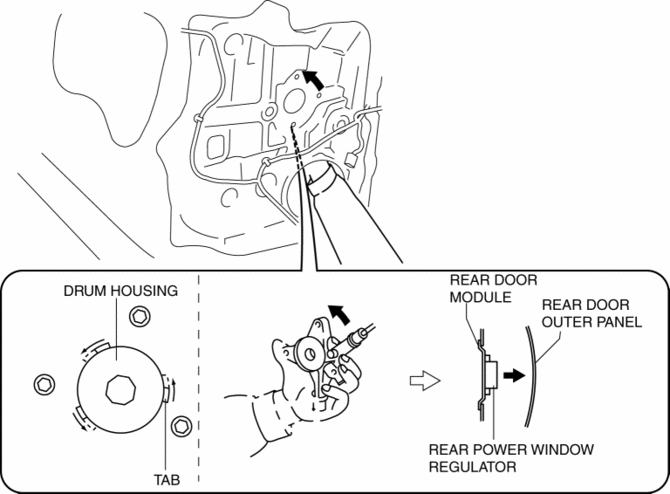
11. Remove the rear power window regulator through the speaker installation hole.
12. Install in the reverse order of removal.
CAUTION:
-
Make sure the cable does not unspool from the drum housing when installing.
 Rear Door Quarter Glass Removal/Installation
1. Fully lower the rear door glass.
2. Disconnect the negative battery cable..
3. Remove the rear door trim..
4. Remove the service hole cover.
5. Remove the hole plug.
6. Remove the ...
 Rear Window Glass Installation
WARNING:
Using a utility knife with bare hands can cause injury. Always wear gloves
when using a utility knife.
CAUTION:
Proper installation of the glass may be difficult if s ...
Other materials:
Cooling System Service Warnings [Mzr 2.0, Mzr 2.5]
WARNING:
Never remove the cooling system cap or loosen the radiator drain plug while
the engine is running, or when the engine and radiator are hot. Scalding engine
coolant and steam may shoot out and cause serious injury. It may also damage
the engine and cooling system.
Tu ...
Front Lower Arm Removal/Installation
CAUTION:
Performing the following procedures without first removing the ABS wheel-speed
sensor may possibly cause an open circuit in the wiring harness if it is pulled
by mistake. Before performing the following procedures, disconnect the ABS wheel-speed
sensor wiring harness connec ...
Steering Wheel And Column Removal/Installation [With Advanced Keyless Entry
And Push Button Start System]
WARNING:
Handling the air bag module improperly can accidentally operate (deploy)
the air bag module, which may seriously injure you. Read the service warnings
before handling the air bag module..
1. Remove the driver-side front scuff plate..
2. Remove the driver-side front sid ...
