Mazda 3 Service Manual: Trunk Lid Opener Cable Removal/Installation
1. Disconnect the negative battery cable..
2. Remove the following parts:
a. Front seat (LH)(See FRONT SEAT REMOVAL/INSTALLATION.)
b. Front scuff plate (LH).
c. Rear scuff plate.
d. B-pillar lower trim.
e. Rear seat cushion.
f. Rear seat back.
g. Tire house trim (LH).
h. Trunk end trim.
i. Trunk side trim (LH).
j. Trunk lid opener lever.
3. Remove the blots and nut.

4. Remove the bracket.
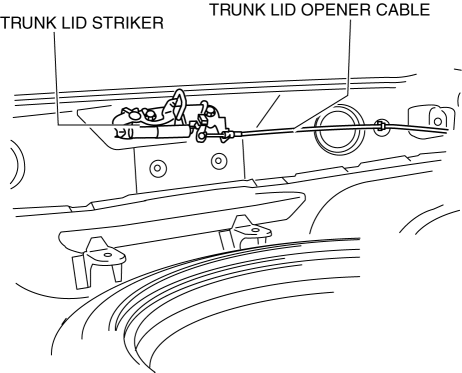
5. Disconnect the trunk lid striker from the trunk lid opener cable.
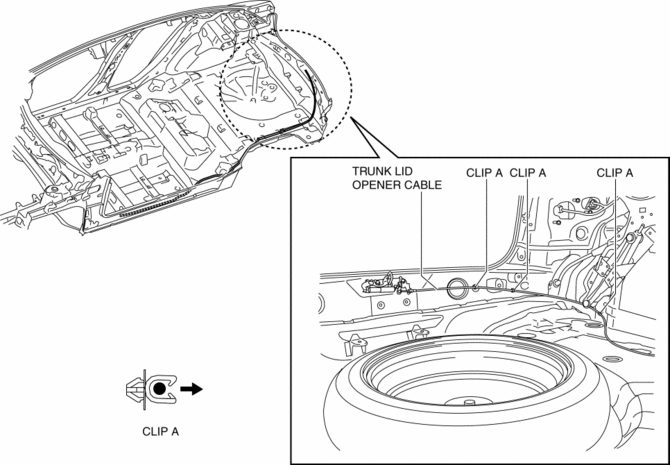
6. Remove the trunk lid opener cable from clips A.
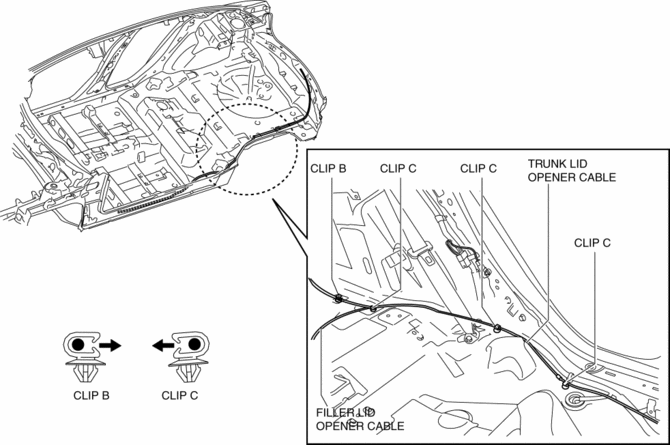
7. Remove the trunk lid opener cable from clips B and C.
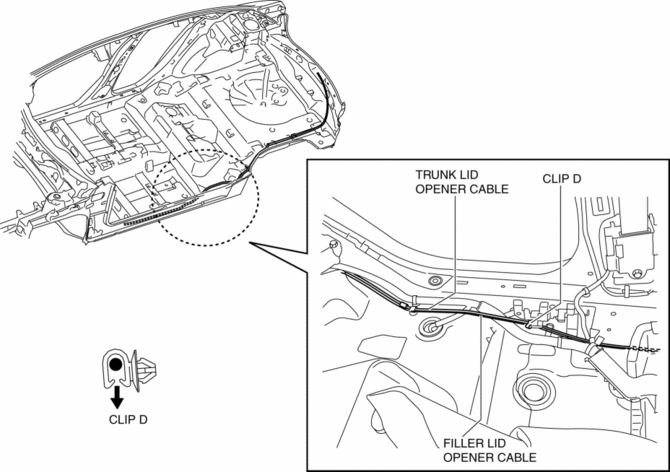
8. Remove the trunk lid opener cable from clips D.
9. Install in the reverse order of removal.
 Trunk Lid Lock Striker Removal/Installation
1. Remove the trunk end trim..
2. Disconnect the trunk lid lock striker from the trunk lid opener cable.
3. Remove the bolts, then remove the trunk lid lock striker.
4. Install in the revers ...
 Trunk Lid Opener Lever Removal/Installation
1. Remove the front scuff plate (LH)..
2. Remove the front side trim (LH)..
3. Remove the fuel-filler lid opener bezel..
4. Partially peel back the floor covering.
5. Remove the bolts.
...
Other materials:
Essential Information
Be extremely careful and prevent injury to yourself and others or damage to
your vehicle
when using this manual for inspection and maintenance.
If you are unsure about any procedure it describes, we strongly urge you to have
a reliable
and qualified service shop perform the work, preferably ...
Rear View Monitor
The rear view monitor provides visual images of the rear of the vehicle when
reversing.
WARNING
Always drive carefully confi rming the safety of the rear and the
surrounding conditions
by looking directly with your eyes:
Reversing the vehicle by only looking at the screen is d ...
Manual Transaxle Oil Replacement [C66 M R]
1. Park the vehicle on level ground.
2. Remove the aerodynamic under cover No.2..
3. Remove the drain plug and gasket, and drain the manual transaxle oil.
4. Install a new gasket and the drain plug.
Tightening torque
39—59 N·m {4.0—6.0 kgf·m, 29—43 ft·lbf}
5. Remove the oil ...
