Mazda 3 Service Manual: Trunk Lid Opener Lever Removal/Installation
1. Remove the front scuff plate (LH)..
2. Remove the front side trim (LH)..
3. Remove the fuel-filler lid opener bezel..
4. Partially peel back the floor covering.
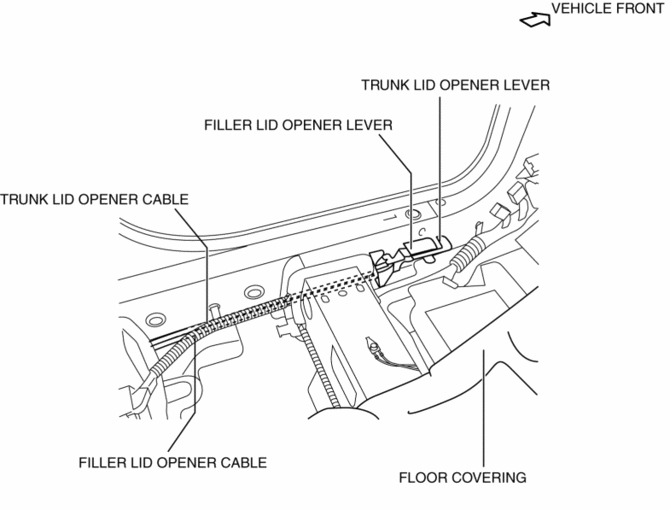
5. Remove the bolts.
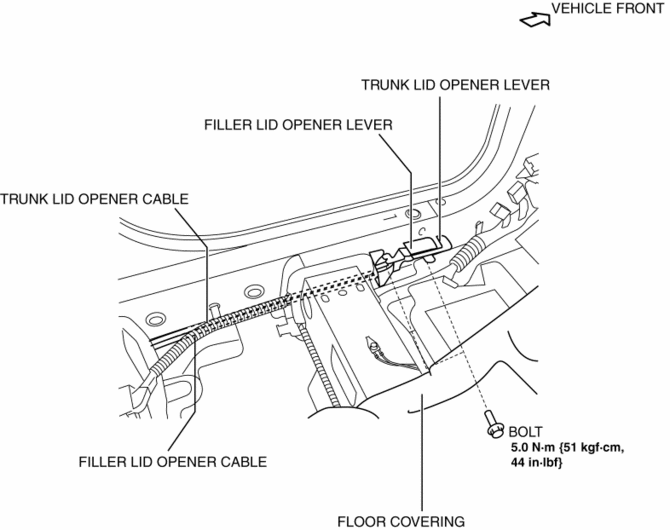
6. Disconnect the cable and trunk lid opener lever.
7. Install in the reverse order of removal.
 Trunk Lid Opener Cable Removal/Installation
1. Disconnect the negative battery cable..
2. Remove the following parts:
a. Front seat (LH)(See FRONT SEAT REMOVAL/INSTALLATION.)
b. Front scuff plate (LH).
c. Rear scuff plate.
d. B-pillar ...
 Trunk Lid Release Actuator Inspection
1. Disconnect the negative battery cable..
2. Remove the trunk lid trim..
3. Remove the trunk lid latch and release actuator..
4. Press the latch in using a flathead screwdriver to inspect the l ...
Other materials:
Fuel Pump Control Module Inspection [Skyactiv G 2.0]
1. Perform the KOEO self-test..
2. Verify that a fuel pump control module related DTC is detected..
If DTCs are detected, repair the malfunctioning part according to the applicable
DTC troubleshooting..
If a DTC is not detected, go to the next step.
3. Inspect the followin ...
Power Outer Mirror Inspection
Mirror Glass Adjustment Motor
1. Disconnect the negative battery cable..
2. Remove the inner garnish..
3. Disconnect the power outer mirror connector.
4. Remove the front door trim..
5. Apply battery positive voltage and connect the ground to the power outer mirror
terminals and inspect t ...
Electric Power Steering Oil Pump Component Disassembly/Assembly
CAUTION:
The internal parts of the EHPAS control module and motor could be damaged
if they receive an impact. Be careful when handling the EHPAS control module
and motor to prevent the component from getting hit. Replace the electric power
steering oil pump component if it has recei ...
