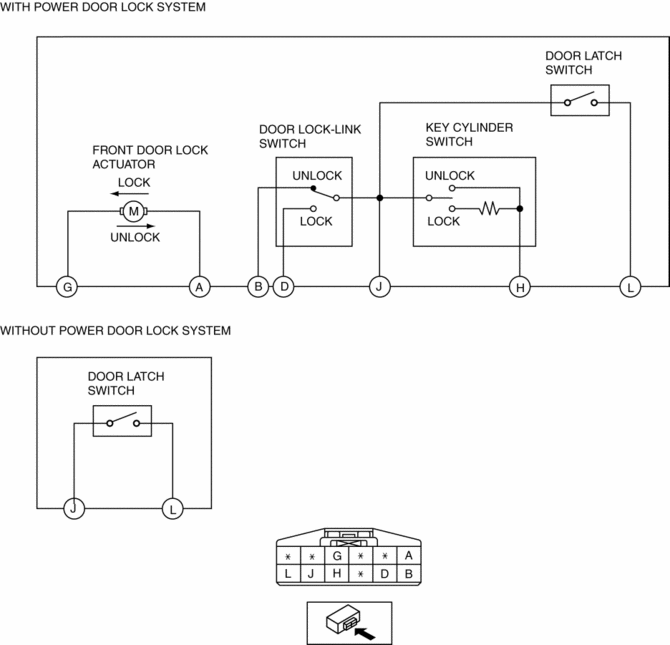
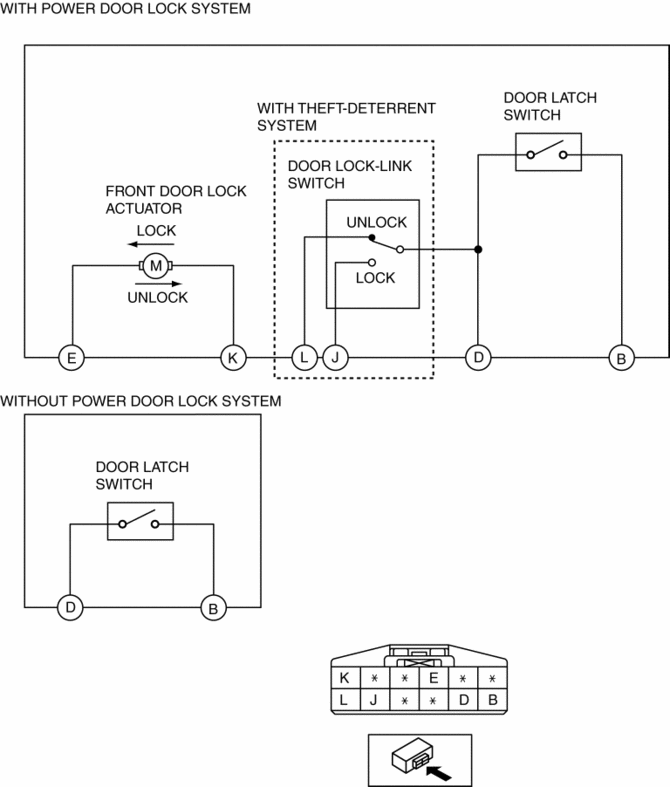
Mazda 3 Service Manual: Front Door Latch And Lock Actuator Inspection
1. The following actuators and switches are integrated with the front door latch and lock actuator. Inspect the front door latch and lock actuator according to each inspection procedure for the following items.
-
Front door lock actuator.
-
Door lock-link switch.
-
Door latch switch.
-
Front door key cylinder.
LH
RH
 Front Door Key Cylinder Switch Inspection
1. To access the glass installation bolt, position the front door glass so that
the distance from the top of the front door glass to the upper part of the front
beltline molding is approx. 80 mm { ...
 Front Door Latch And Lock Actuator Removal/Installation
1. To access the glass installation bolt, position the front door glass so that
the distance from the top of the front door glass to the upper part of the front
beltline molding is approx. 80 mm { ...
Other materials:
BSM (Blind Spot Monitor)
In the Subaru Solterra, the Blind Spot Monitor (BSM) is an advanced
safety feature that utilizes rear side radar sensors positioned behind the left
and right sides of the rear bumper to assist the driver in detecting vehicles located
in areas that are difficult to see using mirrors alone.
WAR ...
Spare Tire
Your Mazda has a temporary spare tire.
The temporary spare tire is lighter and
smaller than a conventional tire, and is
designed only for emergency use and
should be used only for VERY short
periods. Temporary spare tires should
NEVER be used for long drives or
extended periods.
WAR ...
Wheel Hub Component Removal/Installation
CAUTION:
Performing the following procedures without first removing the ABS wheel-speed
sensor may possibly cause an open circuit in the wiring harness if it is pulled
by mistake. Before performing the following procedures, disconnect the ABS wheel-speed
sensor connector (axle side) ...
