Mazda 3 Service Manual: Global Positioning System (Gps) Antenna Removal/Installation
With Audio Unit (Without Display)
1. Disconnect the negative battery cable..
2. Remove the following parts:
a. Upper column cover.
b. Instrument cluster.
3. Remove in the order indicated in the table.
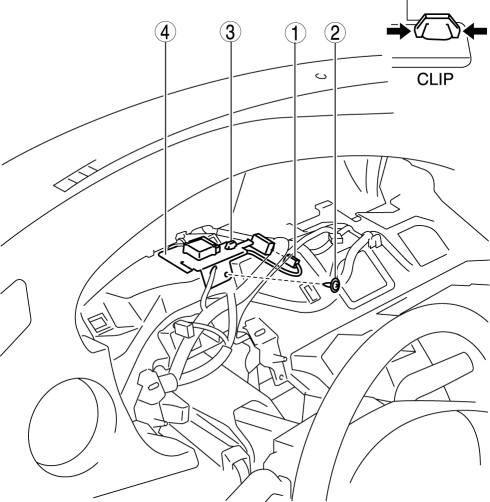
|
1 |
Connector |
|
2 |
Screw |
|
3 |
Clip |
|
4 |
GPS antenna |
4. Install in the reverse order of removal.
With Audio Unit (With Display)
1. Disconnect the negative battery cable..
2. Remove the following parts:
a. Upper column cover.
b. Instrument cluster.
3. Remove in the order indicated in the table.
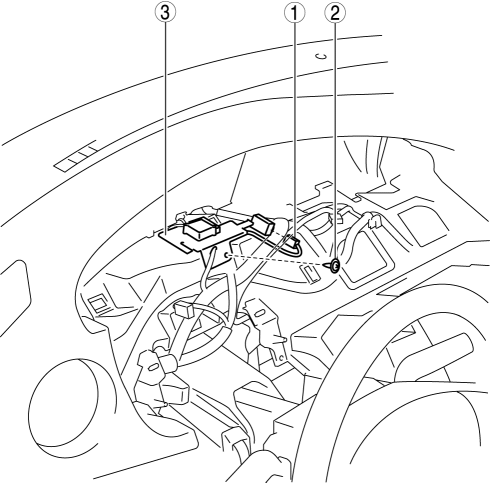
|
1 |
Connector |
|
2 |
Screw |
|
3 |
GPS antenna |
4. Install in the reverse order of removal.
 Car Navigation Unit Removal/Installation
With Audio Unit (Without Display)
NOTE:
Car-navigation unit is integrated with the multi information display.
1. Refer to MULTI INFORMATION DISPLAY REMOVAL/INSTALLATION.
With Audio U ...
 Gps Antenna Feeder Inspection
With Audio Unit (Without Display)
1. Verify that the continuity is as indicated in the table.
If not as indicated in the table, replace the GPS antenna feeder.
With Audio Unit ( ...
Other materials:
Drive Belt Inspection [Mzr 2.0, Mzr 2.5]
MZR 2.0
A/C drive belt
NOTE:
Drive belt deflection/tension inspection is not necessary because of the
use of the maintenance-free type A/C drive belt.
Replace the drive belt if it is found to be damaged during visual inspection,
or if there is a malfunction or noise in th ...
Knee Bolster Removal/Installation
1. Disconnect the negative battery cable..
2. Remove the following parts:
a. Driver-side front scuff plate.
b. Driver-side front side trim.
c. Hood release lever.
d. Upper panel.
e. Shift knob (MTX).
f. Selector lever knob (ATX).
g. Shift panel.
h. Side wall.
i. Console.
j. Dri ...
Ignition Switch Removal/Installation [Without Advanced Keyless Entry And Push
Button Start System]
1. Disconnect the negative battery cable..
2. Remove the column cover..
3. Detach the tab.
4. Pull the pin in the direction of the arrow shown in the figure and release
the lock.
5. Disconnect the ignition switch connector and key interlock solenoid connector.
6. Remove the ...
