Mazda 3 Service Manual: Car Navigation Unit Removal/Installation
With Audio Unit (Without Display)
NOTE:
-
Car-navigation unit is integrated with the multi information display.
1. Refer to MULTI INFORMATION DISPLAY REMOVAL/INSTALLATION.
With Audio Unit (With Display)
1. Disconnect the negative battery cable..
2. Remove the following parts:
a. Upper panel.
b. Shift knob (MTX).
c. Selector lever knob (ATX).
d. Shift panel.
e. Side wall.
f. Console.
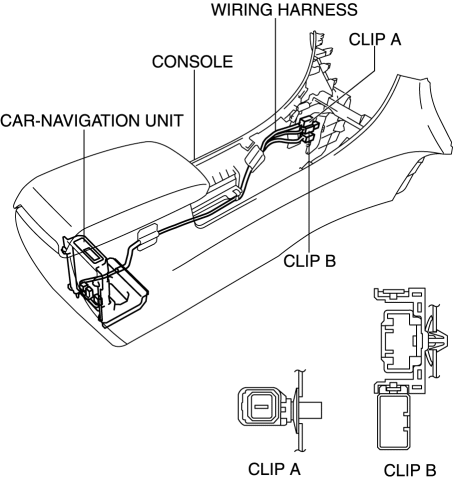
3. Remove clips A and B.
4. Remove the clip C.
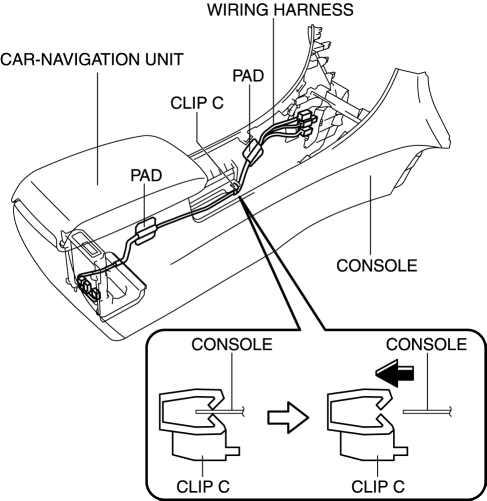
5. Remove the pad.
6. While pressing the clip tabs in the direction of arrow (1) shown in the figure, press the clip in the direction of arrow (2) to detach the tab of clip D from the console.
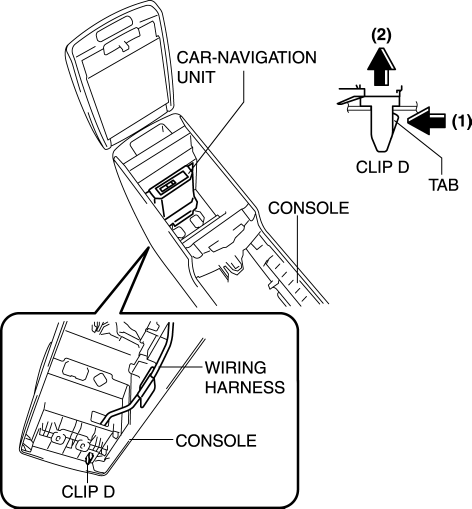
7. Remove the clip D.
8. Move the car-navigation unit assembly in the direction of arrows (1) and (2) shown in the figure and remove the hook.
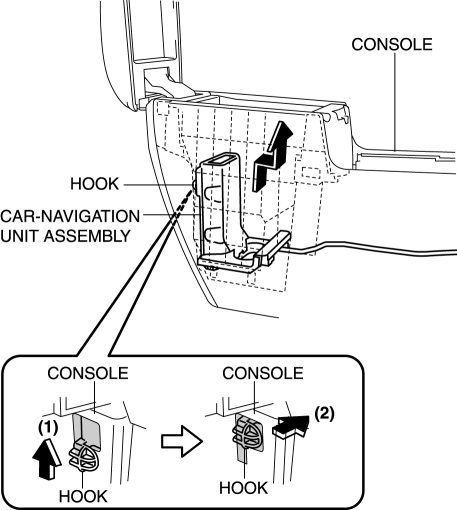
9. Remove the car-navigation unit assembly.
10. Remove the wiring harness from the bracket hook.
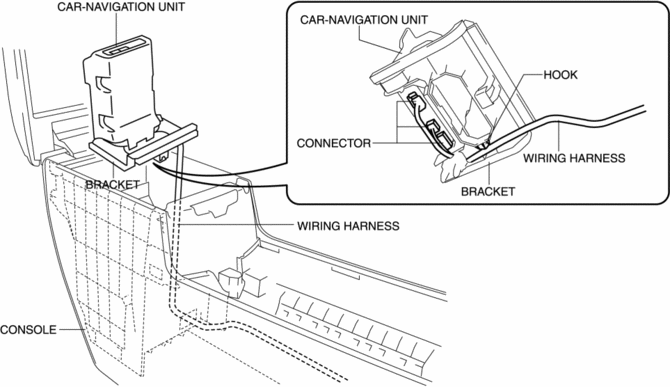
11. Disconnect the connector.
12. Pull the wiring harness from the console.
13. Remove the screws.
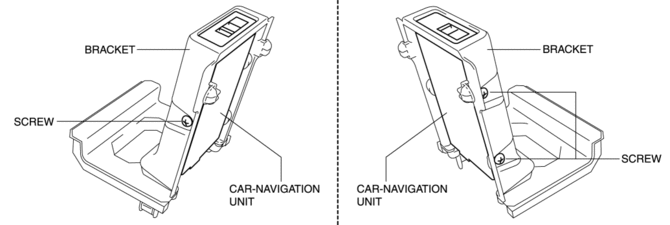
14. Remove the car-navigation unit from the bracket.
15. Install in the reverse order of removal.
 Car Navigation Unit
Purpose
Reads the SD card data inserted into the car-navigation unit and sends the
read data to the audio unit.
Function
The car-navigation unit has the following functions:
...
 Global Positioning System (Gps) Antenna Removal/Installation
With Audio Unit (Without Display)
1. Disconnect the negative battery cable..
2. Remove the following parts:
a. Upper column cover.
b. Instrument cluster.
3. Remove in the order indicated in t ...
Other materials:
Cowl Panel Removal/Installation
1. Disconnect th negative battery cable..
2. Remove the windshield wiper arm and blade..
3. Remove the front fender molding..
4. Remove the cowl grille..
5. Remove the washer hose grommet from the cowl panel and disconnect the front
washer hose.
6. Remove the windshield wiper motor..
7 ...
Trunk Side Trim Removal/Installation
4SD
Left-side
1. Remove the following parts:
a. Rear scuff plate.
b. Tire house trim.
c. Trunk mat.
d. Trunk board.
e. Trunk end trim.
f. Service hole cover
2. Remove the fasteners.
3. Install in the reverse order of removal.
Right-side
1. Remove the following parts:
a. Re ...
Glass Antenna
Purpose, Function
4SD
The AM/FM radio waves and RDS-TMC (Radio Data System-Traffic Message Channel)
radio waves are converted to an electrical signal and the signal is sent to
the audio unit.
5HB (With audio unit (with display))
The RDS-TCM (Radio Data System-Traffic Mes ...
