Mazda 3 Service Manual: Instrument Cluster Removal/Installation
CAUTION:
-
When replacing the instrument cluster, the configuration procedure must be performed before removing the instrument cluster. Replacing the instrument cluster without performing the configuration procedure will result in system malfunction.
1. Perform the instrument cluster configuration when replacing it..
2. Disconnect the negative battery cable..
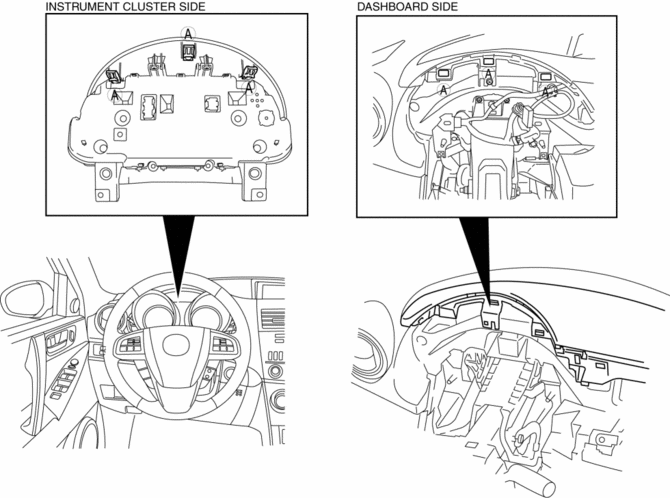
3. Remove the column cover. (upper).
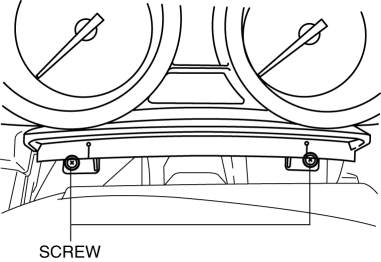
4. Remove the screws.
5. Pull the instrument cluster outward and remove it
6. Disconnect the connector.
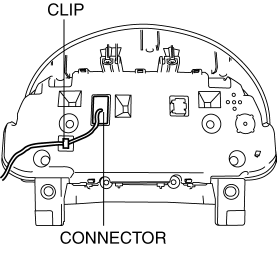
7. Remove the clip.
8. Install in the reverse order of removal.
9. Program the immobilizer system-related parts when replacing the instrument cluster. (With keyless entry system).
CAUTION:
-
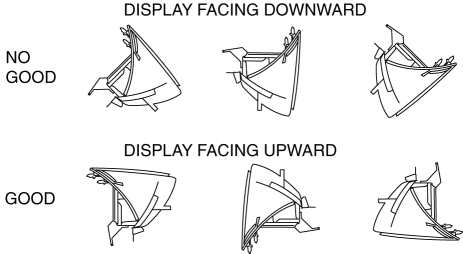
The removed instrument cluster should be placed with the display side up to prevent grease from leaking from the meters.
 Instrument Cluster Inspection
Speedometer
Using a speedometer tester
CAUTION:
When only the front or the rear wheels are driven using a speedometer tester,
the ABS or DSC may determine that the vehicle speed signal is ...
 Instrumentation/Driver Info. Personalization Features Setting Procedure
Instrument Cluster
1. Connect the M-MDS (IDS) to the DLCŌĆō2.
2. After the vehicle is identified, select the following items from the initial
screen of the M-MDS.
Select the ŌĆ£Module ...
Other materials:
Bass Box Inspection
1. Disconnect the negative battery cable..
2. Disconnect the connector..
3. Verify the resistance between bass-box terminals.
If not within the specification, replace the bass-box.
Resistance
0.9ŌĆö1.1 ohms
...
Maintenance requirements
For the Subaru Solterra, consistent daily care and properly scheduled
maintenance are ą║ą╗čÄč湊ą▓ąĖą╝ąĖ čäą░ą║č鹊čĆą░ą╝ąĖ ą┤ą╗čÅ ąĘą░ą▒ąĄąĘą┐ąĄč湥ąĮąĮčÅ
ą▒ąĄąĘą┐ąĄčćąĮąŠčŚ, ąĄč乥ą║čéąĖą▓ąĮąŠčŚ čéą░ ąĄą║ąŠąĮąŠą╝č¢čćąĮąŠčŚ ąĄą║čüą┐ą╗čāą░čéą░čåč¢čŚ.
ąÆą╗ą░čüąĮąĖą║ ą░ą▓č鹊ą╝ąŠą▒č¢ą╗čÅ ąĮąĄčüą ...
BSM OFF Indicator Light
This indicator light illuminates for a few
seconds when the ignition is switched ON.
The BSM OFF indicator light illuminates
when the BSM system is turned off by
pressing the BSM OFF switch.
The indicator light flashes if the BSM
system has a malfunction. Consult an
Authorized Mazda D ...
