Mazda 3 Service Manual: Oil Seal (Differential) Replacement [C66 M R]
1. Remove the aerodynamic under cover No.2 and the splash shield as a single unit..
2. Drain the manual transaxle oil..
3. Disconnect the drive shaft (LH) from the MTX..
4. Disconnect the drive shaft (RH) from the joint shaft..
5. Remove the joint shaft..
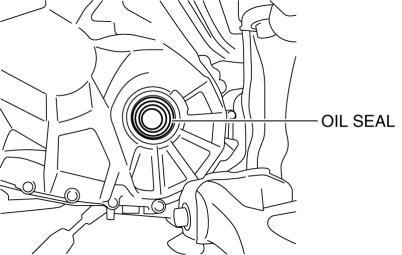
6. Remove the oil seal (LH).

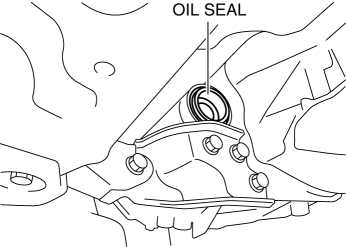
7. Remove the oil seal (RH).

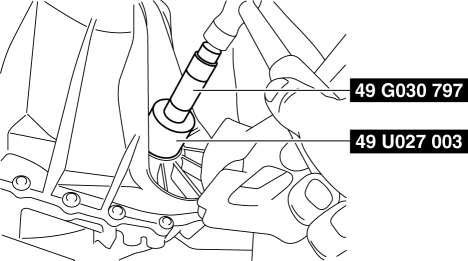
8. Using the SST
s and a hammer, tap each a new oil seal (LH) in evenly until the SST
s contacts the transaxle case.

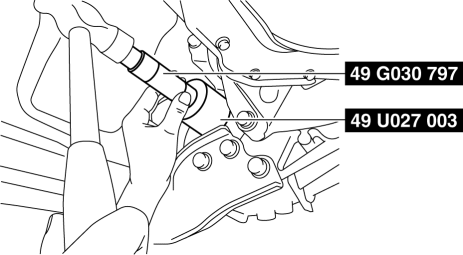
9. Using the SST
s and a hammer, tap each a new oil seal (RH) in evenly until the SST
s contacts the transaxle case.

10. Coat the lip of each oil seal with transaxle oil.
11. Install in the reverse order of removal.
12. Add the specified amount of specified transaxle oil..
 Oil Seal (Differential) Replacement [A26 M R]
1. On level ground, jack up the vehicle and support it evenly on safety stands.
2. Drain the oil from the transaxle..
3. Remove the front tires..
4. Remove the splash shield..
5. Remove the a ...
 Oil Seal (Differential) Replacement [Fw6 A EL]
1. Remove the aerodynamic under cover No.2 and the splash shield as a single
unit..
2. Remove the oil seal.
a. Drain the ATF..
b. Disconnect the drive shaft (LH) from the transaxle..
c. Disc ...
Other materials:
Rear Spoiler Removal/Installation
4SD
1. Remove the trunk lid trim..
2. Remove the nuts.
3. While cutting the double-sided adhesive tape using a flathead screwdriver
or a razor, separate the rear spoiler from the trunk lid.
WARNING:
Using a razor with bare hands can cause injury. Always wear gloves when usin ...
Engine SST [Mzr 2.0, Mzr 2.5]
1: Mazda SST number
2: Global SST number
Example
1:49 UN01 052
2:310–D005
Spring lock coupler tool (green)
1: 49 C017 5A0
2: –
Engine support set
1:49 B011 105
2:–
Adapter
1 ...
Precaution [Dynamic Stability Control (DSC)]
1. The ABS warning light and/or brake system warning light and/or DSC indicator
light and/or DSC OFF light illuminate even when the system is normal.
Warning lights that may illuminate and/or flash
Cases in which the light may illuminate
Conditions in ...
