Mazda 3 Service Manual: Tire House Trim Removal/Installation
4SD
1. Remove the rear seat cushion..
2. Remove the rear scuff plate..
3. Partially peel back the seaming welt.
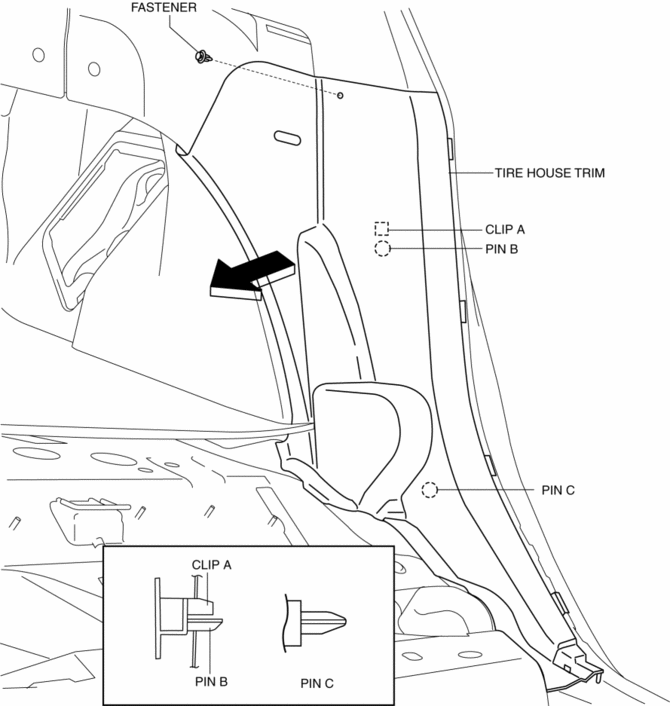
4. Remove the fastener.
5. Pull the tire house trim in the direction of arrow shown in the figure while remove the clip A, pin B and C.
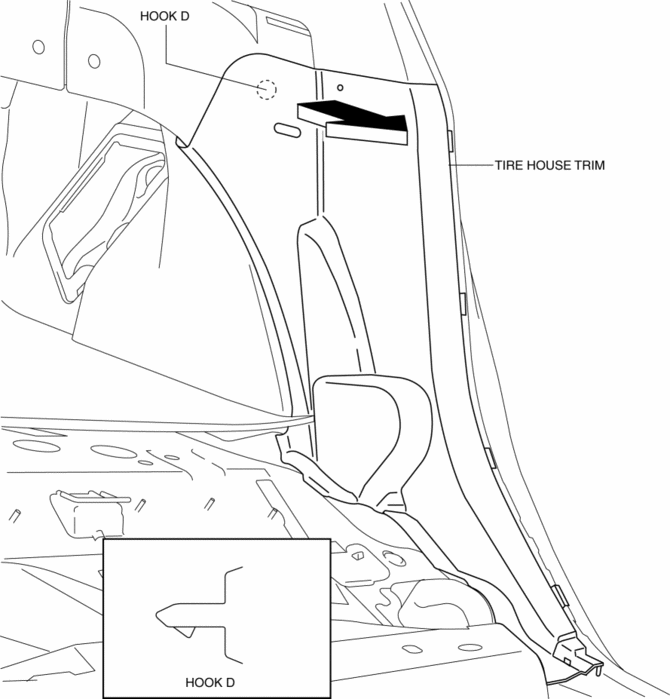
6. Pull the tire house trim in the direction of arrow shown in the figure while remove the hook D.
7. Remove the tire house trim.
8. Install in the reverse order of removal.
5HB
1. Remove the rear seat cushion..
2. Remove the rear scuff plate..
3. Partially peel back the seaming welt.
4. Remove the fasteners.
5. Pull the tire house trim in the direction of arrow (1), while remove the hook A and B.
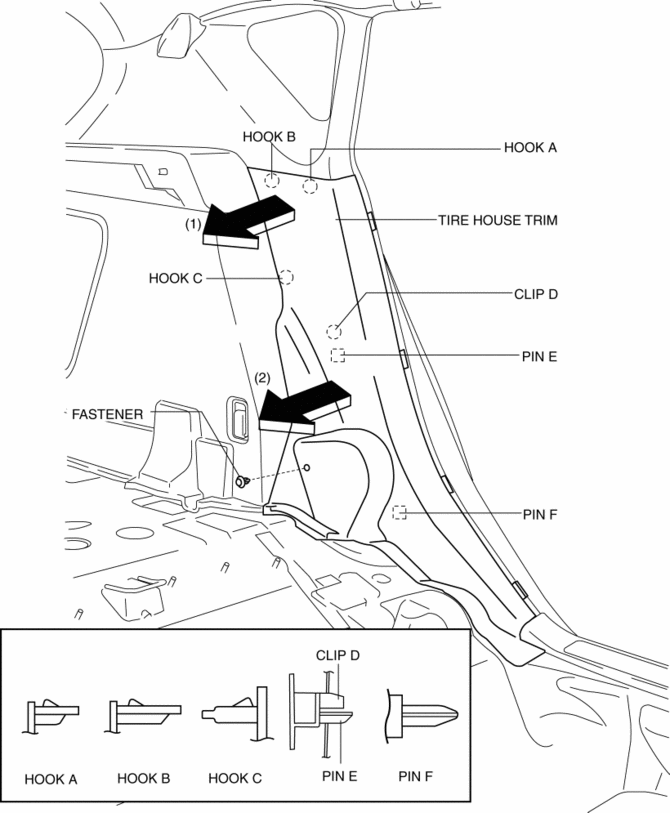
6. Pull the tire house trim in the direction of arrow (2), while remove the hook C, clip D, pin E and F.
7. Remove the tire house trim.
8. Install in the reverse order of removal.
 Parameter Setting Procedure When Tire Size Is Changed
CAUTION:
If the wheel and tire sizes are changed, a discrepancy with the speedometer
needle whereby it exceeds the allowable range could result in a malfunction.
If the wheel and tire si ...
 Wheel Alignment Pre Inspection
1. Park the vehicle on a level ground, in an unloaded condition*, and with the
wheels straight forward.
*: Unloaded condition.....Fuel tank is full. Engine coolant and engine oil are
at specifie ...
Other materials:
Oil Filter Replacement [Mzr 2.0, Mzr 2.5]
WARNING:
Hot engines and engine oil can cause severe burns. Turn off the engine and
wait until it and the engine oil have cooled.
A vehicle that is lifted but not securely supported on safety stands is dangerous.
It can slip or fall, causing death or serious injury. Never work ...
Electric Power Steering Oil Pump Component Disassembly/Assembly
CAUTION:
The internal parts of the EHPAS control module and motor could be damaged
if they receive an impact. Be careful when handling the EHPAS control module
and motor to prevent the component from getting hit. Replace the electric power
steering oil pump component if it has recei ...
Electric Power Steering Oil Pump Component Removal/Installation
CAUTION:
Be careful not to drop the electric power steering oil pump component as
the internal parts of the EHPAS CM could be damaged. Replace the electric power
steering oil pump component if it is subjected to an impact.
1. Remove the front mudguard (RH)..
2. Remove the aerod ...
