
Mazda 3 Service Manual: Ventilator Grille Removal/Installation
Side Ventilator grille
1. Through the wiring harness into the position shown in the figure, remove the side ventilator grille in the direction of arrow.
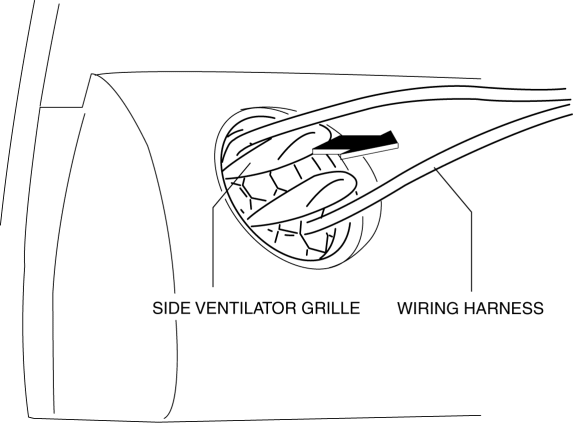
2. When installing the side ventilator grille, push it for the dashboard.
Center Ventilator grille
1. Disconnect the negative battery cable..
2. Remove the center panel..
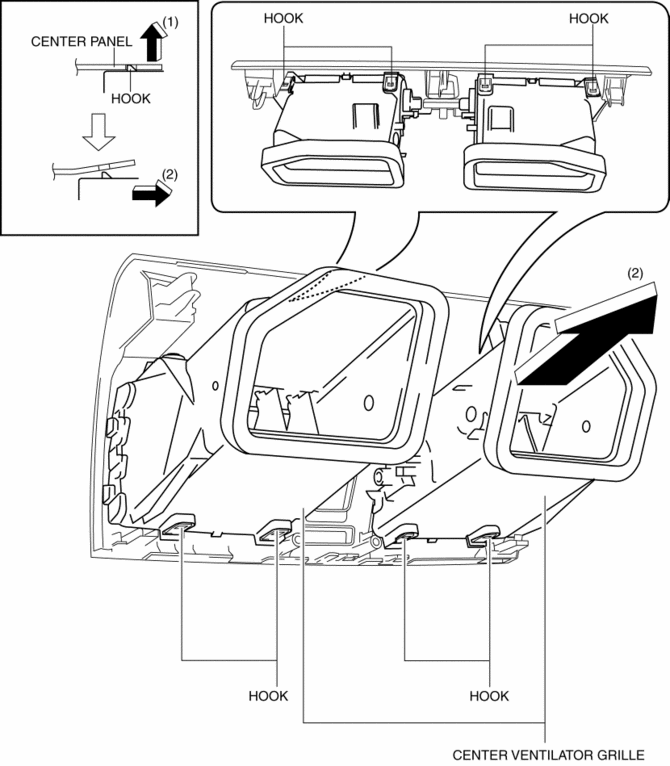
3. Push the edge of center panel in the direction of arrow (1) and detach the hooks.
4. Remove the center ventilator grille in the direction of arrow (2) shown in the figure.
5. Install in the reverse order of removal.
 Splash Shield Removal/Installation
Front Splash Shield
1. Remove the bolts and fastener then remove the front splash shield.
2. Install in the reverse order of removal.
Rear Splash Shield
1. Remove the fastener, screws and ca ...
 Front Crossmember Removal/Installation
CAUTION:
Performing the following procedures without first removing the ABS wheel-speed
sensor may possibly cause an open circuit in the wiring harness if it is pulled
by mistake. Before ...
Other materials:
Coupler Component Removal/Installation [Fw6 A EL]
WARNING:
A hot transaxle and ATF can cause severe burns. Turn off the engine and wait
until they are cool.
Always wear protective eye wear when using the air compressor. If the air
compressor is used, any particles of dirt or soiling could spatter and get into
the eyes.
...
Key Interlock System Inspection
Key Interlock System Inspection
1. Switch the ignition to ON.
2. Perform the following procedures to inspect the key interlock system.
If there is any malfunction, inspect the key interlock solenoid and NOT P
position switch..
a. Verify that the ignition cannot be switched to off ...
Ignition Switch Removal/Installation [Without Advanced Keyless Entry And Push
Button Start System]
1. Disconnect the negative battery cable..
2. Remove the column cover..
3. Detach the tab.
4. Pull the pin in the direction of the arrow shown in the figure and release
the lock.
5. Disconnect the ignition switch connector and key interlock solenoid connector.
6. Remove the ...
