Mazda 3 Service Manual: Windshield Wiper Motor Removal/Installation
1. Disconnect the negative battery cable..
2. Remove the following parts:
a. Windshield wiper arm and blade.
b. Front fender molding.
c. Cowl grille.
d. Center cowl grille No1, No2
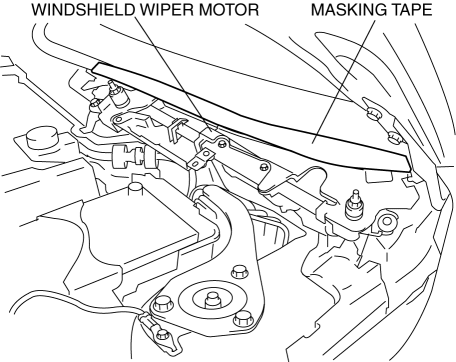
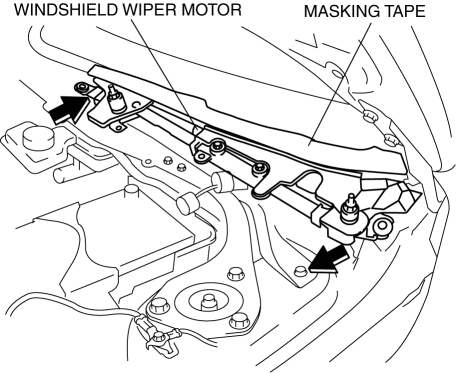
3. Stick masking tape on the figure.
CAUTION:
-
If the front wiper motor is removed without affixing protective tape to the windshield, the motor may contact the windshield and damage it. Always affix protective tape along the edge of the windshield when removing the front wiper motor.
-
Stick masking tape on the position to show in the figure of the windshield.
4. Remove the bolts.
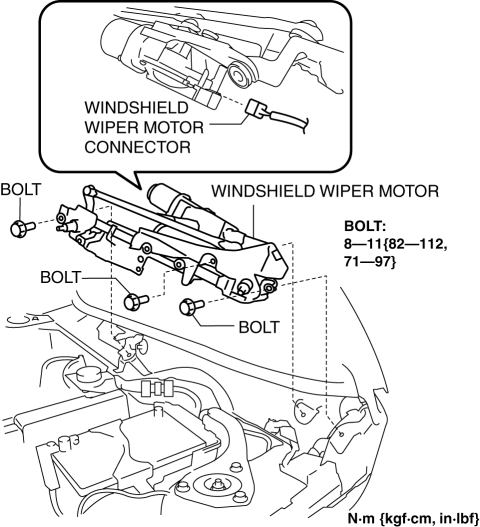
5. Disconnect the windshield wiper motor connector.
6. Remove the windshield wiper motor..
7. Install in the reverse order of removal.
Windshield Wiper Motor Remove Note
1. Slide the windshield wiper motor in the direction of the left front fender and pull it out from between the windshield and the cowl panel.
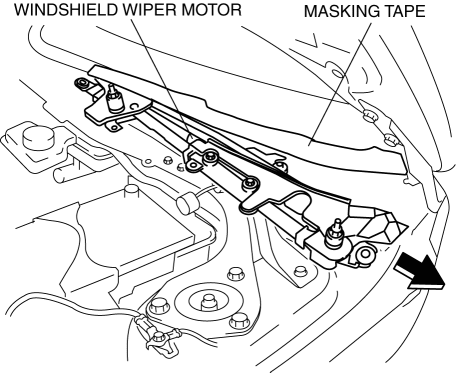
2. Be careful when removing the windshield wiper motor so that it does not strike the windshield. If the windshield wiper motor hits the windshield, it could cause damage to the windshield.
 Windshield Wiper Motor Inspection
1. Disconnect the negative battery cable..
2. Remove the following parts:
a. Windshield wiper arm and blade.
b. Front fender molding.
c. Cowl grille.
d. Center cowl grille No.1, No.2
3. Di ...
 Rain Sensor Removal/Installation
1. Disconnect the negative battery cable..
2. Spread open the rain sensor cover in the direction of the arrows and disengage
tabs A to remove it.
3. Disconnect the rain sensor connector.
...
Other materials:
Remote Air Conditioning System
In the Subaru Solterra, the Remote Air Conditioning System utilizes
energy stored in the traction battery to allow the climate control system to be
activated remotely, providing a comfortable cabin environment before entering the
vehicle.
When the Subaru Solterra is connected to a charging ...
Rear Spoiler Removal/Installation
4SD
1. Remove the trunk lid trim..
2. Remove the nuts.
3. While cutting the double-sided adhesive tape using a flathead screwdriver
or a razor, separate the rear spoiler from the trunk lid.
WARNING:
Using a razor with bare hands can cause injury. Always wear gloves when usin ...
Transaxle Oil Inspection [G66 M R]
1. Park the vehicle on level ground.
2. Remove the aerodynamic under cover No.2..
3. Remove the oil level plug and washer.
4. Verify that the oil is near the brim of the plug port.
If the oil level is lower than the low level, add the specified amount and
type of oil through the ...
