Mazda 3 Service Manual: Cowl Panel Removal/Installation
1. Disconnect th negative battery cable..
2. Remove the windshield wiper arm and blade..
3. Remove the front fender molding..
4. Remove the cowl grille..
5. Remove the washer hose grommet from the cowl panel and disconnect the front washer hose.
6. Remove the windshield wiper motor..
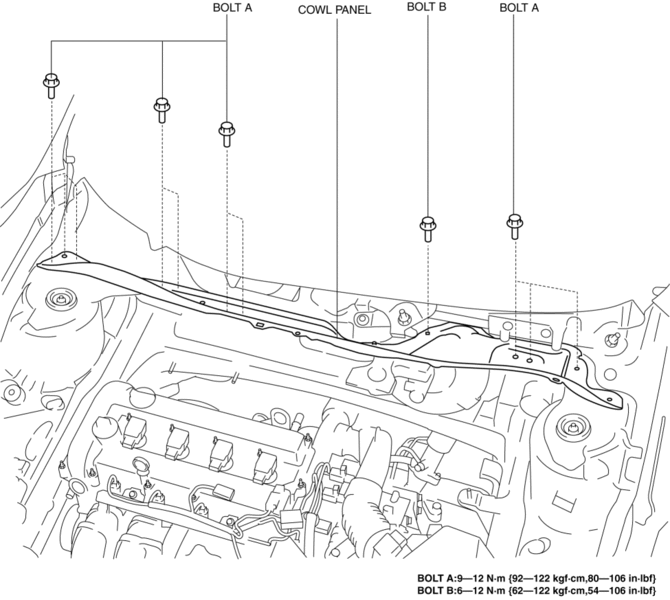
7. Remove the bolts A and bolt B.

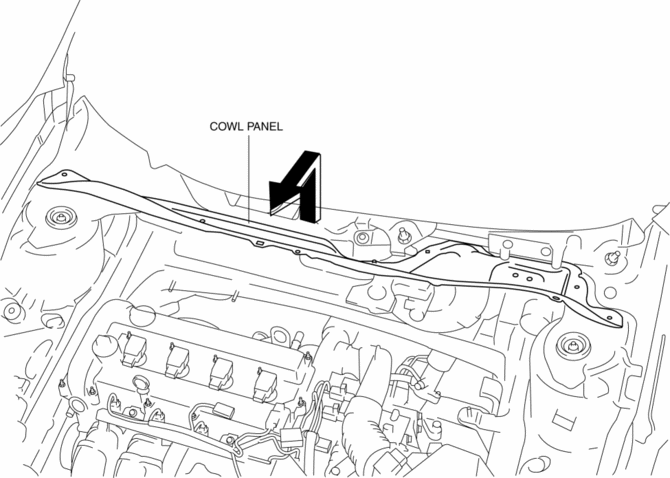
8. Remove the cowl panel in the direction of the arrow shown in the figure.

9. Install in the reverse order of removal.
 Cowl Grille Removal/Installation
1. Remove the windshield wiper arm and blade..
2. Remove the fastener A.
3. Pull the front fender molding in the direction of the arrow shown in the figure
and remove it while remove the tab B a ...
 Energy Absorbing Form Removal/Installation
1. Disconnect the negative battery cable..
2. Remove the rear combination light..
3. Remove the rear bumper..
4. Remove the fasteners.
5. Remove the rear energy-absorbing form.
6. Instal ...
Other materials:
Rear Door Trim Disassembly/Assembly
1. Disassemble in the order shown in the figure.
1
Screw
2
Assist handle
3
Switch panel cover
4
Power window subswitch
5
Rear door trim
2. Assembl ...
Windshield Wiper Motor Removal/Installation
1. Disconnect the negative battery cable..
2. Remove the following parts:
a. Windshield wiper arm and blade.
b. Front fender molding.
c. Cowl grille.
d. Center cowl grille No1, No2
3. Stick masking tape on the figure.
CAUTION:
If the front wiper motor is removed without affixin ...
B Pillar Lower Trim Removal/Installation
1. Remove the front scuff plate..
2. Remove the rear scuff plate..
3. Partially peel back the seaming welt.
4. Pull the B-pillar lower trim in the direction of the arrow (1), (2) shown
in the figure, detach tab A, pin B, pin C, clip D.
5. Remove the B-pillar lower trim in the direction ...
