Mazda 3 Service Manual: Instrument Cluster Disassembly/Assembly
CAUTION:
-
Do not drop the instrument cluster or damage the printed board. This will lead to a system malfunction.
1. Perform the instrument cluster configuration when replacing it..
2. Disconnect the negative battery cable..
3. Remove the column cover. (upper).
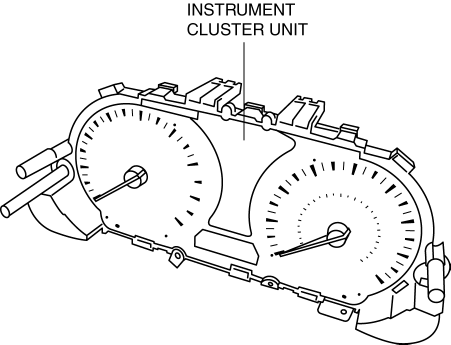
4. Remove the instrument cluster..
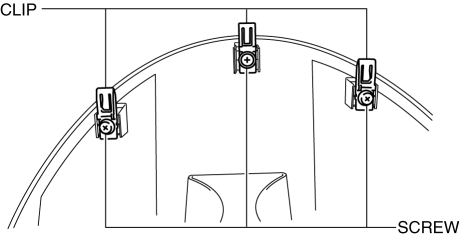
5. Remove the screws and clips.
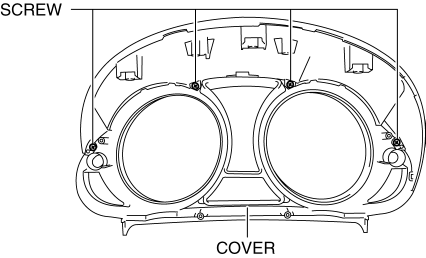
6. Remove the screws.

7. Remove the cover.
8. Remove the screws from the cover.

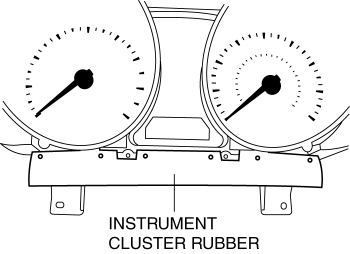
9. Remove the instrument cluster rubber.
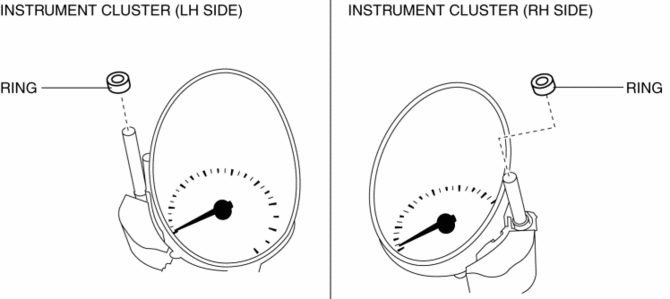
10. Remove the rings.
11. Detach the tabs
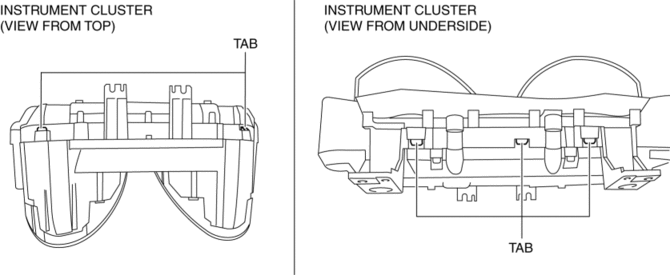
12. Detach the tabs.
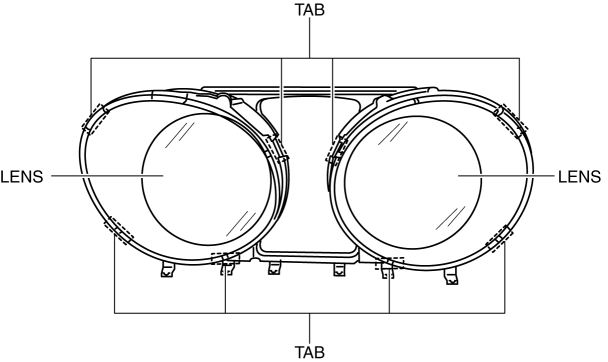
13. Remove the lens.
14. Assemble in the reverse order of disassembly.
 Instrument Cluster Configuration
1. Connect the M-MDS (IDS) to the DLC-2.
2. After the vehicle is identified, select the following items from the initialization
screen of the IDS.
Select the “Module Programming”.
...
 Instrument Cluster Inspection
Speedometer
Using a speedometer tester
CAUTION:
When only the front or the rear wheels are driven using a speedometer tester,
the ABS or DSC may determine that the vehicle speed signal is ...
Other materials:
Wastegate Actuator Inspection [Mzr 2.3 Disi Turbo]
1. Remove the air hose and air duct..
2. Disconnect the hose from the wastegate actuator.
3. Plug the wastegate actuator as shown in the figure.
4. Connect the vacuum pump to the port
5. Raise the pressure slowly and take a measurement of the pressure when the
rod stroke is 1.5 mm {0.0 ...
Charcoal Canister Removal/Installation [Mzr 2.0, Mzr 2.5]
Except for Mexico
1. Remove in the order indicated in the table.
1
Evaporative hose
2
Quick release connector
(See QUICK RELEASE CONNECTOR (EMISSION SYSTEM) REMOVAL/INSTALLATION [MZR
2.0, MZR 2.5].)
3
Charc ...
Cooling Fan Component Removal/Installation [Mzr 2.0, Mzr 2.5]
WARNING:
Never remove the cooling system cap or loosen the radiator drain plug while
the engine is running, or when the engine and radiator are hot. Scalding engine
coolant and steam may shoot out and cause serious injury. It may also damage
the engine and cooling system.
Tu ...
